

I remember the first time I dared to paint my vinyl shutters. Armed with enthusiasm and a bucket of paint, I dove right in — only to see warping and bubbling develop within days. That frustrating realization hit me hard. Vinyl, as it turns out, isn’t like traditional wood; it demands a different approach to keep it looking perfect without unintended damage.
So, today, I’m sharing the secrets I’ve uncovered to paint vinyl shutters successfully — without risking warp or peel. I’ll walk you through the steps to ensure your shutters stay pristine and durable, saving you time and money in the long run.
Why Vinyl Shutters Warping Is a Common but Fixable Problem
Vinyl is lightweight, low-maintenance, and highly popular for exterior accents, but it comes with its own set of challenges. Warping often happens because of improper preparation, incorrect paint selection, or failing to account for temperature and humidity during the painting process. Early in my DIY journey, I made the mistake of using regular exterior paint without considering vinyl-specific needs, and the result was less than ideal. Since then, I’ve learned that your success hinges on understanding vinyl’s unique properties and choosing the right products and techniques.
If you’ve faced similar issues or wonder whether painting vinyl is worth it, you’re not alone. But here’s the good news: with the right approach, you can refresh your shutters beautifully and keep them looking great for years. For more comprehensive tips on boosting your home’s curb appeal, check out this ultimate guide to house painting.
Curious about what common mistakes to avoid? One mistake I made early on was skipping the proper cleaning stage, which caused the paint to peel prematurely. Trust me, a little extra prep work goes a long way. Now, I’ll guide you through practical steps to ensure your vinyl shutters are prepped, painted, and protected properly, so they won’t warp or sag down the road.
Ready to transform your shutters without the warping woe? Let’s dive into the specifics and get that professional finish you’re after.
Prep the Surface Properly
Begin by thoroughly cleaning your shutters with a mild detergent and water to remove dirt, mold, and chalky residues. Use a soft-bristle brush or a pressure washer on a gentle setting—think of it as giving your shutters a gentle spa treatment to ensure the paint adheres well.
Dealing with stubborn grime
If you encounter mold or mildew, apply a mixture of one part bleach to three parts water, letting it sit for 15 minutes before rinsing thoroughly. After cleaning, let the shutters dry completely—this is crucial to prevent trapped moisture from causing warping later.
Sand Lightly for Better Adhesion
Lightly sand the surface with fine-grit sandpaper (around 220 grit). This step roughens the glossy vinyl surface, much like scuffing a non-stick pan before seasoning it. I once skipped this step on a set of shutters, and the paint peeled within months. Sanding now ensures the primer and paint bite into the vinyl, reducing the risk of warping or bubbling.
Select the Right Paint and Primer
Use a high-quality, 100% acrylic latex exterior paint formulated for PVC or vinyl surfaces. Pair it with a bonding primer designed for slick surfaces—like the ones used for plastic or vinyl windows. This combination acts as a bridge, much like a primer coat on a wall, offering better adhesion and flexibility to withstand temperature swings.
Color stability considerations
Opt for lighter shades, especially if your shutters face direct sunlight. Dark colors absorb heat more intensely, which can lead to warping. Remember, your paint choice impacts longevity—check the manufacturer’s specifications and reviews.
Apply Paint Strategically
Use a high-quality brush or a short nap roller to apply the paint evenly. Avoid thick coats; instead, use multiple thin layers—like layering pancake batter; too thick, and it won’t cook properly. Wait at least four hours between coats, or as recommended on the product label. This patience prevents paint buildup, which can trap heat and cause warping.
Watch out for temperature and humidity
Paint on days when temperatures are between 50°F and 85°F, and humidity is low. Painting in extreme heat or humid conditions is like trying to cook in a hot oven with the door open—you’ll get uneven results and potential warping. I learned this the hard way when I painted during a hot summer afternoon, and the paint shrank as it dried, causing cracks and warping.
Finish with a Clear Sealant for Durability
Once the color coats dry, consider sealing your shutters with a clear, exterior-grade acrylic sealer. This adds a flexible protective layer, like a clear coat on a car, shielding against moisture, UV rays, and temperature fluctuations. Applying the sealant helps maintain the paint’s integrity and prevents warping over time.
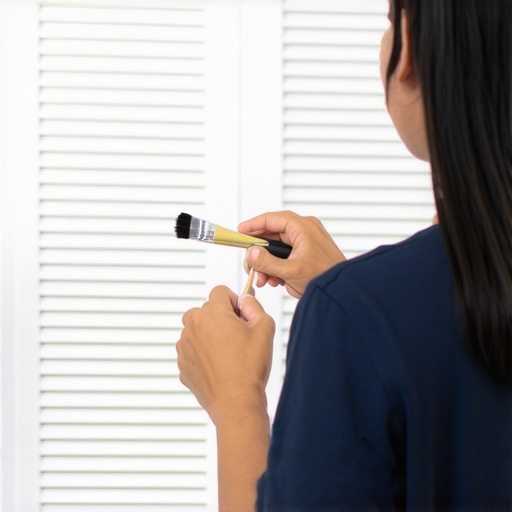
Image shows a close-up of vinyl shutters being painted with a brush, highlighting proper technique and product use for durable results.
Many homeowners approach house painting with a set of widely accepted beliefs, but behind these myths lie crucial nuances that determine the true success of your project. While it’s common to think that a fresh coat of paint instantly transforms your home, real mastery goes beyond simple brushstrokes. For example, a prevalent misconception is that all paints are equally suitable, but in reality, selecting the wrong type can lead to issues like peeling, bubbling, or even warping, especially on tricky surfaces like vinyl or concrete.
A common trap many fall into is over-relying on DIY techniques without understanding the importance of surface preparation. Skipping steps like detailed cleaning, sanding, or priming often results in subpar adhesion and durability. This is why, if you’re serious about lasting results, investing time in proper prep pays dividends—something I’ve learned through years of experience. Want to see how professional painters approach this? Check out this guide to professional painting.
Now, let’s tackle a misconception that’s particularly insidious: many believe that applying multiple thick coats of paint saves time, but in reality, it often leads to uneven finishes and faster deterioration. Thinner, multiple coats allow better drying, adhesion, and color depth, reducing risks like bubbling or cracking. This plays into an advanced nuance—waiting sufficient drying time between coats creates a resilient, professional-looking finish.
Another hidden aspect concerns environmental factors. Many overlook how temperature and humidity influence paint performance. For example, painting during high humidity or extreme temperatures can cause the paint to dry improperly, leading to defects such as blistering or peeling. A study by the Painting and Decorating Contractors of America emphasizes the importance of optimal weather conditions for exterior projects, which can make or break your results if ignored.
Ask yourself, how often do you consider the specific properties of your surface material, climate, or paint composition before starting? Recognizing these details elevates your approach from amateur to professional. Remember, the small details matter—skipping them can cause undoing your efforts, wasting time and money.
Are you guilty of any of these common mistakes or myths? Share your experiences in the comments! For more insights into elevating your home’s appearance, explore this ultimate guide to house painting. Taking the time to understand and apply these hidden nuances ensures your painting project not only looks great but endures over time, saving you headaches and costly repairs down the line.
Maintaining Your Painting Arsenal for the Long Haul
To ensure your home’s paint remains vibrant and durable over time, investing in the right tools and understanding proper maintenance is vital. High-quality brushes, rollers, and sprayers aren’t just for a flawless finish—they also reduce strain and save money in the long run. For instance, I personally swear by a professional-grade 4-inch angle brush for cutting-in edges; it offers precision that cheaper brushes just can’t match, and it lasts much longer if cleaned correctly after each use. Similarly, a high-quality, foam-based roller minimizes streaks and evenly spreads paint, which is crucial for exterior surfaces exposed to weather fluctuations.
Proper cleaning and storage extend the life of your equipment. Rinse brushes and rollers thoroughly with water or solvent based on the paint type—oil-based or latex—then store them in airtight containers or dedicated tool bags. Regular maintenance prevents buildup of old paint and reduces the likelihood of bristle or roller deterioration, which can ruin your finished look and cause uneven application. For sprayer enthusiasts, inspecting seals and nozzles before each use prevents clogs that may result in uneven coverage or paint wastage. A well-maintained toolkit not only gives professional results but also makes your work safer and more efficient.
Looking ahead, advances in technology are shaping the future of painting tools. Innovations like robotic paint applicators and smart sprayers equipped with sensors are beginning to offer more uniform finishes with less effort, especially on large projects. Keeping abreast of these emerging trends allows both professionals and DIYers to stay competitive and achieve superior results. For example, understanding how electrostatic sprayers work—using electric charge to attract paint droplets to surfaces—can significantly reduce overspray and improve coverage, saving time and money in the process. You can read more about these innovations in current industry reports, such as those published by TechCrunch.
How do I maintain my painting tools to keep them performing like new?
Effective maintenance of your painting equipment involves thorough cleaning immediately after each use, using appropriate solvents—water for latex paints and mineral spirits for oil-based paints. Store brushes with the bristle side facing up or hang them to prevent deforming. Regularly inspect and replace worn-out parts, such as roller covers or spray nozzles, to ensure consistent application. Implementing a routine maintenance schedule ensures your tools function optimally and last for multiple projects. Why not try cleaning your brushes with a high-quality brush cleaner this weekend? It’s a small step that yields big benefits in both tool longevity and the quality of your finishing work. For detailed maintenance techniques, you might find this article helpful.
Lessons from My Painting Mishaps That Changed My Approach
One of the most valuable lessons I learned was the importance of patience, especially when applying multiple thin coats rather than rushing with thick layers. Waiting for each coat to dry thoroughly prevents warping and bubbling. I also realized that surface prep isn’t a chore—it’s the foundation of a lasting finish. Skipping cleaning or sanding can undo hours of work in just a few months. Finally, understanding vinyl’s unique nature led me to select paints and primers designed specifically for plastic surfaces, which dramatically improved the durability of my shutters. These insights, gained through trial and error, saved me time and avoided costly mistakes.
My Go-To Resources for Superior House Painting Results
For comprehensive guidance, I continuously turn to the ultimate guide to house painting. It covers everything from surface preparation to finishing touches, ensuring no step is overlooked. When exploring new tools or techniques, I trust books like Master the art of house painting with pro tips, which offer insights straight from seasoned professionals. Additionally, industry websites such as TechCrunch provide updates on innovative painting tools that could revolutionize DIY projects. These resources keep me inspired and informed, pushing my skills to new heights.
Embrace the Journey and Elevate Your Home’s Look
Don’t let fear hold you back from transforming your home’s exterior with beautiful, lasting paint. Embrace the learning curve, celebrate small victories, and remember that every brushstroke brings you closer to a space you love. With patience, proper technique, and the right knowledge, your vinyl shutters—and entire home—can become stunning showcases of your hard work and creativity. Why not start today and see how your effort pays off? Share your home improvement stories or ask questions below—I’d love to hear about your experiences with house painting and how you’re making your space uniquely yours.