

I’ll never forget the first time I tried to give my aging metal patio set a fresh coat of paint. I sanded, primed, and carefully applied the paint, feeling proud of my little DIY project. But a few weeks later, I noticed pinkish-orange patches creeping along the edges—rust, slow and sneaky, ruining months of work. That lightbulb moment hit hard: I was missing something crucial. If you’ve faced similar frustrations—painting your outdoor furniture only to watch rust dictate the outcome—you know how discouraging it can be.
Why Your Efforts to Paint Metal Furniture Are Often in Vain Without the Right Technique
The truth is, painting metal patio furniture isn’t just about slapping on a coat of paint. It’s about understanding the underlying causes of rust and how to prevent it from ruining your efforts. Early on, I made the mistake of ignoring surface prep, thinking that good paint and a brush would do the trick. Spoiler: it didn’t. Rust needs to be tackled at its source, and that includes proper cleaning, rust removal, and applying specialized primers. Once I started using the right products and techniques—like rust-inhibiting primers and sealants—my outdoor furniture held up beautifully, even after harsh winters.
Is All Paint Created Equal When It Comes to Rust Prevention?
Many believe that any outdoor paint will protect their metal furniture from the elements. But that’s a misconception. Not all paints are formulated for outdoor metal, and some are more prone to peeling or developing rust over time. After my initial mistake, I learned to choose paints labeled specifically for metal and outdoor use, which contain rust inhibitors. For more expert insights, check out the comprehensive home painting tips that emphasize selecting high-quality, weather-resistant paints for durability.
Now, I’m here to guide you through the essential steps to ensure your painted metal patio furniture stays rust-free and lasts for years. Ready to say goodbye to rust and hello to a beautiful outdoor space? Let’s dive into the practical, proven methods that will make your project a success.
Prepare the Surface Properly
Start by removing any existing rust with a wire brush or sandpaper, focusing on the edges and corners where rust tends to accumulate. Once cleaned, wash the furniture with a mixture of mild soap and water to eliminate dirt, grease, and loose paint. Rinse thoroughly and let it dry completely to prevent trapping moisture under new paint layers. During my first attempt, I skipped thorough cleaning, which caused rust to return despite my careful painting. Proper surface prep is like laying a solid foundation—crucial for lasting results.
Apply a Rust-Inhibiting Primer
Choose a high-quality, rust-inhibiting primer specifically designed for metal surfaces. Use a brush or spray to apply it evenly across all surfaces, paying particular attention to seams and crevices. Let the primer dry fully as per the manufacturer’s instructions before moving on to painting. I once rushed this step, and within months, rust appeared along the edges. The primer acts like a protective barrier—think of it as sealing the magnet so rust can’t stick.
Select the Right Paint for Outdoor Metal
Opt for a paint formulated for outdoor metal furniture with built-in rust inhibitors. Apply at least two thin coats, allowing the first to dry completely before adding the second. Use a quality brush or spray for a smooth finish. My experience with cheap paint was disappointing; it peeled after a winter freeze. Think of this layer as armor—thick enough to withstand weather but thin enough to dry evenly.
Technique for Even and Durable Finish
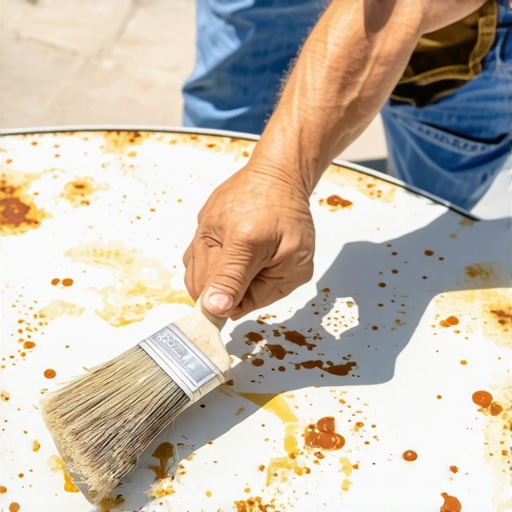
When painting, use long, smooth strokes and avoid overloading your brush to prevent drips. Maintain a wet edge to achieve a seamless look, preventing lap marks. During my project, I noticed that quick, uneven strokes created streaks; taking my time and working methodically yielded a professional look. If you encounter drips, immediately smooth them out before they dry for a sleek appearance. This careful application ensures the paint bonds well and resists chipping.
Extra Tips for Longevity and Protection
Seal the painted surface with a clear outdoor sealant to add extra defense against moisture and UV damage. Regular maintenance, like cleaning and inspecting for chips or scratches, extends your furniture’s lifespan. Remember, even the best paint needs touch-ups over the years. To maximize your efforts, check out the local painting solutions for expert assistance when needed. Proper technique and regular upkeep transform your outdoor space into a long-lasting oasis.
 Many homeowners and DIY enthusiasts assume that mastering basic painting techniques guarantees professional results. However, even experienced painters often overlook subtle yet crucial nuances that can dramatically affect the longevity and appearance of a painted surface. Let’s dig deeper into these complexities to refine your craft and avoid common pitfalls that can undermine your efforts.
One widespread myth is that primer’s primary role is merely to improve paint adhesion. In reality, the choice of primer—especially when painting surfaces prone to staining, bleeding, or rust—can make or break your project. For instance, using a standard primer on a wood surface with tannins can lead to stains bleeding through the topcoat, ruining an otherwise perfect finish. Experts recommend specifying a stain-blocking or bonding primer tailored to your surface type. According to a study published by the *Journal of Coatings Technology*, proper surface preparation with the right primer can extend paint durability by up to 30%.
Why do so many fall for the myth that all paints are equal for outdoor use?
Because, frankly, many assume that buying the most expensive paint guarantees superior results. But this misconception neglects to consider environmental factors—UV exposure, moisture, temperature fluctuations—that require specific formulations. In my experience, selecting a paint labeled for exterior metal with rust inhibitors significantly reduces rust formation over time. Skimping on quality here is a common trap that can lead to peeling and rapid deterioration, especially in harsh climates. For expert insights, check out why local painting matters and how expert color selection enhances durability.
Another advanced nuance involves the importance of drying conditions. Many overlook that the ambient humidity and temperature during application and curing stages can impact paint film formation. Applying paint in high humidity can trap moisture, leading to clouding, blisters, or mold growth beneath the surface. Conversely, painting in extreme cold can cause inadequate curing, making the finish more susceptible to peeling. It’s a mistake to follow generic weather recommendations without considering your specific environment. Expert painters often use indoor heating or dehumidifiers to optimize conditions during critical stages—something worth considering if you aim for professional-level results. For more detailed strategies, visit master the art of house painting for tips tailored to different climates.
To recap, the key to elevating your painting projects lies in understanding these nuanced factors: meticulous surface prep with suitable primers, selecting paints formulated for your environment, and controlling drying conditions. Neglecting these details can lead to an ‘oops’ moment where your work fails prematurely, despite careful brushwork. Have you ever fallen into this trap? Let me know in the comments and share your lessons learned. Enhancing your knowledge of these subtle aspects makes a tangible difference between average and exceptional results—so don’t overlook the fine print that professional painters swear by.
Achieving a professional-grade paint job isn’t just about the right paint and proper prep; it also hinges on using the best tools and maintaining them effectively. Over the years, I’ve refined my toolkit to ensure long-term durability, efficiency, and a flawless finish. Investing in high-quality equipment and knowing how to care for your tools can dramatically extend their lifespan and improve your results.
Why Quality Tools Make All the Difference
Using premium brushes, rollers, and sprayers isn’t about luxury—it’s about reliability and precision. I personally favor Purdy brushes for their superior bristle retention and edge control, which help achieve crisp lines and smooth surfaces without leaving brush marks. When it comes to rollers, I recommend Wooster for their durability and variety, particularly the Nylon/Polyester hybrid nap for exterior surfaces. These tools apply paint more evenly, reducing the need for multiple coats, which saves time and materials in the long run.
Maintaining Your Painting Equipment
Proper maintenance of tools is crucial. After each project, I thoroughly wash brushes and rollers with warm, soapy water or the appropriate solvent for oil-based paints. Store brushes upright or hanging in a dry place to prevent bristle deformation. Cleaning and storing tools correctly not only preserves their performance but also saves money—replacing high-quality brushes frequently can be costly. A tip I swear by is using a simple method to keep your paint tray moist during extended breaks, which prevents waste and ensures consistent coverage.
Leveraging Advanced Techniques and Equipment
For larger surfaces or textured exteriors, I highly recommend investing in professional-grade sprayers like the Graco Magnum. They offer adjustable pressure and are compatible with various tip sizes, allowing for precise application even on challenging surfaces. Spray application reduces surface inconsistency and accelerates the project timeline, especially when combined with the right prep and topcoat strategies.
Looking ahead, trends suggest an increasing adoption of eco-friendly, low-VOC paints paired with brushless, ergonomic tools. These advances aim to promote healthier indoor environments and reduce fatigue during long jobs. As technology evolves, staying informed about these innovations can give you a definite edge, saving both time and effort while ensuring top-tier results.
How do I keep my painting tools in top shape over time?
The key lies in regular cleaning, proper storage, and timely replacement of worn parts. For example, replacing roller covers when they become old or deformed can prevent unsightly streaks and uneven coatings. Additionally, investing in a sturdy cart or rack for your brushes and tools keeps them organized and protected from dust and moisture. For expert advice and ongoing support, don’t hesitate to reach out to professionals who can help you develop custom maintenance routines tailored to your tools and projects.
Finally, I encourage you to experiment with high-quality sprayers on your next exterior project—it’s a game-changer. The precision, speed, and finish quality can rival professional standards. Remember, using the right equipment isn’t a shortcut; it’s an investment in success that pays off over many years and projects.

Prompt for image: Close-up of professional-grade paintbrushes and rollers being cleaned and stored properly, emphasizing maintenance importance. Alt text: Well-maintained painting tools ready for future projects. Title: Ensuring Your Painting Tools Last for Long-Term Success.
After years of battling rust on my outdoor metal furniture, I realized that the deepest lessons often come from our most frustrating experiences. Those moments of trial and error teach us nuances that no guide can fully capture, and embracing these insights transforms a simple project into a mastery of craft. Here are some of the key lessons I discovered along the way that can help you elevate your own outdoor painting endeavors.
Why Patience and Attention to Detail Are Your Best Allies
One breakthrough came when I stopped rushing through surface preparation. Giving rust removal, thorough cleaning, and drying the proper time ensured the paint adhered better and lasted longer. Skipping these steps might save time now but can lead to costly failures down the line. Remember, meticulous prep work is the foundation of a durable, rust-resistant finish—trust me, it’s worth every minute.
My Secret to Choosing Paint That Stands Up to Nature
I learned to never compromise on the quality of the paint. Not all exterior paints are created equal; selecting one with proven rust inhibitors and weather resistance made a noticeable difference. It’s like armor for your furniture—think of it as an investment in beauty and longevity. For trusted options, consult resources like home painting tips that emphasize using high-quality, weatherproof products.
How Consistency and Technique Define the Final Look
Applying paint in thin, even coats with proper tools—preferably high-quality brushes and rollers—made my finish look professional. I also learned to work with a wet edge to avoid lap marks, which can ruin an otherwise seamless surface. Patience in technique pays off, resulting in a smooth, long-lasting coat that resists peeling and rust formation.
The Power of Routine Maintenance and Protective Coatings
Once painted, sealing the surface with an outdoor sealant extended the lifespan even further. Regular inspections for chips or scratches, and prompt touch-ups, prevented small issues from becoming major rust problems. Establishing a simple maintenance routine means your furniture stays pristine, saving time and money over the years. To explore more about protective strategies, visit local painting solutions that specialize in long-term results.
Sharing a Personal Tip: Invest in Your Tools as If They Are Part of the Project
High-quality tools, like sturdy brushes from Purdy and rollers from Wooster, made all the difference in achieving a flawless, durable finish. Proper cleaning and storage extended their usability, saving me from frequent replacements. The best painters I know treat their tools like investments—because they are. And when I used professional-grade sprayers, it sped up the process and improved the consistency of the coats—an upgrade that’s more accessible than you might think.
Keep Moving Forward: Your Visual Progress Will Inspire You
Every time I completed a project, I felt a surge of confidence that motivated me to tackle more challenging spaces. The key is to start small, learn from each experience, and recognize that mastery develops over time. Whether you’re repainting one piece or your entire patio set, embracing these lessons will accelerate your growth and produce stunning results. View these projects as opportunities to refine your skills—your outdoor space will thank you for it.
Where Your Painting Passion Can Grow
If you’re eager to delve deeper into professional techniques or need tailored advice, the team at our expert painters are ready to guide you. From detailed tutorials to personalized consultations, investing in knowledge accelerates your progress and ensures lasting satisfaction with your projects.
Your Turn to Transform Your Space
Remember, every expert painter started where you are now—faced with uncertainty, eager to learn, and hungry for success. What’s the next step in your outdoor painting journey? Share your goals or challenges below, and let’s keep the conversation going. Together, we can make your outdoor space a masterpiece built on solid techniques and confident craftsmanship.