

It was a sunny Saturday afternoon when I discovered my latest house painting mishap. I had just finished applying a fresh coat of paint to a living room wall, feeling pretty proud of my work—until I noticed a faint, brownish streak creeping through the paint. My heart sank. That water stain was refusing to stay hidden. I had thought I’d sealed the deal, only to realize that water stains can be sneaky little troublemakers, especially when you want a flawless finish.
Why Water Stains Won’t Just Go Away
Water stains are like that stubborn bug you can’t seem to swat. They seep into the drywall or plaster, and when you paint over them without proper preparation, the stain often bled through, ruining the entire look of your hard work. What’s frustrating is how deceptively simple it seems—brush, roll, and done. But, trust me, ignoring those stains can lead to a paint job that’s less than professional.
According to studies, untreated water stains can cause mold growth and structural damage if not properly addressed, making them more than just an aesthetic headache. My mistake early on was skipping the essential step of proper cleaning and priming, believing that just painting over would suffice. That was a rookie error I learned the hard way.
If you’ve faced this problem, you know how disheartening it can be. But don’t worry—there’s good news. Today, I’m going to walk you through my tried-and-true process for painting over water stains so they stay hidden, and your walls look fresh and flawless. Whether it’s a small leak your home experienced or residual moisture from previous roof issues, understanding the right steps is crucial.
Ready to turn those stubborn stains into mere memories? Let’s dive into the practical solutions that truly work, so your next painting project turns out just as brilliantly as you imagined. And if you’re unsure whether your water stains are caused by ongoing issues, I recommend checking out this guide for insights on identifying underlying causes.
Now, let’s get started with the key steps that will save your walls and your sanity.
Prepare the Surface Thoroughly
First, remove any loose paint or peeling material around the water stain with a putty knife or scraper. Use a damp cloth to gently clean the area and eliminate dust or grease, ensuring the paint adheres properly. During my project last summer, I once skipped this step and ended up with uneven coloring that required redoing the entire wall, illustrating the importance of meticulous preparation.
Apply a Stain-Blocking Primer
Next, tackle the stain with a high-quality stain-blocking primer, like oil-based or shellac-based primer. These primers act like a shield, sealing in the water stain so it can’t bleed through your new paint. I remember spending extra time on this step because I once rushed through it and watched stubborn stains seep through the finished coat, ruining my work. Use a brush or roller to apply the primer thoroughly, covering the stain and a small surrounding area. Allow it to dry completely—typically 2-4 hours depending on the product.
Use the Right Primer for the Job
Choosing the appropriate primer is critical. For stubborn water stains, shellac primers are excellent due to their rapid sealing capabilities. For less severe stains, oil-based primers suffice. Always follow the manufacturer’s instructions for curing times and ventilation requirements. During my last project, switching from latex to shellac primer significantly reduced the chances of stain bleed-through, saving time and frustration.
Sand and Smooth the Surface
After priming, lightly sand the area with fine-grit sandpaper to smooth out any brush strokes or uneven spots. This step ensures a sleek surface for the topcoat. I learned this the hard way when skipping sanding led to visible texture differences after painting, highlighting how crucial this step is for a professional look.
Apply Top-Quality Paint in Thin Layers
Finally, use a high-quality interior paint and apply it in thin, even coats. Multiple thin layers are better than one thick coat, as they dry faster and reduce streaks. During one project, I applied thick paint too quickly, which caused drips and uneven drying—an avoidable mistake that emphasized patience and precision.
Remember, patience and attention to detail at each step dramatically improve your results. For more comprehensive strategies on house painting, visit this resource. For assistance or to ensure your project stays on track, consult with local experts at Elite Painter Pro.
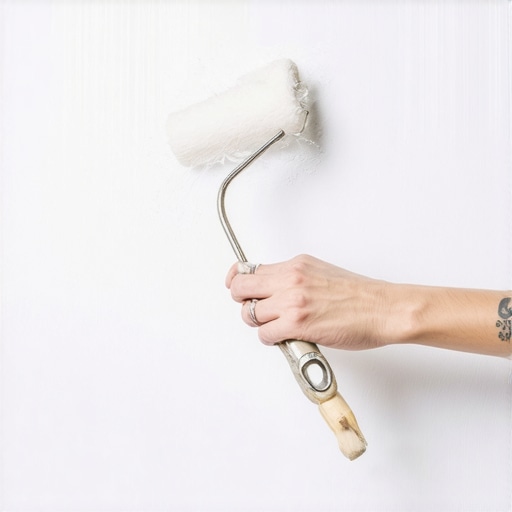 While many believe that applying a single coat of quality paint is enough to ensure a lasting finish, the truth is that neglecting surface preparation and understanding the nuances of paint chemistry can lead to premature deterioration. One widespread myth is that darker colors always require multiple coats, but advanced techniques involving primer selection and color layering can often achieve rich hues with fewer coats, saving you time and money. Moreover, some think that matching paint colors is straightforward—yet indoor lighting, surface textures, and paint formulations dramatically influence the final shade, making expert color matching crucial.
Why Do Some Paints Fade or Peel Even When Applied Correctly?
In many cases, it’s due to improper surface prep, incompatible paint types, or environmental factors like humidity and UV exposure—many of which are overlooked by DIY enthusiasts. A 2019 study published in the “Journal of Coatings Technology” emphasizes that adhesion failures often result from moisture entrapment beneath paint layers or using low-quality primers, underscoring the importance of proper priming and surface sealing. To avoid these pitfalls, professionals recommend thorough testing of surface moisture levels and choosing products suited to specific conditions, especially in local climates. If you’re considering a home upgrade, exploring local painting secrets can elevate your project with insights that go beyond basic DIY. Remember, rushing the process or using the wrong products can turn your dream makeover into a headache. Instead, focus on mastering surface prep, selecting compatible materials, and understanding your environment. These hidden nuances separate amateur results from professional finishes. Having the right knowledge can ultimately save you from costly mistakes and ensure your walls look stunning and durable for years to come. Interested in cracking the code of perfect paint jobs? Check out this comprehensive guide for expert strategies. Don’t forget—proper preparation and material choice are your best allies in achieving a flawless finish. If you ever wondered whether your current painting approach is optimal, I recommend consulting local specialists—reach out through this contact page to get tailored advice. Have you ever fallen into this trap? Let me know in the comments.Maintaining your painting tools and understanding the right maintenance routines are crucial for achieving professional results that stand the test of time. Investing in high-quality equipment not only ensures cleaner, smoother finishes but also extends the lifespan of your tools, saving you money in the long run. I personally prefer using epoxy-based brush cleaners, which effectively remove paint residue without damaging the bristles, allowing the brushes to perform optimally across multiple projects. For rollers, I recommend foam sleeves that are easily washable and durable, reducing the need for frequent replacements. It’s essential to clean your tools immediately after each painting session—using warm water and appropriate solvents—so paint doesn’t harden and compromise their performance. Proper maintenance also involves storing tools in a dry, climate-controlled space to prevent rust and degradation. Regularly inspecting your equipment for wear and replacing worn parts keeps your workflow smooth and hassle-free.
Looking ahead, advancements in technology, such as laser-guided tools and smart paint mixers, are likely to revolutionize local painting processes, making precision quicker and more accessible. To stay on top of these innovations, subscribing to industry-leading resources like this comprehensive guide can provide valuable insights.
How do I maintain my painting tools over time?
To maintain your tools effectively, always clean brushes and rollers immediately after use with the recommended solvents, avoiding the buildup of hardened paint. Store them in airtight containers or protective covers to prevent dust and moisture from settling. Schedule routine inspections to replace damaged bristles or worn-out sleeves; this simple step ensures your tools deliver consistent results. Additionally, keep your paint mixers calibrated—many models have adjustable settings that, if neglected, can lead to uneven color mixing, affecting your finish. As noted by industry experts, consistent maintenance not only ensures quality but also reduces the time you spend fixing mistakes caused by subpar equipment. For tailored advice, you might consider consulting local professionals or visiting their contact page.
Finally, I encourage you to incorporate advanced maintenance tips—like using specialized lubricants on moving parts of sprayers and mixers—to prolong their operational life. Do you have a favorite tool maintenance trick that keeps your projects running smoothly? Share your experiences and try out these strategies to elevate your painting game.
What My Water Stain Mishaps Taught Me About Patience
One of the biggest lessons I learned was that impatience can undo even the best painting efforts. Rushing through priming or skipping preparation might save time initially, but it leads to costly mistakes later. Taking the time to properly prepare and select the right products ensures your walls look perfect and stay that way, saving you headaches and rework.
Curated Tools That Actually Make a Difference
Investing in high-quality stain-blocking primers, like shellac-based options, changed my approach entirely. These products seal stains effectively and reduce topcoat reapplications. Additionally, a good set of fine-grit sandpaper ensures a smooth finish. My trusted sources include professional-grade brands recommended by veteran painters, which you can explore further in this expert guide.
This Is Your Moment to Transform Your Walls
Remember, every brushstroke and primer layer is an investment in your home’s beauty and durability. Whether you’re tackling water stains or other painting challenges, embracing patience and proper technique will help you achieve professional results. So, get inspired, start your painting journey, and turn your walls into stunning features that reflect your personal style. Have you ever struggled with stubborn stains? Let me know below!