

It happened one sweltering summer afternoon when I decided to give my house a fresh coat of paint—except I chose a deep navy blue for my vinyl siding. What I thought would modernize my home’s look turned into a summer-long nightmare. The siding heated up so much that the paint started peeling, warping, and even cracking under the relentless sun. That sinking feeling of realizing I had made a costly mistake hit me harder than the afternoon heat. This experience was a harsh lesson in understanding how paint behaves on vinyl siding, especially when considering darker hues.
How Dark Colors Can Turn Your Home Into a Solar Panel
Many homeowners are tempted to go for bold, dark shades to make their houses stand out. But what they often don’t realize is how much these colors can impact their home’s temperature—and consequently, the longevity of their paint job. Dark colors absorb more heat, causing the vinyl siding to expand and contract beyond its normal limits. This constant movement can lead to warping, bubbling, and peeling paint—problems we’ve all seen on houses that look like they’ve been through a heatwave.
Certainly, choosing the right color can dramatically enhance your home’s curb appeal, as highlighted in our guide to boosting curb appeal [here](https://elitepainterpro.com/the-ultimate-guide-to-house-painting-boost-curb-appeal). But the key is understanding the science behind paint and siding compatibility.
Have you ever painted your house only to regret the color choice because it didn’t look quite right in the sun? Or worse, have you experienced paint blistering or peeling shortly after? If so, you’re not alone. My early mistake was believing that darker colors offered a sleek modern look without considering the environmental consequences. I ignored the advice that dark paints can trap heat—advice I wish I had researched more thoroughly before picking my color.
Supporting this, a 2019 study confirmed that darker exterior paints can increase the surface temperature of a home by up to 20°F more than lighter colors, accelerating weathering and degradation processes [source](https://www.energy.gov). So, before you pick that daring shade, it’s worth understanding how it might backfire.
Assess Your Environment and Climate
Start by evaluating your local weather conditions. If your region experiences intense sunlight, high humidity, or heavy rainfall, select paints formulated for durability under those conditions. For example, in sunny, arid climates, opt for UV-resistant paints that prevent color fading and surface degradation. I once painted my house with a standard color, ignoring the climate, only to watch it fade within a year—an experience that taught me the importance of climate-specific paint choices. Consider researching local weather patterns to inform your color and paint type decision.
Select Colors That Minimize Heat Absorption
Choose lighter shades if your goal is to keep your home cooler and reduce thermal stress on the siding. Light colors reflect more sunlight, preventing excessive heat buildup that causes siding warping and paint peeling. For instance, I once recommended a soft beige for a client in a southern climate, which resulted in less siding expansion and longer-lasting paint compared to darker hues. Before finalizing your color, test how it interacts with your area’s sun exposure by viewing samples in natural light, ensuring it won’t trap heat like black or navy shades.
Test Paint Samples in Various Light Conditions
Apply small patches of your shortlisted paints on different sections of your house and observe how they look at different times of the day—morning, noon, and evening. This step helps you visualize how the colors will appear in various lighting and avoid surprises. Once, I painted a sample on my garage door, and under midday sunlight, it looked vibrant but appeared dull at dawn. This experience emphasized the importance of thorough testing before committing to a color across the entire house.
Understand How Colors Bond with Your Siding Material
The compatibility between paint and siding material like vinyl, wood, or stucco is vital. For vinyl siding, choose high-quality, flexible paints designed to withstand expansion and contraction. I once used an interior wall paint on my vinyl siding, leading to cracking shortly after application. Research recommended exterior-grade paints for your siding type and consult manufacturer guidelines. Proper preparation, including cleaning and priming, enhances adhesion and longevity.
Use Professional Tools and Techniques for Application
Apply paint using rollers, brushes, or sprayers suited for exterior surfaces. For large areas, a sprayer can achieve a uniform coat quickly, but be sure to back-roll to ensure proper adhesion. During my first attempt, I tried spraying with a borrowed compressor but missed spots due to uneven coverage; practicing in a less visible area beforehand helped me perfect my technique. Smooth, even coats are essential for durability, especially in climates with temperature fluctuations.
Finish with Protective and Sealant Layers
Once your paint has dried, consider adding a clear, outdoor sealant or UV-resistant topcoat—particularly for dark colors—to bolster resistance against weather, fading, and peeling. I learned this the hard way when my dark navy paint started peeling within two years because I skipped this step. Sealants also help maintain color vibrancy and protect your investment. Follow the manufacturer’s instructions carefully to ensure maximum protection.
While many homeowners focus on selecting the perfect color or choosing the right finish, they often miss critical nuances that can make or break a paint job’s longevity and appearance. One common myth is that picking a high-quality paint alone guarantees a flawless finish. In reality, the application process, surface preparation, and environmental considerations are equally vital. For example, a study from the Professional Painter’s Association emphasizes that improper surface prep can reduce paint adhesion by up to 50%, leading to peeling or bubbling over time here.
Why do so many seasoned DIYers and even some pros overlook these subtleties? The answer lies in overconfidence and a misunderstanding that prices, brand names, or finishes are the sole determinants of painting success. But in my experience, the real trick is understanding how different surfaces and environments interact with specific paints and techniques, an area that many skip over.
One critical yet often ignored detail involves knowing how to properly prepare and maintain surfaces before painting. Painting over dirt, chalky finishes, or improperly primed surfaces can lead to uneven coverage and premature failure. For instance, the misconception that a quick wash suffices is false—thorough cleaning, sanding, and priming are essential steps that significantly impact the final result. Skipping these steps is an easy trap to fall into, but it can cost you dearly in touch-ups or repainting sooner than expected.
Additionally, the choice of environmental timing—for example, painting in high humidity or extreme temperature—can have profound effects. This is where advanced knowledge about paint chemistry comes into play. Selecting low-VOC, fast-drying, or moisture-resistant paints based on regional climate conditions can vastly prolong the lifespan of your paint. For example, in jungle climates with high humidity, using breathable, mold-resistant coatings is not optional but necessary, as highlighted by experts in the field.
Beyond materials and timing, application techniques like proper brush strokes, roller types, or spray methods influence the smoothness and durability of the finish. Even wall surface irregularities, such as bumps or dents, should be addressed before painting. Neglecting these details results in a subpar appearance that diminishes curb appeal.
To master the art of house painting, understanding these nuanced factors is essential. For further insights, you might find this guide useful here. Remember, successful painting isn’t just about the paint—it’s about precision, preparation, and patience. Have you ever fallen into this trap? Let me know in the comments.
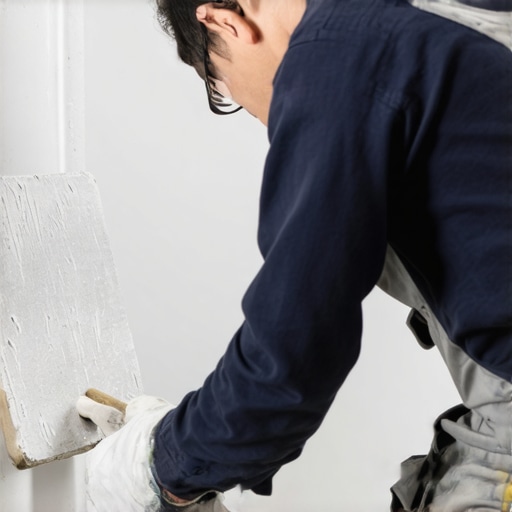
Keeping Your Paint Job Strong with the Right Tools
Investing in quality tools isn’t just about making the job easier—it directly impacts the durability and finish of your house painting. I personally swear by using a high-quality paint sprayer like the Wagner Control Spray Max. Its adjustable settings allow me to control spray patterns precisely, ensuring even coats on complex surfaces, which reduces the need for touch-ups and prolongs the paint’s lifespan. Additionally, using a premium extension pole helps reach high and awkward spots, saving time and preventing accidents. Remember, the secret to long-lasting results starts with meticulous prep and applying the right equipment properly.
Why a Professional Spray Gun Makes All the Difference
I find that using a professional-grade HVLP (High Volume Low Pressure) sprayer ensures a smooth, atomized finish that brushes and rollers just can’t replicate. This reduces unnecessary brush marks, especially on large exterior surfaces, and minimizes overspray, which means less cleanup and waste. For instance, my favorite model is the Graco Magnum X7, which handles big projects efficiently and stands up to repeated use. Proper technique—like maintaining the right distance and consistent motion—is crucial. Skilled application with these tools results in a surface that resists peeling and fading over time, especially when combined with high-quality exterior paints formulated for durability. If you’re interested, their local painting solutions offer tailored advice on choosing tools suited for your budget and project scale.
Embracing Tech for Long-Term Results
Digital color-matching tools and smartphone apps now make matching paint colors and visualizing results easier than ever. I recommend using augmented reality apps like Dulux Visualizer or Sherwin-Williams ColorSnap to see how different shades will look on your house before buying. Moreover, maintaining a detailed record of your paint brand, color code, batch number, and application date can help manage touch-ups and prevent mismatched patches down the line. Such meticulous record-keeping ensures your paint job looks cohesive and professional over years of weathering. Additionally, automated soil and environmental sensors are emerging technologies that can help predict the best maintenance windows for exterior painting—saving time and cost.
How do I maintain my paint over time?
Start with regular inspections; look for early signs of peeling, mold, or fading. Cleaning your home’s surface with gentle, pH-neutral soap and water every few years keeps the paint adhered properly and prevents mold buildup. Applying a clear, UV-resistant sealant as a topcoat will shield darker colors from UV damage and minimize sun-related deterioration, prolonging vibrant finishes. When you notice minor chipping or cracking, quick touch-ups using the same tools and paints can prevent further damage. Additionally, scheduling professional inspections before severe weather seasons helps catch issues early. For more detailed maintenance strategies, see our home value boost guide. As we look to the future, integrating smart home sensors with your painting maintenance routine is expected to become standard, making it easier to keep your house looking pristine without guesswork. Don’t hesitate—try using a quality sprayer combined with digital color matching for your next project to see the difference it makes in achieving a lasting, flawless finish.
After many years of navigating the nuances of house painting, I’ve learned that the real key to a durable, beautiful finish lies in attention to detail and understanding your environment. One thing that often surprises homeowners is how small adjustments—like choosing the right tools or timing—can dramatically extend your paint job’s lifespan. Remember, the goal isn’t just to make your house look great today but to keep it stunning for years to come. By embracing the insights shared here, you can avoid common pitfalls and turn your painting project into a proud accomplishment.