

It’s a bright Saturday morning, and I’m all set to finally give my living room a fresh new coat of paint. I grab my bucket of primer, brushes, and those fancy sponges I saw online. I’m feeling confident — until I step back and realize something’s off. The walls look grimy, sticky, and—worse—muddy in the corners. Suddenly, my nearly perfect weekend project feels doomed before I even start. That’s when I had my lightbulb moment: I skipped a crucial step in preparing my walls, and it nearly ruined the entire paint job.
The Key to a Lasting, Smooth Finish Starts Here
If you want your walls to look flawless and stand the test of time, you need to start with a solid cleaning routine. Believe me, I’ve learned this lesson the hard way. Skipping this step leads to peeling, uneven color, and most annoyingly, the need to redo everything sooner than expected. Today, I’ll reveal how to clean your walls properly before painting, based on my own mistakes—and tips from the pros. When walls are properly prepared, your paint will stick better, look smoother, and last longer, saving you time and money in the long run.
Is Skipping Wall Prep Really Worth the Risk?
I used to think a quick wipe-down was enough—until I noticed patches of paint peeling after just a few months. Early on, I made the mistake of believing that dirt and dust wouldn’t seriously affect the quality of our paint job. Turns out, this couldn’t be further from the truth. The Environmental Protection Agency stresses that surface contaminants can significantly impair paint adhesion, causing premature failure. So, if you don’t want to be repainting your walls every few years, it’s crucial to do this right from the start.
Are you currently facing the frustration of paint that doesn’t stick well or starts peeling too soon? Don’t worry—next, I’ll walk you through the step-by-step process of cleaning your walls effectively for a professional-looking finish, every time. Trust me, a little extra effort here makes all the difference—and your future self will thank you for it.
,
Start with a Thorough Dust and Dirt Removal
My first attempt at cleaning walls was a quick swipe with a damp cloth, which left dust behind. The next day, I noticed the paint only partially adhered, causing uneven coverage. To avoid this, use a soft broom or a microfiber duster to remove cobwebs and loose debris from ceilings and corners. Then, wipe walls with a damp sponge or rag, ensuring you remove surface dust, dirt, and grease. For stubborn stains, mix a few drops of mild dish soap with warm water. This initial step is crucial because dirt acts like a barrier, preventing primer and paint from sticking effectively.
Dealing with Sticky or Greasy Surfaces
If your walls have stubborn grime—think of greasy kitchen walls or areas with smoke residue—simply wiping with water isn’t enough. Instead, use a solution of trisodium phosphate (TSP) diluted as directed, or a vinegar-water mix for a natural approach. Apply the cleaner with a sponge, focusing on greasy patches, and then rinse with clean water. Make sure to wear gloves, as these cleaners can be harsh. This step removes oils and residues that could cause paint to peel or bubble later.
Addressing Mold, Mildew, and Moisture
In damp areas like bathrooms or basements, mold and mildew are common hurdles. I once ignored this step and ended up with paint peeling after a few months. To prevent this, scrub mold with a solution of bleach and water (1 part bleach to 3 parts water), or use commercial mold removers. After scrubbing, rinse thoroughly and let the wall dry completely—ideally 48 hours—since moisture is the enemy of lasting paint. For highly damp surfaces, consider applying a mold-resistant primer before painting, which acts as a barrier against future mold growth.
Inspect and Spot-Treat Imperfections
While cleaning, I noticed tiny cracks and patched areas that looked uneven. Clean any chalky or flaking paint off with a wire brush or scraper, then sand these areas smooth with medium-grit sandpaper. Cleaning and smoothing out imperfections ensures your paint adheres uniformly, avoiding blotchy spots or peeling later. This detailed prep might seem tedious but pays off with a sleek finish that lasts over time.
Dry Walls Thoroughly Before Painting
After all cleaning and repair work, the walls must be totally dry. I once painted over damp walls during a rainy spell, which led to blistering paint. Use a dehumidifier or fans to expedite drying, especially in humid environments. A damp wall will trap moisture under the paint, risking peel and mold growth. Don’t rush this step; a properly dried surface ensures the primer and paint bond seamlessly, resulting in a professional-quality finish.
Remember, meticulous wall preparation is like laying a strong foundation for a house—it makes all the difference in the final appearance and durability of your paint job. For more detailed strategies on house care, check out this guide.
**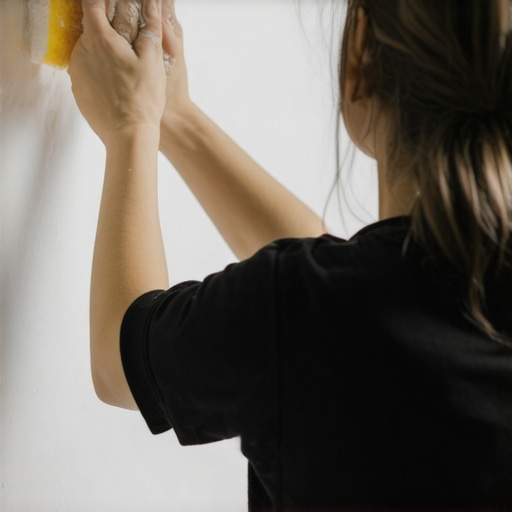 **
**
The image shows a homeowner scrubbing a wall with a sponge dipped in a vinegar-water solution, illustrating the cleaning process.
Even seasoned painters sometimes fall into traps when it comes to house painting. A prevalent myth is that surface preparation isn’t as crucial as applying multiple coats quickly. But in reality, skipping detailed prep—like inspecting for peeling paint or hidden damage—can doom your project from the start. For example, neglecting to sand glossy surfaces or remove old paint layers can cause new paint to peel prematurely, a mistake many make thinking they can save time. One advanced mistake is misjudging the type of primer needed; using standard primer on stained or oily surfaces will hardly provide the adhesion you expect, leading to costly touch-ups later. According to experts at the Painting and Decorating Contractors of America, proper surface analysis and tailored primer choices are critical for lasting results. It’s tempting to think that faster, cheaper methods are sufficient, but this often results in uneven color, bubbling, or peeling, ultimately costing more time and money. A nuanced understanding of surface chemistry, previous paint conditions, and environmental factors like humidity can elevate the quality of your work significantly. For instance, painting exterior surfaces in high humidity without appropriate moisture barriers will lead to blistering or mold growth beneath the paint layer. Don’t overlook the importance of primer, surface cleaning, and environment—these are the hidden nuances that distinguish amateur from professional results. For more expert insights, check out these pro tips. Remember, rushing or skipping steps might seem convenient now, but it’s a false economy. Have you ever fallen into this trap? Let me know in the comments.
Keep It Working: Tools and Tips for Longevity
To ensure your house painting projects stand the test of time, investing in the right tools is crucial. From quality brushes to specialized equipment, the right set of tools can make all the difference in achieving a professional finish that lasts. For example, I swear by using high-quality synthetic bristle brushes like Purdy’s Pro-Extra series, which hold their shape and provide smooth application, especially on interior walls. Pairing these with a good roller frame, such as the Wooster ProDilator, helps prevent bristle loss and ensures even coverage.
When tackling large-scale projects or local painting jobs, portable and efficient equipment will save you time and frustration. Consider investing in a 5-gallon paint pail with a built-in grid for roller loading; it keeps your work consistent and reduces spills. For exterior surfaces, especially textured or uneven walls, a spray gun like the Graco Project Painter Plus can be a game-changer, providing smooth, even coats with less physical effort. Just ensure you have the right filters and nozzles for your paint type to avoid clogs and ensure a seamless finish.
For maintaining your tools and ensuring long-term performance, proper cleaning and storage are key. Using solvents like mineral spirits for oil-based tools and warm, soapy water for latex paints prevents buildup and extends their lifespan. Additionally, storing brushes vertically or hanging them allows the bristles to remain in shape, making your next project easier and faster. Remember, well-maintained tools are the backbone of consistent quality in any painting endeavor.
How do I maintain my painting tools over time?
Regularly cleaning your brushes, rollers, and equipment after each use is essential. For brushes, rinse thoroughly with the appropriate solvent, reshape the bristles, and let them dry flat or hang with the bristles down. Store rollers in airtight containers or reattach them to their frames after cleaning to prevent deforming. Inspect your spray equipment for clogs or wear before each use, replacing worn nozzles and filters routinely. These simple yet effective maintenance routines ensure your tools perform optimally over multiple projects, ultimately saving you money and guaranteeing a professional-quality finish each time.
Looking ahead, advancements in innovative painting tools are making DIY projects easier and more reliable than ever. For instance, cordless electric spray systems now offer greater mobility without sacrificing precision, making detailed interior work quicker. Incorporating smart storage solutions and routine upkeep will be part of the future landscape as well, helping homeowners and professionals alike maintain their investments efficiently.
Don’t forget, the quality of your tools combined with proper maintenance can dramatically impact the durability and appearance of your paint job. Try out a high-end brush cleaning system or a versatile sprayer, and see how they transform your projects. To further refine your approach, explore expert tips on upcoming painting strategies for long-term results.
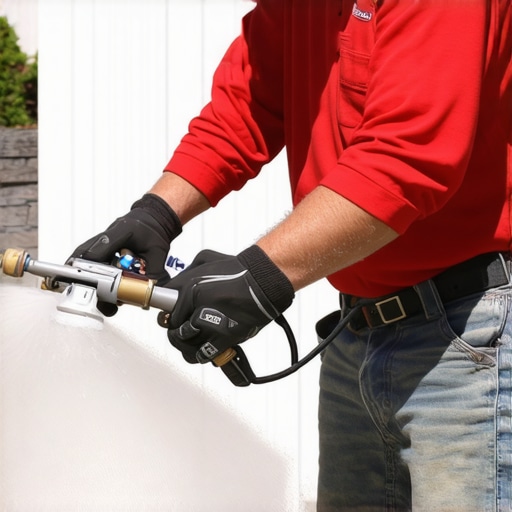
The image demonstrates a professional using a graco spray gun with proper filters during a house painting project, ensuring even coverage and efficiency.
The Hidden Pitfalls That Almost Cost Me My Finish
One of my biggest lightbulb moments was realizing that meticulously preparing walls is more crucial than the actual painting process itself. I once rushed through cleaning and sanding, thinking it was a waste of time. The result? Bubbles, peeling, and a finish that looked shabby within months. It taught me that the joy of a beautiful paint job begins long before the first stroke—it’s in the details of wall prep.
Tools That Turn Pro Tricks Into Your Routine
Over time, I discovered that investing in high-quality brushes and tools like Purdy’s Pro-Extra brushes or a Graco spray system makes a tangible difference. They not only save time but also produce a smoother, more durable finish. My advice? Don’t settle for cheap tools if you want professional results that last.
Embracing the Art of Patience for Longevity
Waiting for walls to dry thoroughly is an underrated step. Rushing to paint over damp walls led me to avoid future headaches like peeling or mold. Using fans, dehumidifiers, or simply scheduling wisely can be your secret weapon. Remember, a well-dried surface is the foundation of a flawless, lasting paint job.
My Most Surprising Misstep and How to Avoid It
I once ignored surface imperfections, assuming they wouldn’t show after painting. Big mistake. Small cracks and uneven patches can turn into glaring flaws if not addressed. Sanding and repairing before painting creates that sleek finish we all desire. Lesson learned: Invest time in surface perfection, and your future self will thank you.
Resources That Changed the Way I Paint
For advanced techniques, I trust local painting strategies and the comprehensive guides on painting your home effectively. These resources provided insights into surface analysis, proper priming, and environmental considerations—crucial for homes exposed to different climates and conditions.
Your Next Step Toward a Perfect Finish
Painters often say that success is 10% talent and 90% preparation. With the right mindset and careful groundwork, you can achieve stunning results that stand the test of time. Remember, wall prep might seem tedious, but it’s your secret weapon for a durable, professional-looking paint job. Ready to elevate your painting projects? Check out these expert tips and turn your vision into reality.