

Walking into my living room after a weekend of DIY, I couldn’t help but notice the uneven, sloppy paint lines around the windows. It was a small detail, but it screamed amateur. That lightbulb moment hit me—those tiny trims, often overlooked, can make or break the overall look of a room. The truth is, getting that crisp, professional finish on interior window trim is trickier than it looks. I’ve been there, trying to brush on a clean line, only to end up with paint smudges, drips, or uneven edges. But don’t worry, I’ve learned a few secrets over the years that turned my painting from frustrating to flawless.
Today, I want to share how you can elevate your home’s appearance by mastering the art of professional-looking window trim. Whether you’re refreshing a single room or tackling a whole house, these tips will help you achieve a smooth, polished finish that will impress anyone who steps inside.
Why Your Window Trim Can Make or Break Your Interior Design
The small details in home painting, like your window trim, often go unnoticed unless they’re done poorly. When done right, well-painted trim adds depth, contrast, and a sense of craftsmanship that elevates your entire space. Yet, many homeowners shy away from perfecting this detail, fearing the meticulousness it requires. From inconsistent paint lines to messy edges, these mistakes can quickly undo the effort you put into painting your walls.
Getting that professional look is achievable, even if you’re a beginner. It’s all about understanding the right techniques, tools, and preparation. If you’ve ever faced the disappointment of a paint line that looks like a toddler did it, know that this is a common problem everyone struggles with initially. But I promise, with patience and practice, you can get a finish so sharp it fools the eye.
One mistake I made early on was rushing through the prep stage. I thought painting the trim would be quick and straightforward—wrong! Proper taping, cleaning, and sanding are crucial steps that set the foundation for a sleek look. Skipping these can lead to paint bleed, uneven edges, or chipping down the line. According to professional painters, meticulous prep work isn’t an optional step; it’s the secret to a clean finish, as supported by experts at Elite Painting Pro.Prepare Your Workspace for Precision
Begin by clearing the area around your windows, removing any curtains, blinds, or furniture that could obstruct your work. Lay down drop cloths to protect flooring and use painter’s tape to mask off the glass and adjacent walls. I once skipped this step and ended up with paint smudges on my window panes; a simple mistake that cost me time. Proper preparation creates a clean baseline, making the actual painting smoother and reducing cleanup later.
Choose the Right Tools for Clean Lines
Invest in angled brushes (2-3 inches wide) and high-quality painter’s tape designed for delicate surfaces. An angled brush allows you to follow the trim edges precisely, much like a pilot tracing a runway. I remember grabbing a stiff-bristled brush and battling paint bleeding onto the glass—temporarily frustrating but a learning point. Using the right tools ensures you can control the application, resulting in sharper edges and fewer touch-ups.
Prime and Sand for a Flawless Finish
If your trim has been previously painted or has stains, apply a compatible primer and let it dry thoroughly. Lightly sanding the surface with fine-grit sandpaper creates a smooth, even base, akin to smoothing out a rough stone before polishing. I once painted over rough wood without sanding, which caused the paint to unevenly adhere and peel later. Skipping this step may save time upfront but results in imperfections that become glaring upon closer inspection.
Master the Edging Technique
Begin by applying painter’s tape precisely along the edges of the trim, pressing down firmly to prevent bleed-through. Load your angled brush with a small amount of paint—don’t overload it. Then, carefully follow the tape line, keeping a steady hand and consistent pressure. Think of it like tracing a map route—you want controlled, deliberate movements. During my first attempt, I rushed and accidentally pressed the brush into the tape, causing jagged lines. Taking your time and building the paint in thin layers produces a crisp, professional look.
Layer and Smooth Out the Paint
Apply thin, even coats of paint, allowing each to dry fully before adding the next. Patience is key; thick coats are prone to drips and uneven texture. I once tried to rush with a single thick layer, resulting in sagging and uneven color. Using a high-quality, low-VOC paint (see this guide for selecting the best: Low VOC Paints) helps achieve smoothness and quicker drying times. Use a small brush for touch-ups along the edges for sharp, clean lines.
Remove Tape Carefully for a Neat Finish
Once the paint is dry to the touch (at least an hour or as specified by the manufacturer), gently peel the masking tape at a 45-degree angle. Removing tape too soon can smudge the edges, while waiting too long can cause the paint to set and tear. During my first experience, I pulled the tape immediately after painting, which resulted in peeled corners—less than ideal. For best results, peel slowly, especially around corners and detailed trim, for a perfectly crisp line.
Refine and Clean Up
If any paint has bled under the tape, use a small brush dipped in the original trim color to carefully touch up. Clean your brushes with warm, soapy water or mineral spirits if using solvent-based paints, ensuring they stay in good shape for future projects. I’ve found that meticulous cleanup and touch-ups are what separate a beginner job from a professional finish. Practice patience during these finishing touches, and your trim will look like it was done by a pro.
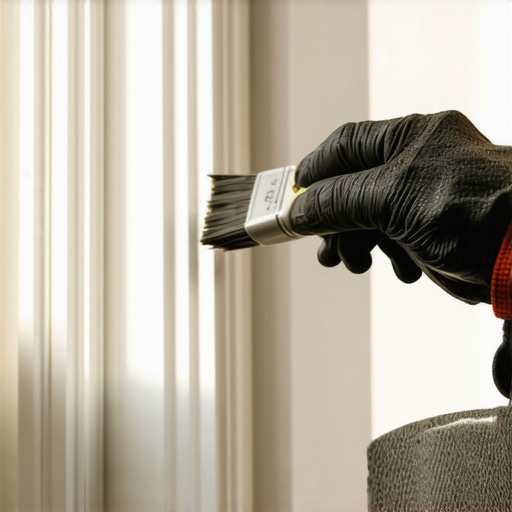 Many homeowners and even aspiring painters believe that a simple coat of paint and some brushes are enough to achieve a flawless finish. However, this oversimplification masks several hidden nuances that can make or break your project. In my experience, one common myth is that using cheaper paint will save money without compromising quality. The truth is, affordable paints often require more coats, leading to increased time and costs, and may not adhere properly to surfaces, resulting in peeling or uneven color over time. According to a study by the Paint Quality Institute, high-quality paints contain better binders, which improve durability and coverage, ultimately saving you money and effort in the long run.
Keep Your Investment Alive with Proper Maintenance
Achieving a professional house paint job isn’t just about the initial application; it’s equally about ongoing maintenance. Regular inspections and touch-ups prevent minor issues from turning into costly repairs. I recommend setting a bi-annual schedule to examine your painted surfaces, paying close attention to any peeling, cracking, or fading. Addressing these issues early ensures your home’s aesthetic appeal endures over time.
Essential Tools for Long-Term Durability
Beyond brushes and rollers, investing in quality equipment pays dividends. A high-grade paint sprayer, like the Graco Magnum X7, allows for even application over large areas, reducing uneven wear and improving longevity. Pair this with a powered paint mixer to ensure your colors stay consistent throughout the project, which is vital for uniform wear down the line.
For spot repairs, a good multi-pack sanding sponge helps smooth out imperfections that can trap moisture or debris, leading to premature deterioration. Utilizing advanced primers, such as Moisture Resistant Primer, creates a protective barrier against environmental damage, extending your paint’s lifespan.
The Future of House Painting Tools
As technology evolves, we can expect smarter, more durable paints embedded with nanotechnology that repair themselves or resist environmental wear better than ever. Automated cleaning tools for brush or roller maintenance may become standard, reducing errors and improving finish quality. Staying informed about these innovations through trusted sources will give you a competitive edge in maintaining your home’s appearance.
How do I maintain my painted surfaces over time?
The key to long-lasting results lies in consistent care. Regularly clean your siding and trim with gentle solutions to remove dirt and mold—this prevents surface degradation. For instance, a soft pressure wash once a year can be enough to maintain vibrancy. When you notice signs of wear, such as peeling or cracking, address them promptly with targeted repairs. Applying a fresh coat of paint or sealant over existing paint—after proper sanding and priming—can restore your home’s finish and shield it from harsh weather.
Don’t forget to use the best practices for painting over existing surfaces. For example, careful preparation and selecting the right brush for touch-ups can make a significant difference in durability. I personally swear by maintaining a dedicated set of tools just for touch-ups, which saves time and ensures consistency. Invest in good-quality brushes and paints to see the best results over the years.
Looking ahead, consider exploring innovative products like self-cleaning paints or coatings infused with UV blockers, which can dramatically extend your home’s visual appeal and structural integrity. To improve your results, try applying a thin, even layer of high-quality exterior paint with a sprayer, ensuring better adhesion and resistance to weathering. Remember, a little extra effort now goes a long way in preserving the beauty and value of your home for decades to come.
The Hidden Lessons Behind Perfect Window Trim
One of the most eye-catching details that can elevate your interior design is flawlessly painted window trim. Through my journey, I learned that patience with prep work is the most underestimated step—skipping it often leads to uneven edges and paint bleed. I also discovered that choosing the right tools, like high-quality angled brushes, makes all the difference in achieving clean lines. A light bulb moment was realizing that thin, multiple coats—not thick, hurried layers—produce a smooth, durable finish that lasts for years. And perhaps most surprisingly, I found that removing painter’s tape at just the right time prevents those stubborn paint lines from tearing or smudging, sealing the project with a professional touch.
My Go-To Resources for Interior Painting Success
Over the years, I’ve curated a handful of tools and guides that truly transformed my projects. First, the pro tips guide for house painting offers insights into brush control and surface preparation that I wish I knew earlier. For tools, I swear by high-quality angled brushes; they allow for precise edges and reduce clean-up afterward. The best painter’s tape designed for delicate surfaces ensures my lines stay sharp without damaging the finish. Lastly, I trust these touch-up techniques for quick fixes, elevating a good job to a great one.
Your Turn to Create Beautiful Spaces
Remember, perfecting your window trim isn’t just about aesthetics—it’s about instilling pride in your home and embracing the learning process. Each project teaches invaluable lessons that no tutorial can fully capture. So, don’t be afraid to take your time, experiment with tools, and enjoy the artistry of painting. Ultimately, your efforts will pay off with a stunning result that rivals professional craftsmanship. Ready to transform your space with expert window trim painting? Reach out to us through our contact page if you need detailed guidance or professional assistance. Now, tell me—what’s been your biggest challenge in achieving those crisp paint lines around your windows? Share below and let’s learn together!.