

I remember the day I painted my house’s stucco exterior. The sun was shining, and I was eager to refresh the look with a new coat of paint. But within weeks, I noticed the paint peeling, bubbling, and fading unevenly. Turns out, I had rushed into painting without checking the crucial factor—my stucco’s moisture level. That lightbulb moment taught me a vital lesson: if your stucco is too damp, all your efforts could go to waste, or worse, cause long-term damage.
Why Moisture Content Actually Matters for Painting Stucco
Understanding whether your stucco is dry enough isn’t just a minor detail; it’s the foundation of a successful paint job. Excess moisture trapped beneath the surface can lead to peeling, blistering, and even mold growth down the line. According to industry experts, moisture issues are a leading cause of exterior paint failures, with improper preparation reducing the lifespan of your paint by years. So, how can you tell if your stucco is too damp to paint? Fortunately, with a little patience and some simple tests, you can avoid costly mistakes and ensure a long-lasting finish.
Skeptical? It’s Worth the Extra Step
Early in my painting adventures, I thought I could skip the moisture check—after all, it looked dry enough, right? Wrong. I realized that visually inspecting isn’t enough. I made the mistake of painting on a cloudy day, thinking the moisture was gone, but the underlying moisture was still lurking. Don’t fall into the same trap. Proper moisture testing is your best defense against future headaches. Want to learn how to do it accurately? Keep reading, and I’ll walk you through the methods I wish I knew from the start. If you’re eager for practical tips, you might find these local painting secrets useful in ensuring your project turns out perfect—check out [local painting secrets](https://elitepainterpro.com/local-painting-secrets-elevate-your-space-effortlessly). Now, let’s dive into how you can determine your stucco’s dryness before you pick up that paintbrush.
Start with a Simple Moisture Test
Before grabbing your paintbrush, take a small piece of clear plastic sheeting, about a square foot, and tape it tightly against the stucco surface with waterproof tape. Leave it overnight. In the morning, check for condensation or moisture buildup under the plastic. If you see water droplets or the surface feels damp, your stucco isn’t dry enough. I learned this the hard way when, after a quick look, I painted over a surface that tested positive for moisture, leading to peeling within weeks.
Use a Moisture Meter for Accurate Results
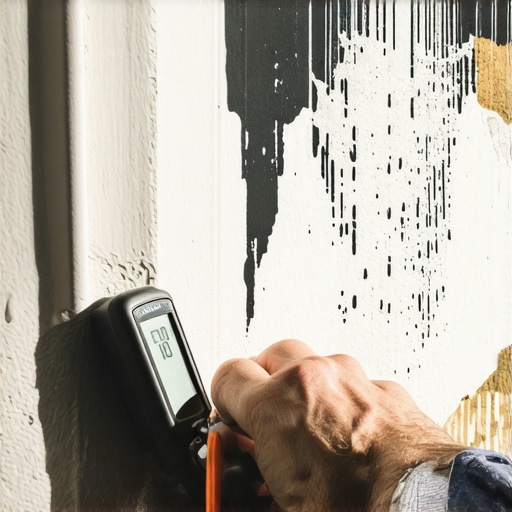
The plastic bag method is quick, but for precision, a moisture meter is your best friend. Insert the probe into various spots on the stucco—especially shaded or cooler areas where moisture might linger. A moisture content below 15% generally indicates the surface is dry enough to paint. I once borrowed a moisture meter from my neighbor’s toolbox; after testing, I realized some patches still had excess moisture, prompting me to wait another couple of days. Not only did this save my paint job, but it also extended its lifespan significantly.
Know When to Wait
The weather plays a significant role. If you’ve recently experienced rain or high humidity, give your stucco extra time to dry. Ideally, wait at least 48 hours after a rainfall before testing. During one project, I painted after a light mist, thinking it looked dry. The results were disastrous—peeling and bubbling. It took extra patience, but I finally caught my mistake, ensuring a durable finish. Remember, patience pays off and is a key factor in successful house painting.
Check Multiple Spots and Times
Moisture isn’t always uniform. Test multiple areas—near the ground, shaded spots, or corners—because these tend to retain moisture longer. Also, test again after a few dry days to confirm consistency. I made the mistake of testing only one location, which gave a false sense of security. Later, I found some spots where paint failed earlier, emphasizing the importance of thoroughness. This comprehensive approach guarantees that your entire surface is ready, preventing preventable issues later on.
Use Proper Equipment and Techniques
Invest in a quality moisture meter. Affordable models are available online; they provide quick and reliable readings. Follow the manufacturer’s instructions for calibration and operation. Think of it as the difference between guessing your paint is dry vs. knowing for sure—like using a thermometer to check water temperature before swimming. Proper testing saves time and money in the long run, ensuring your paint adheres well and endures harsh weather conditions.
By integrating these steps into your prep routine, you avoid common pitfalls that lead to costly repairs or repainting. For more insights into local painting strategies, check out this guide. Proper moisture testing is fundamental—think of it as the foundation for a successful and lasting paint job.
 Even seasoned painters sometimes fall prey to misconceptions that can derail a project. One widespread myth is that a single coat of paint suffices for a flawless finish. Reality suggests that most quality results require at least two coats, especially when dealing with darker colors or textured surfaces—skipping this step often leads to uneven coverage and premature wear. Trusting DIY shortcuts over proper preparation can be costly. Do not underestimate the importance of surface prep; neglecting it invites bubbling, cracking, or peeling down the line.
A forgotten nuance many overlook is the impact of climate conditions on drying times and paint adhesion. For instance, painting in high humidity or extreme temperatures can hinder proper curing, leading to failures that require repainting sooner than expected. Various studies, including those by the [Paint Quality Institute](https://paintquality.com), demonstrate that environmental factors are crucial for longevity.
Caution is also warranted regarding the choice of paint sheen. While flat finishes hide flaws effectively, they are less durable in high-traffic areas or kitchens. Conversely, semi-gloss and satin paints provide a balance of durability and appearance but are often misused; applying semi-gloss in a bedroom can create an overly shiny, sterile look that clashes with cozy decor.
Advanced painters know to avoid common pitfalls like applying paint over inadequately patched or cleaned surfaces. Moisture, cracked drywall, or grease residues can cause bubbling and peeling. For example, a simple step like spot priming stained or uneven areas ensures adhesion and a smoother finish. Learning to recognize these details saves time and money.
What about color selection? Many believe choosing a trendy hue guarantees satisfaction. But in my experience, understanding the interplay of light—both natural and artificial—can make or break your palette. For detailed advice, check out [colour-your-world], which guides homeowners through sophisticated color techniques for 2025.
Are there any hidden traps you’ve encountered during painting projects? Share your experiences, and if you’re ready to elevate your knowledge further, explore [innovative house painting ideas](https://elitepainterpro.com/innovative-house-painting-ideas-to-refresh-your-living-space) for creative inspiration. Remember, mastering these nuances ensures your paint job is not just good-looking but also long-lasting—a hallmark of true professionals.
Keeping Your Painting Projects in Top Shape Over Time
Maintaining your freshly painted surfaces is crucial to ensure their long-term beauty and durability. Using the right tools and adopting solid routines can extend the lifespan of your paint job significantly. One essential tool I personally rely on is a high-quality microfiber roller cover. Unlike cheaper alternatives, microfiber covers keep their fluffiness longer, providing smoother application and reducing streaks. Regularly cleaning and storing your rollers properly with a roller spinner not only prolongs their usability but also ensures consistent coverage on your next project.
How do I maintain the quality of my paintwork over the years?
Routine inspections and touch-ups are key. Keep a small container of the original paint used on hand for quick fixes when scuffs or minor damage occur. Additionally, applying a clear sealer or protective coat on high-traffic or exposed areas can prevent premature wear. This is especially important in environments prone to moisture or temperature fluctuations. For advanced protection, I recommend exploring scuff-resistant finishes available for commercial spaces, which are also suitable for busy family homes—learn more about these options here.
Investing in trustworthy equipment pays off
Using professional-grade tools like a Wagner control spray system enables an even, efficient application, reducing labor fatigue and offering precise control on complex surfaces. These sprayers are designed for longevity and can handle multiple projects if properly maintained. When cleaning spray equipment, always follow the manufacturer’s guidelines, and store them in a dry, protected spot to prevent corrosion. A well-maintained tool not only performs better but also preserves the quality of your finish over the years.
Plan for the future with smart strategies
Looking ahead, I see a growing trend toward eco-friendly, low-VOC paints combined with smart maintenance routines. By investing in such products and pairing them with proper upkeep, homeowners can enjoy vibrant, durable finishes while minimizing environmental impact. Regular cleaning with gentle, pH-neutral cleaners, along with periodic re-protection coats, can preserve your paint’s integrity for 5-10 years, depending on exposure and quality. For innovative ideas on how to renovate thoughtfully, check out this guide. Now is the perfect time to implement these advanced maintenance tips—your future self will thank you.
Lessons that Changed My Painting Approach
- One of my biggest lightbulb moments was realizing how often I underestimated the importance of checking moisture levels — skipping this step almost always led to paint failure within months.
- Discovering that a simple plastic sheet overnight test can save your project from bubbling or peeling proved to be a game-changer for me.
- Investing in a quality moisture meter transformed my prep routine, giving me confidence that my surfaces were truly ready for paint, avoiding costly reworks.
- Patience truly pays off; waiting for the perfect drying conditions, especially after rain, saves countless headaches in the long run.
- Testing multiple spots and times revealed hidden moisture pockets, often overlooked, which can jeopardize your entire paint job.
Tools and Resources That Elevated My Work
- Moisture meters: I trust the ones from local hardware stores for their accuracy and durability, making moisture testing an easy step.
- Local painting secrets: This resource offers insights on regional climate considerations affecting drying times and moisture levels.
- Color Your World: For tips on choosing the right paint types based on your environment, ensuring durability and aesthetic appeal.
- Expert house painting tips: A comprehensive guide that has helped me refine every aspect of my projects.
- Professional painting insights: Learning from seasoned pros has improved my techniques and results dramatically.
Seize Your Painting Journey Today
Taking control of your house painting by mastering moisture considerations isn’t just about a flawless finish — it’s about respecting your home’s integrity and longevity. Every brushstroke counts when you understand the nuances that lead to success. Why not apply these lessons and elevate your next project into a professional-level masterpiece? Your home deserves that extra touch of care and expertise. Ready to transform your space with confidence? Dive into the world of expert house painting tips and let your home glow with pride — because the beauty of your space starts with the right prep and patience. Have you ever overlooked moisture testing and faced issues? Share your story below and let’s learn together.