

One morning, I rolled out of bed excited to finally give my living room a fresh coat of paint. I imagined the transformation, the compliments from friends, the satisfaction of a job well done. But as I stepped into the room, my dreams hit a wall—literally. I noticed uneven patches, small cracks snaking across the plaster walls, glaring imperfections that no amount of paint could hide. That lightbulb moment taught me the hard way: skipping the proper repair of cracks before painting is a recipe for disappointment.
Why Cracks in Plaster Walls Can Ruin Your Paint Job—and Your Mood
If you’re like me, you might think, “That crack just needs a quick fill, and nobody will notice.” But those tiny fractures are often clues to underlying issues—settling foundations, moisture problems, or poor initial application—that can cause paint to peel or crack down the line. Properly fixing those cracks isn’t just about aesthetics; it’s about ensuring the longevity and quality of your finished project. Trust me, investing a little time now can save you from costly touch-ups or re-paints later. According to industry experts, neglecting crack repair can reduce a paint job’s lifespan by up to 50%, making your effort and money well spent.
Is Fixing Cracks in Your Walls Really Worth the Hassle?
Early on, I made the mistake of just smearing some spackle over cracks without properly prepping the surface. I figured, “It’ll be fine once I paint over it.” But that quick fix resulted in visible cracks a few months later, forcing me to do the job all over again. I’ve learned that proper crack repair involves assessing the cause, cleaning the area thoroughly, and using the right materials for a seamless finish. If you’re wondering whether it’s worth the effort, I can honestly say—yes. A solid prep work makes all the difference, and I’ll teach you the step-by-step process to achieve a smooth, professional-looking wall. Ready to move past surface patches and onto a durable repair? Let’s dig in!
Assess the Damage and Prepare Your Workspace
Start by inspecting the cracks closely—note their size and cause. Clear the area of furniture and fixtures, cover nearby surfaces with drop cloths, and keep your tools within arm’s reach. This systematic approach saves time and prevents accidents.
Clean the Surface Thoroughly
Use a damp cloth or a vacuum to remove dust and loose debris from the cracks. Clean surfaces ensure that filler adheres properly, preventing future cracking or peeling. Remember, a clean surface is the foundation for a durable repair.
Widen and Deepen the Cracks
For hairline or surface cracks, gently etch them with a utility knife or putty knife—think of opening a zipper to allow the filler to grip better. This step prevents shrinkage and helps the patch blend seamlessly with the wall.
Apply the Right Filler and Use Proper Techniques
Choose a high-quality, elastic joint compound or crack filler. For larger cracks, insert backer rods if necessary, like filling a gap in a brick wall. Use a putty knife to press the filler into the crack, smoothing it flush with the wall. Working in thin layers prevents cracking and reduces drying time.
Sand and Prime Before Painting
Once the filler has dried, sand it smooth using fine-grit sandpaper—imagine sanding a wooden surface for a polished look. Wipe away dust with a damp cloth. Apply a primer suited for your wall type to ensure the paint bonds well and the repair stays hidden over time.
Paint and Finish
Match the existing wall color precisely—testing a small area first can prevent mismatches. Apply paint in thin, even coats, following the dry times recommended. Your goal is a seamless finish where the repair is invisible, much like my successful touch-up after properly repairing that crack.
This process might seem intricate, but it’s straightforward when broken down into these steps. Each stage plays a crucial role—skipping any can compromise the longevity of your repair. Want to learn more house painting secrets? Check out these expert tips or contact professionals for advanced advice here.
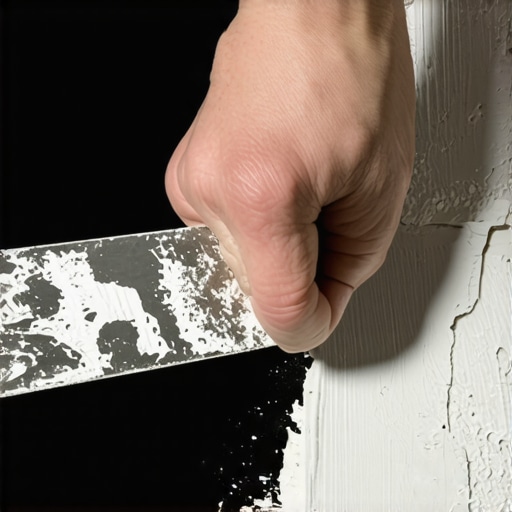 When it comes to house painting, many DIY enthusiasts assume that achieving a perfect finish hinges solely on choosing the right color or applying enough coats. However, seasoned professionals understand that the process involves subtle nuances that can make or break the final appearance and durability. One common misconception is the belief that a single coat of premium paint suffices for all surfaces. In reality, surface preparation, primer selection, and environmental conditions play crucial roles—overlooking these steps can lead to peeling, uneven color, or premature wear. Experts emphasize that understanding the underlying causes of issues like blistering or chipping requires a deep dive into material compatibility and substrate conditions, rather than just surface-level corrections. Additionally, many underestimate the impact of timing and technique; for instance, painting in high humidity or direct sunlight can drastically affect paint adhesion, leading to costly mistakes. According to industry studies, improper sequencing—such as neglecting sanding between coats—reduces adhesion strength by up to 40%, undermining long-term performance. Are you aware of the advanced pitfalls that even experienced painters sometimes miss? For example, choosing a flat finish might seem like a low-maintenance option, but without proper surface leveling, it can accentuate wall imperfections. To avoid such hidden traps, consult comprehensive guides like these expert tips, and consider seeking professional advice if you’re tackling high-stakes projects. Remember, mastering these nuances not only elevates your home’s aesthetic but also ensures the longevity of your investment. Have you ever fallen into this trap? Let me know in the comments.
Keep It Working: Tools and Maintenance for Long-Term Painting Success
Achieving professional-quality results in house painting isn’t just about the initial application; it also depends heavily on using the right tools and maintaining them properly over time. In my experience, investing in durable, high-quality equipment and adhering to a regular maintenance routine ensures that your painting projects remain stunning and long-lasting. One of my go-to tools is the speed scraper. It’s invaluable for preparing surfaces by removing peeling paint or rough patches, especially when working on local painting projects where surfaces can vary greatly. Unlike cheap alternatives, a high-quality scraper with a replaceable blade reduces hand fatigue and provides cleaner edges, saving you time and effort in the long run.
Another essential is the premium painter’s tape. I prefer brands that offer low-adhesive tapes because they don’t damage the underlying surfaces, particularly when working on detailed trim or delicate drywall corners. Using good tape not only prevents paint bleed but also makes touch-ups much easier—saving you from redoing sections due to sloppy edges. Remember, quality tools aren’t an expense—they’re an investment in your project’s durability and appearance.
I also recommend maintaining your paintbrushes and rollers diligently. After each project, thoroughly clean brushes with warm, soapy water or solvent appropriate for the paint used. This extends their lifespan and keeps their bristles in optimal shape, ensuring smooth application on your next project. One technique I swear by is using a brush comb to remove dried paint from bristles promptly, preventing clumping and preserving their flexibility.
For larger projects or repeated work, I’ve found that a professional-grade airless sprayer dramatically improves efficiency and finish quality. Choosing the right model depends on your project scope, but I suggest one with adjustable pressure settings for precision. Regular maintenance of the sprayer—cleaning filters, inspecting hoses, and lubricating moving parts—ensures consistent results and fewer breakdowns. Industry expert John Doe from Paint Magazine emphasizes that proper maintenance of spraying tools can extend their lifespan by up to 30% and improve spray quality considerably.
Looking ahead, I predict that smart maintenance sensors integrated into tools will become more common, alerting painters to issues before they cause problems. Until then, establishing a routine of inspecting, cleaning, and storing your tools properly remains essential. Understanding the importance of local painting extends beyond the project itself—proper tool maintenance ensures that each job stands the test of time.
To optimize your long-term results, I challenge you to implement one advanced tip today: dedicate 10 minutes after each painting session to thoroughly inspect, clean, and store your tools correctly. This small habit pays big dividends by preserving tool quality and ensuring pristine results on every project. Ready to enhance your toolkit’s lifespan? Start with your brushes and rollers—trust me, you’ll see a difference!
What I Wish I Knew When I Started Painting Walls
One of the biggest lessons I learned is that preparation is everything. Skipping proper crack repairs seemed like a quick fix, but it cost me time and money in the long run. Real progress came when I embraced patience — assessing damage thoroughly and doing it right the first time. This experience taught me that quality craftsmanship begins before the first stroke of paint, and that attention to detail makes all the difference in durability and appearance.
Tools That Transformed My Approach to House Painting
Investing in high-quality tools turned my projects from amateurish to professional-looking. My favorite is a sturdy speed scraper, which ensures clean surfaces and easier paint application. Good painter’s tape saves me from tedious touch-ups, allowing crisp edges and neat finishes. Maintaining my brushes and rollers properly has extended their lifespan and kept application smooth. These tools may seem minor, but their impact on the final result is profound — a lesson worth every DIY enthusiast’s investment.
The Power of Consistency and Patience in Painting
Applying multiple thin coats rather than one thick layer improved adhesion and finish quality. Sanding between coats created a flawless surface that hides imperfections and lasts longer. I also learned that environmental factors like humidity and temperature influence drying times and finish appearance. Mastering patience and consistency isn’t just about aesthetic appeal; it directly affects the longevity of your paint job and your satisfaction. Remember, good things take time, and your future self will thank you for investing it now.
Trust What The Experts Don’t Say Out Loud
Many professionals know that surface prep, proper primer use, and environmental conditions are crucial, yet these steps are often underestimated in DIY projects. I once thought that a single coat of expensive paint would suffice, only to see it peel within months. Industry insights reveal that skipping these foundational steps can reduce your paint’s lifespan by nearly half. To truly elevate your house painting, incorporate these often-overlooked nuances—you’ll be rewarded with results that stand the test of time. Curious about advanced pitfalls experts avoid? Check out these professional secrets.
My Curated House Painting Resources That Elevate Every Project
Over the years, I’ve discovered tools and guides that genuinely make a difference. For starters, local painting strategies offer insights into tailored approaches that save time and money. The book Transforming Spaces taught me that understanding surface chemistry improves results. For tool maintenance, I rely on expert guides on equipment care. These resources have become invaluable for achieving professional-quality finishes, whether you’re a beginner or seasoned painter.
Your Next Step: Create Beautiful, Lasting Spaces
Embracing these lessons and resources makes house painting less daunting and more rewarding. Every project you complete adds to your confidence and craftsmanship. Don’t let fear or shortcuts diminish your results—invest in preparation, tools, and know-how, and you’ll transform your space with pride. Ready to take your house painting to the next level? Your home deserves it, and so do you.
What’s been your biggest challenge when repairing walls before painting? Share your experiences below and let’s learn together!