

I remember the first time I tried to repaint my old metal window frames. Bright and optimistic, I slapped on some paint, only to find it peeling off in just a few months. Talk about disappointment! It was a lightbulb moment for me: I’d been missing a crucial step, and it was costing me time, money, and frustration.
Since then, I’ve learned the ins and outs of painting metal window frames properly—without the dreaded flaking. Whether you’re restoring vintage charm or just sprucing up your home, understanding the right techniques makes all the difference.
Why Painting Metal Frames Without Flaking Is a Game Changer
Painting metal window frames might seem simple, but it’s actually a delicate process. Flaking paint not only ruins your home’s appearance but also exposes the metal to rust and damage. A poor paint job can turn into a costly, time-consuming cycle of redoing everything every few years.
What many folks overlook is the importance of proper preparation, primer, and choosing the right paint type. Skipping these steps is a common mistake I made early on—believing that any paint would do the trick—only to regret it later. This experience taught me that quality matters, especially when it comes to maintaining the integrity of your window frames.
By applying the correct primer and using specialized paint designed for metal surfaces, you can ensure your windows stay pristine for years. Plus, a bit of extra effort in the beginning saves a lot of headache down the line. For example, did you know that applying a rust-inhibiting primer can extend the life of your paint job significantly? I found this out the hard way after painting over rust without a primer—leading to even more peeling! You can read about the significance of local painting and how it boosts your home’s value [here](https://elitepainterpro.com/why-local-painting-matters-boost-your-homes-value).
So, if flaking has been your concern, stick around. I’ll walk you through the exact steps that transformed my projects from frustrating failures into successful home upgrades. Ready to learn how to get that smooth, durable finish on your metal window frames?
Is Flaking Paint Just a Cosmetic Issue, or Is It a Sign of Bigger Problems?
Early in my painting journey, I thought peeling paint was just a surface issue. I didn’t realize it could lead to rust and structural damage if not properly addressed. That’s why I now emphasize the importance of using quality primers, especially rust-inhibitive types, to prevent future issues. You want your paint to stick—not just look good temporarily.
If you’ve faced similar problems or are tired of wasting time on rework, you’re in the right place. Let’s dive into the proven methods to ensure your metal window frames stay flawless for years to come.
Prepare the Surface Like a Pro
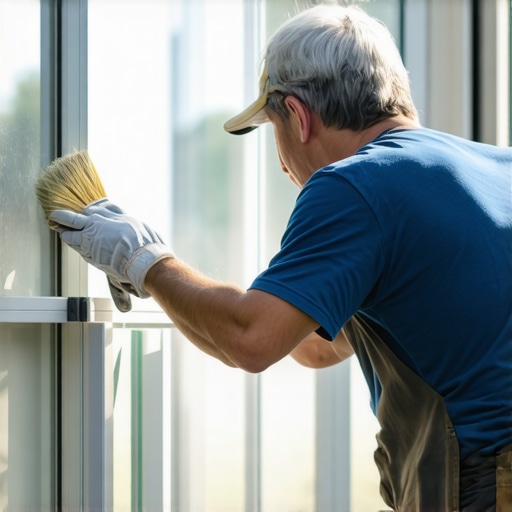
My first real success came when I reserved an entire morning for surface prep. I started by scrubbing the frames with a wire brush to remove rust and flaking paint, making sure to wear safety goggles—think of this step as exfoliating your skin before applying moisturizer, essential for lasting results. After cleaning, I rinsed with a damp cloth, then let everything dry thoroughly, preferably overnight. Skipping this step led to paint bubbling and peeling within months, so don’t rush it.
Apply a Rust-Inhibiting Primer for Durability
Next, I used a high-quality, rust-inhibitive primer. It’s like laying a foundation of a house—without it, your paint has nothing to grip onto. I chose a primer specifically formulated for metal because it penetrates the surface and prevents rust from undercutting the paint. When applying, I brushed a thin, even coat, avoiding thick layers that can drip or pool. Remember, patience pays off; let the primer dry as per the manufacturer’s instructions for maximum adhesion. Trust me, this step is the secret weapon against flaking.
Use the Right Paint and Application Technique
For the main coat, I picked a high-quality, alkyd-based paint designed for metal surfaces—think of it as a suit of armor for your frames. I meticulously applied the paint using a synthetic brush, working from top to bottom to prevent drips. For larger surfaces, a sprayer can save time and ensure even coverage, but only if you’re confident in your technique to avoid overspray. Don’t forget to follow the manufacturer’s recommended number of coats; usually, two is ideal for durability.
Don’t Rush the Drying Process
One mistake I made early on was rushing to reassemble my window frames. I learned the hard way that patience is key—wait at least 24 hours after the final coat before handling or exposing to the elements. This ensures the paint cures properly, creating a flexible, strong bond that resists peeling. If you live in a humid climate, consider extra drying time or using a dehumidifier in the room.
Seal and Protect with Clear Coats
To maximize the lifespan of your painted frames, I recommend applying a clear sealant designed for outdoor metal. Think of this as a topcoat of sunblock—shielding the paint from UV rays, rain, and pollution. I applied it with a clean brush in a single, even layer, avoiding overapplication which can cause streaks. This final step locks in your hard work and keeps your frames looking fresh for years.
Regular Maintenance Keeps Things Looking Sharp
After completing my project, I established a routine of inspecting my window frames every year. I clean them gently with soapy water, touching up chips or scratches promptly. Regular upkeep prevents small problems from snowballing into major flaking or rust. Think of it as regular skin care—consistent attention preserves the integrity of your paint job.
Bringing your metal window frames from peeling to perfection isn’t magic—it’s just following a methodical process. Every step builds on the last, creating a durable, beautiful finish that withstands the test of time. For more insights into high-quality local painting practices, you can visit here.
 Many homeowners believe that choosing any type of paint or rushing through the prep work guarantees a perfect finish, but experienced painters will tell you there’s more beneath the surface. One prevalent myth is that all paints are created equal; however, the true difference lies in selecting specialized products designed for specific surfaces and conditions. Using generic paint on metal, for instance, often results in flaking and rust, especially if you skip essential steps like primer or surface preparation. According to industry experts, neglecting these critical details can lead to costly rework and diminished durability. Another misconception is that painting is a quick weekend project—this underestimates the importance of patience, especially with drying times and proper curing, which are vital for long-lasting results. An advanced mistake many overlook involves improper surface assessment, such as failing to identify moisture or structural issues hidden behind the paint layer. These hidden problems can cause paint failure months after completion, stressing the need for thorough inspections before starting. For those aiming for flawless, durable finishes, understanding the nuances of surface conditions and product compatibility is crucial. For example, using a high-quality, rust-inhibiting primer on metal surfaces not only enhances adhesion but also prevents future corrosion, significantly extending the lifespan of your paint job. The key is to approach house painting with a thoughtful strategy, prioritizing preparation and material selection over shortcuts. Remember, high-quality local painting services often include these nuanced steps that amateurs tend to overlook, and choosing experienced professionals can save you from common pitfalls. To sidestep these issues, educate yourself about the specific requirements for each surface and condition—you can find valuable advice in comprehensive guides like this ultimate guide. Making these informed choices and avoiding myths ensures your house looks stunning and lasts for years to come. Have you ever fallen into this trap? Let me know in the comments.Ensuring your house painting projects stand the test of time is as much about maintenance and the right tools as it is about the initial application. Investing in quality equipment not only makes the process smoother but also significantly extends the longevity of your paint job. I highly recommend using a high-grade, HVLP (High Volume Low Pressure) sprayer for large exterior surfaces—this tool provides even coverage with minimal overspray, saving you time and paint. Personally, I prefer the Graco Magnum series because of its durability and adjustable pressure settings, which give me control over different textures and surfaces. For smaller touch-ups or intricate areas, a high-quality angular brush with synthetic bristles is indispensable; it allows you to reach tight corners without leaving streaks. A detail sander can be a game-changer when preparing surfaces; it efficiently removes old, peeling paint and smooths rough patches, ensuring perfect adhesion for your new coat. Staying organized with a sturdy magnetic paint holder keeps your tools accessible, helping you maintain consistency across applications. As we look to the future, advancements in paint technology and application equipment, like infrared curing or smart coatings, promise to simplify maintenance even further, reducing the need for frequent touch-ups.
**How do I maintain my painted surfaces over time?** Regular inspections are key—look for early signs of peeling or rust and address them immediately. Gentle cleaning with mild soap and water prevents dirt buildup that can degrade paint over time. For areas prone to moisture or rust, applying a rust-inhibiting primer during touch-ups can drastically improve durability, as confirmed by industrial coating experts. Additionally, scheduling periodic re-coating every 5-7 years depending on climate and exposure can preserve your home’s aesthetic and structural integrity. Remember, proactive maintenance saves money and effort in the long run. For detailed strategies on upkeep, check out this resource.
Starting with quality tools makes the maintenance process easier, but it’s also about establishing a routine. Keep your tools clean and properly stored to prevent rust and damage—don’t leave your sprayer or brushes exposed to the elements. For heavy-use equipment, I recommend following manufacturer cleaning instructions meticulously; for example, cleaning your sprayer with mineral spirits after each use prevents clogging and ensures optimal performance. Regularly inspecting painted surfaces and touching up minor chips or abrasions promptly can prevent more significant issues down the line. Remember, a small investment in proper maintenance tools and habits now will pay off with a beautifully preserved finish long into the future. Try implementing a monthly visual inspection and deep-clean routine to keep your surfaces pristine, and you’ll notice the difference in your home’s curb appeal and structural soundness.
What I Wish I Knew Before My First Metal Paint Job
One of my biggest lightbulb moments was realizing that not all paints are created equal—especially when it comes to metal surfaces. Choosing the right primer and paint can mean the difference between a finish that lasts years or one that flakes in months. I also learned the importance of surface assessment; identifying rust spots or moisture issues beforehand saves headaches later. Another lesson was patience—allowing each coat to dry thoroughly before proceeding prevents peeling and bubbling, which I used to overlook in my eagerness to finish. Lastly, understanding that maintenance and regular touch-ups are part of the process helped me appreciate the ongoing effort needed to keep my home looking flawless.
Tools and Resources That Elevate My Painting Game
Over time, I’ve curated a toolkit that makes all the difference. A high-quality HVLP sprayer from Graco provides even coverage and reduces overspray, making large exterior jobs smoother. I trust the comprehensive guides on local painting solutions to keep me informed about industry best practices. The book The Ultimate Guide to House Painting is my go-to for understanding color selection and application techniques. For quick reference, having sturdy brushes and quality primers on hand ensures that every step is done right. These tools and resources help me deliver lasting results that stand the test of time, avoiding the pitfalls of DIY shortcuts.
Your Next Step in Home Transformation
Remember, tackling metal and other challenging surfaces with the right knowledge and tools isn’t just about aesthetics; it’s about prolonging the life of your home and saving money in the long run. Whether you’re considering your next project or already underway, embrace the learning process—each project is a chance to improve and refine your technique. Don’t wait for problems to develop; proactive maintenance and education are your best allies. Take this knowledge and turn your home into a resilient, beautiful space that reflects your care and craftsmanship. For more inspiration and professional insights, explore innovative painting ideas to enliven your living space and ensure lasting beauty.