

I remember the first time I tackled a painting project where I was faced with a stubborn radiator nestled right against the wall. I thought, “How hard can this be?” Well, let me tell you—it was a lot harder than I expected. I spent hours trying to maneuver brushes and rollers, feeling like I was battling a stubborn beast that refused to give up its hiding spots. That lightbulb moment hit me hard: there’s got to be a smarter way to paint behind radiators without the chaos of moving them around.
The Easy Fix for Painting Behind Radiators
If you’ve ever found yourself frustrated with tight spaces, you know exactly what I mean. Painting behind radiators is one of those tasks that can make an otherwise straightforward project feel like an obstacle course. The good news is, after some trial and error—and a couple of costly mistakes—I discovered techniques that save time, prevent damage, and keep my sanity intact. Today, I’m going to share the tricks I’ve learned so you won’t have to struggle the way I did.
Is It Really Possible to Paint Behind a Radiator Without Moving It?
Yes, it absolutely is. Early on, I tried all the typical approaches—moving furniture, using long-handled brushes, even contorting into strange positions. But a mistake I made was underestimating the importance of surface preparation and the right tools. I learned that with a little planning and the right supplies, you can achieve professional results without the headache of disassembly. According to the Painting and Decorating Contractors of America, proper preparation and the right tools can significantly improve the quality of hard-to-reach paint jobs, making this trick well worth trying.
Curious how? Stay with me, because we’re about to get into the practical steps that will transform your painting experience and keep your walls—and your nerves—intact. And if you’re interested in broader tips, you might enjoy our detailed guide on professional strategies for home painting.
Prep Your Space and Tools
Start by clearing the area as much as possible, removing any nearby furniture and covering the floor with drop cloths. Use painter’s tape to mask off radiators and adjacent walls, ensuring clean edges. Gather your tools: a high-quality angled brush, a long-handled roller, and a mini foam roller for tight spots. I once grabbed my usual brush but found it left streaks; switching to an angled brush made a significant difference, especially when I could control the stroke more precisely.
Apply Precision with the Right Technique
Use an Angled Brush for Edges
Hold the brush at a slight angle and apply paint with light, controlled strokes. Think of it like a chef carefully piping icing onto a cake—precision is key. I remember a time I was painting behind a radiator in my guest bedroom; I used this method to edge carefully around the pipe without drips, resulting in a crisp, professional look.
Utilize a Mini Foam Roller for Broad Areas
For larger sections, a mini foam roller can cover ground efficiently. Dip the roller lightly into the paint, remove excess, and roll steadily in a smooth, overlapping motion. This approach saved me hours when I painted my living room—a good tip is to keep a steady hand and avoid pressing too hard, which can cause drips near tight corners.
Get Creative with Extensions and Accessories
Attach a long-handled extension pole to your roller to reach behind radiators comfortably. For the edges close to the wall, use a narrow paintbrush to tidy up, ensuring you don’t miss spots or get paint on the wall unnecessarily. During my last project, I found an extension pole that doubled my reach, making the job not only quicker but also less physically taxing.
Work Systematically in Sections
Divide the area into manageable sections, gradually working your way around the radiator. Always paint from top to bottom to prevent drips from falling onto completed areas. I learned this the hard way when I painted wet paint over dry, sticking it to a freshly painted section, which caused uneven patches. A methodical approach keeps everything uniform and neat.
Final Touches and Clean-up
Once the main painting is complete, remove painter’s tape carefully while the paint is still slightly tacky to avoid tearing. Use a detail brush for touch-ups in tight corners or tricky spots. Clean your brushes and rollers immediately after use to keep them in good condition for future jobs. I always keep a jar of mineral spirits or water, depending on the paint type, handy to wash tools right after finishing.
By following these steps and mastering your tools, you’ll achieve a flawless finish behind radiators without the hassle of moving them. Remember, patience and precision are your best allies in detailed painting tasks like this—practice makes perfect, and your walls will thank you for the extra care.
Many homeowners and even novice painters adopt common beliefs about house painting, but some of these ideas can lead to costly mistakes or subpar results. Let’s dig deeper into what most people get wrong and the subtle nuances that can elevate your painting project from amateur to professional quality.
Contrarian Wisdom: Don’t Always Paint Over a Water Stain Immediately
A widespread myth is that covering water stains with paint instantly solves the problem. In reality, many overlook the importance of addressing the root cause before painting. Painting over a water stain without proper sealing can lead to staining through the new paint, causing frustration and rework. Experts recommend using a stain-blocking primer to prevent recurrence, as highlighted in a study by the Painting and Decorating Contractors of America. Skipping this step is an advanced mistake that can undermine your entire project.
The Common Trap of Overestimating Paint Coverage
Many assume that a single coat of high-quality paint suffices for a flawless finish. However, in reality, most surfaces require at least two coats to ensure even coverage and durability. Rushing this process can result in blotchy patches or uneven gloss. A mistake often made is not applying a primer on new or patched drywall, which can cause uneven absorption and color inconsistencies. Taking the time for proper prep and multiple coats results in a professional, long-lasting look.
What Are the Advanced Mistakes to Watch Out For?
One often overlooked error is neglecting surface preparation due to time constraints or assuming the existing paint is durable enough. This oversight can cause peeling or bubbling later, especially if the old paint is oil-based or contains lead. Also, many forget that environmental conditions, like high humidity, can significantly affect drying times and adhesion. For instance, painting in high humidity without proper surface drying can trap moisture, leading to blistering or mold growth. Always consider external factors and proper surface prep to ensure a flawless finish.
Remember, achieving high-quality painting results isn’t just about choosing the right color or finish—it’s about understanding and mastering the subtle nuances involved. For deeper insights into strategic approaches, check out our ultimate guide on boosting your home’s curb appeal.
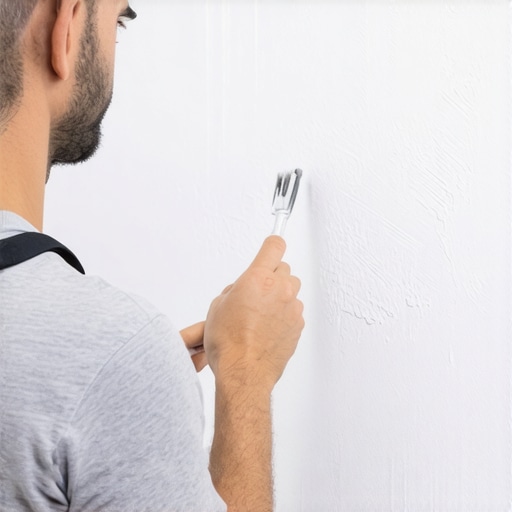
Finally, avoid common pitfalls like skipping primer on problematic surfaces. Proper surface preparation and understanding advanced considerations can save you time and money in the long run. Have you ever fallen into this trap? Let me know in the comments, and share your experiences or questions for further discussion.
Keep Things Running Smoothly with the Right Equipment
When undertaking house painting, having the proper tools isn’t just about efficiency—it’s about ensuring long-term quality and ease of maintenance. I personally rely on high-grade sprayers like the Wagner Control Pro 150 to achieve even coats in large areas, reducing paint wastage and eliminating brush marks. This sprayer’s adjustable pressure control allows me to adapt quickly to different surfaces, whether smooth siding or textured stucco, maintaining consistency over time. For detailed touch-ups and tight corners, I swear by the 3M Precision Angle Painters Masking Tape, which adheres well to various surfaces and prevents bleed-through, making my cleanup easier and preserving the crisp lines I aim for. Investing in quality brushes, like Purdy’s XL Series, boosts paint flow control and decreases fatigue during prolonged jobs, ultimately enhancing the finish’s durability.
Tools I Recommend for Long-Term Results
Maintaining your painted surfaces over time requires more than just initial effort; it demands durable tools. I recommend using a high-quality masonry sealer brush for sealing cracks and joints, which prevents moisture ingress and future peeling. A humidity meter such as the Extech MO290 helps monitor environmental conditions, ensuring optimal drying times and adherence, especially in fluctuating climates. When it comes to cleaning, I use biodegradable, odorless mineral spirits for oil-based paints and tap water with mild detergent for latex paints—keeping my tools in top shape extends their lifespan and guarantees professional-looking results during touch-ups years down the line. Remember, the key to long-lasting paint is consistent maintenance, and using the right tools makes that process much easier.
Scaling Your Painting Setup With Advanced Equipment
As your projects grow in size or complexity, scaling your toolkit becomes essential. Remote-controlled paint sprayers like the Graco Magnum X7 allow for rapid coverage over large surfaces, significantly reducing labor time and improving uniformity. For project management, digital color-matching devices streamline choosing the perfect hue and ensure consistency across multiple rooms or exterior facades. Additionally, setting up a dedicated, organized workspace equipped with wall-mounted storage for brushes, rollers, and tools prevents clutter and speeds cleanup, which is crucial for ongoing or repeat projects. Embracing these advanced tools not only enhances your efficiency but also elevates the quality of your work, making future maintenance and touch-ups much simpler. Looking ahead, I believe the trend toward automation and smart tools will continue to simplify renovation tasks, adding more precision and control to DIY enthusiasts and professionals alike.
How do I maintain my painting tools over time?
Proper maintenance of your tools ensures longevity and preserves the quality of your finish. After each project, thoroughly clean brushes and rollers according to the paint type—using water for latex and mineral spirits for oil-based paints. Store brushes with protective covers, and keep your sprayers and airless equipment in a dry, dust-free environment. Regularly inspect hoses and seals, replacing any worn parts to prevent leaks or pressure drops. Applying a light coat of oil or silicone spray on metal parts can prevent rust. For detailed guidance, consider consulting expert advice on long-term tool maintenance. Taking these steps guarantees that your tools remain in prime condition, saving money and effort during subsequent projects. I encourage you to try out a high-quality sprayer or moisture meter from my recommendations and see how they improve your workflow and results.
Lessons I Learned the Hard Way in Local Painting
One of the biggest revelations for me was realizing that patience truly pays off when it comes to detailed house painting. Rushing through the process often led to uneven coats and frustrating reworks, especially in tricky spots like behind radiators. I also discovered that investing in high-quality tools, like an angled brush and extendable rollers, made a world of difference—saving time and ensuring crisp lines. Perhaps most surprisingly, I found that surface preparation, including thorough cleaning and priming, is the secret sauce that prevents future peeling or staining issues, especially on previously painted surfaces. These lessons reminded me that there’s no substitute for meticulous prep and the right gear if you want professional results without tearing out your hair.
Tools and Resources That Transformed My Approach
Over time, I found that certain tools and sources became my trusted allies in house painting. For managing tight spots behind radiators, I swear by the Wagner Control Pro 150 sprayer, which provides even coverage on large surfaces with minimal fuss. For precise edges, the 3M Precision Angle Painters Masking Tape is unbeatable—it sticks well without damaging walls and prevents bleed-through. To sharpen my color-matching skills, I often turn to the expert guidance offered by Color Your World, which keeps me updated on trendy palettes and techniques. And for maintaining my tools, I rely on biodegradable mineral spirits and regular cleaning routines—these small habits keep my brushes and sprayers in top condition for countless projects. These resources have empowered me to tackle even the most challenging corners with confidence and consistency.
Embrace Your Painting Journey with Confidence
Getting behind radiators without the chaos of moving them is just one step toward mastering house painting. Remember, every challenge presents an opportunity to learn and improve. Whether you’re a DIY enthusiast or an aspiring pro, the key lies in curiosity and patience—trust me, those tiny shifts in technique add up to stunning results. If you’re ready to elevate your skills further, check out our comprehensive local painting solutions for every budget—there’s a world of expert advice waiting to inspire your next project. Now, go ahead and pick up that roller; your beautifully painted walls are closer than you think. What’s your biggest house painting obstacle right now? Share below, and let’s troubleshoot together!