

It was a sweltering summer afternoon when I first realized my masonry sealer wasn’t doing its job. I had just finished painting the exterior of my home, feeling proud of my work. But mere weeks later, I noticed strange damp spots creeping up the wall, as if the sealer had surrendered to the weather. That was my lightbulb moment: I needed a simple way to test whether my sealer was still effective or if it was silently failing.
Why You Shouldn’t Ignore the Damp Cloth Test
Many homeowners and even some contractors overlook the importance of verifying their masonry sealer’s performance before heavy rain or harsh weather. It’s tempting to assume
Prepare a Test Area for Accurate Results
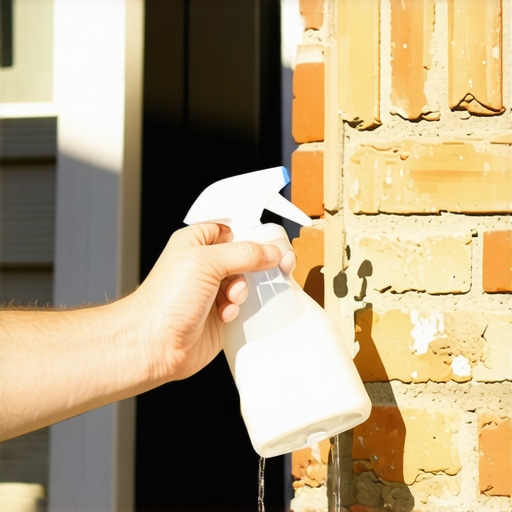
Start by selecting a small, inconspicuous section of your wall, ideally in a shaded spot to prevent rapid drying. Clean the surface thoroughly with a stiff brush or pressure washer to remove dirt, mold, and loose paint. Once dry, apply a slight film of water with a sponge or spray bottle over the area. If the water beads up and doesn’t soak in immediately, your surface is already somewhat water-resistant, but further testing is necessary for the sealer’s effectiveness.
Apply Water Test to Confirm Sealant Integrity
For the actual test, use a spray bottle or sponge to generously apply clean water to the chosen spot—think of it as giving your wall a quick shower. Wait for about 10 minutes and observe. If the water has absorbed into the surface and leaves a damp patch, your sealer isn’t fully effective. If the water remains in beads or a shiny film on the surface, your sealer is still doing its job. I once tested a DIY-sealed brick wall, and seeing the water bead up instantly reassured me that my effort was worth it, saving me from costly rework later.
Repeat and Confirm Regularly
Perform this water test every year before the rainy season to catch early signs of sealant degradation. If you notice water no longer beads, it’s a clear sign that reapplication is needed. Remember, like any protective coating, masonry sealers fade over time due to weather exposure. Regular testing ensures your home’s foundation remains protected, preventing costly repairs.
Fine-Tune Your Maintenance Routine
Use this testing method as a preventive measure rather than waiting for visible damage. Regularly inspecting your walls allows you to plan re-sealing visits proactively. It’s similar to how I caught a failing sealer on my backyard stone patio early, avoiding water seeping into the cracks during a heavy storm. For more insights into local painting techniques that can extend your sealer’s life, check out local painting secrets to maximize durability.
 Many homeowners believe that choosing the cheapest paint or doing the job themselves guarantees savings, but this misconception can lead to costly mistakes. In reality, investing in quality paints and proper preparation is essential for a long-lasting finish. For example, some assume that all paints are created equal, but according to industry experts, low-quality paints often contain fewer binders, leading to faster peeling and fading. Additionally, overspending on high-end paint isn’t necessary if you understand the nuances of selecting the right finish and formulation for your specific surfaces. One advanced mistake many make is neglecting surface preparation, which can cause paint to peel prematurely, regardless of quality. Proper cleaning, sanding, and priming are often overlooked steps that significantly extend the lifespan of your paint job. Furthermore, the misconception that one coat is enough might seem economical, but applying multiple thin coats yields a more durable and even finish. Another hidden nuance is the impact of environmental factors; ignoring humidity and temperature during painting can compromise adhesion and drying times. Studies show that painting during improper weather conditions increases the likelihood of imperfections and reduces longevity. To truly master house painting, it’s crucial to understand these subtle details rather than relying on common myths. For comprehensive professional tips that can save you money and enhance your home’s appearance, explore master the art of house painting. Thinking about elevating your space with expert techniques? Check out local painting secrets to maximize your results. Have you ever fallen into this trap? Let me know in the comments.
Maintaining Your Paintwork with Reliable Tools
Achieving a professional-looking, durable paint job isn’t just about selecting the right paint; it also hinges on using the right tools that ensure consistency and longevity. I personally swear by high-quality brushes like the Purdy Pro-Extra series for trims and edges because their stiffness allows for precise lines without leaving brush marks. For larger surfaces, a Wagner Spraytech Control Pro 150 cart-based sprayer delivers an even coat in less time, minimizes drips, and reduces fatigue—making it ideal for extensive projects. When it comes to surface preparation, I rely on a Makita cordless orbital sander equipped with 120-grit discs; its portability and adjustable speed save time and create a smooth base that helps paint adhere better over time.
Software and Planning Resources I Trust
Beyond physical tools, effective project management is crucial. I use Trello to organize stages, track supplies, and set deadlines, which keeps my workflow streamlined. For color selection and visualization, Sherwin-Williams’ ColorSnap Visualizer app helps clients see how different hues will look in their spaces, reducing costly recolors later. These digital resources aid in keeping projects on schedule and within budget, which is vital for both small DIY jobs and larger local painting contracts.
Long-Term Results Require Consistent Maintenance
To ensure your paint holds up over the years, incorporate regular inspections using a moisture meter to detect early signs of water ingress—preventing issues like peeling or mold. Applying protective coatings like clear sealants over painted surfaces can further extend their life, especially in high-traffic or weather-exposed areas. Remember, every tool and technique has a future trend; as eco-friendly paints become more prevalent, expect brushless electric tools compatible with water-based coatings to dominate the market.
How do I maintain my painting tools over time?
Proper cleaning and storage are key. I rinse brushes and rollers immediately after use with warm water and a mild detergent if working with latex paints, and adhere to manufacturer storage instructions to keep them in prime condition. Regularly sharpening or replacing blades on tools like razors or scrapers also maintains efficiency. For extended tool life, consider investing in tool maintenance kits that include lubricants and cleaning solutions. Staying diligent with maintenance not only saves money but also guarantees your work continues to impress year after year. Want to elevate your craft? Try one of the advanced tips mentioned here, like using a high-quality sprayer for smooth finishes, and see the difference it makes. For more professional insights into maintaining quality results long-term, explore our innovative house painting ideas.
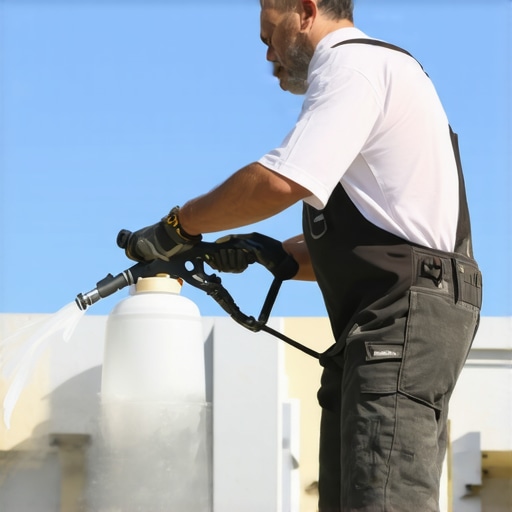
Photo example: A professional painter using a high-quality sprayer on a freshly painted exterior, showcasing the importance of proper tools for lasting results.
Throughout my years of working in local painting and house painting, I’ve uncovered some priceless insights that aren’t found in typical tutorials. These lessons have saved me time, money, and frustration, and I want to share them so your painting projects can reach their full potential.
The Wisdom I Wish I Had Known When Starting Out
- Don’t underestimate the power of surface prep: Skipping thorough cleaning and sanding can lead to peeling and chipping, no matter how good your paint is. Proper prep is your foundation for a durable finish.
- Invest in quality brushes and tools: Tools like Purdy brushes or professional sprayers may seem costly upfront, but they produce smoother coats and reduce repainting frequency, making your work look more professional.
- Timing matters more than you think: Painting in humid or too-cold weather can extend drying times and compromise adhesion. Choosing optimal conditions ensures your work lasts for years.
- Test your paint: treat it like a scientist: Small water and sealer tests can reveal if your surface is truly protected, saving you from future headaches and rework.
- Master the subtleties of paint selection: Understanding finishes (matte, satin, semi-gloss) and VOC levels can make or break your project’s longevity and indoor air quality.
- Long-term maintenance beats quick fixes: Regular inspection and timely re-coating can extend the life of your paint job, saving money and preserving beauty over decades.
Tools and Resources That Changed My Approach
- Local painting secrets: These insights helped me avoid common pitfalls and elevate my craftsmanship with proven techniques.
- Pro house painting tips: A collection of expert advice that refined my skill set and made projects more efficient and durable.
- Innovative ideas for refreshing your space: Creativity fuels quality, and these ideas gave me new perspectives on transforming homes beautifully.
- Future-focused painting strategies: Staying ahead of trends ensures longevity and style in my work, making clients not just satisfied but thrilled.
The Drive to Elevate Your Craft
Mastering local house painting isn’t just about applying paint; it’s about creating lasting impressions, protecting homes, and building a craft you’re proud of. Every project is a chance to learn, adapt, and grow. If you’re ready to step up your game, embrace these insider lessons, trust in your tools, and never stop exploring innovative techniques. Your home and your skills deserve the best—why settle for less?
What’s the most unexpected lesson you’ve learned from your own painting adventures? Share your experiences below and join a community of passionate painters committed to excellence!