

I still remember the frustrating moment when I decided to refresh my living room walls. I pulled back the old, yellowed wallpaper only to reveal stubborn patches of plaster that seemed to resist every gentle tug. My heart sank as I realized I might have gouged the surface or created more work for myself. It was that lightbulb moment where I understood the importance of proper technique—removing wallpaper isn’t just about peeling; it’s about respecting the surface underneath.
Why Removing Wallpaper Without Gouging Matters More Than You Think
There’s nothing more disheartening than investing time and effort into updating your space only to discover hidden damages beneath your lovingly applied paint or new wallpaper. Gouging the plaster not only ruins the aesthetic but also increases repair costs and complicates your decorating project. Trust me, I’ve learned this the hard way, and it’s a mistake I want to help you avoid. Proper removal preserves your wall’s integrity, making your next paint job or wallpaper project smoother and more professional-looking.
Is It Really Worth the Extra Effort to Save Your Plaster?
I used to think that a quick spray of wallpaper remover and a few vigorous pulls would suffice. However, I learned that rushing through the process often leads to peeling off chunks of plaster along with the wallpaper. Early on, I made a critical mistake—using too much force without understanding the material’s delicate nature. That lesson made me realize the importance of patience and the right tools, which can lead to flawless results without damage. For more insights on professional techniques, check out this guide on professional painting tips.
Now, if you’ve faced the challenge of removing stubborn wallpaper without gouging, you’re already on the right track. The good news is, with a few proven tricks, you can keep your plaster intact while getting rid of old wallpaper efficiently. Ready to learn how?
Score the Surface Carefully
Begin by gently scoring the wallpaper with a utility knife, creating light, even lines without pressing too hard, similar to scratching a map to prepare it for peeling. I once made the mistake of pressing too deeply, which resulted in tears and gouges. Instead, use a light touch and move slowly to avoid damaging the plaster underneath. This step allows the removal solution to penetrate beneath the paper, loosening the adhesive.
Apply a Gentle Stripping Solution
Next, apply a dampening agent such as a mixture of warm water and a few drops of dish soap or a commercial wallpaper stripper. Use a spray bottle for even coverage, akin to watering a delicate plant. Let it sit for 10–15 minutes—this softens the adhesive, making removal easier. When I tried rushing this step, the wallpaper tore, and I had to redo patchy sections, which was frustrating.
Use the Right Tools
Employ a plastic scraper or a putty knife to lift the edges of the wallpaper gently. Avoid metal blades; they are like knives on glass—prone to gouging. Hold the scraper at a shallow angle and work slowly along the scored lines. I remember one time when I resorted to a metal scraper; I damaged the wall before realizing my mistake. Stick with plastic tools, and work patiently.
Peel with Consistent, Gentle Force
Start at a corner or seam, gently pulling the wallpaper back. Use your hand or a soft cloth to peel, maintaining steady, even pressure, similar to peeling a sticker without tearing it. If resistance occurs, apply more solution and wait. Rushing the process, like yanking, will increase the risk of gouging. I learned this the hard way when I pulled too hard and tore a patch of plaster.
Address Stubborn Patches
For areas resistant to removal, reapply the solution and wait a few extra minutes. Use a pointed tool to pry edges carefully—think of it as coaxing a stubborn knot loose. Patience here ensures your plaster remains intact. Having learned to take my time, I now achieve smooth walls without repairs, saving both effort and money.
Clean and Inspect the Surface
Finally, remove any residual adhesive with a damp cloth or sponge. Inspect the wall for gouges or damage. Small imperfections can be sanded smooth later, but large gouges mean patching. I once overlooked minor gouges, and my freshly painted wall looked uneven—a mistake I now avoid by inspecting thoroughly. Proper cleaning ensures a uniform surface for your next coat of paint or wallpaper.
Many homeowners believe that choosing the right paint color is the key to a stunning home, but in my experience, the real nuance lies beneath the surface. Too often, people focus on superficial factors like color and finish, neglecting critical details that can make or break a painting project. One common myth is that hiring the cheapest painter guarantees savings, but I’ve seen that cost-effective strategies can backfire when quality suffers. For example, skipping surface preparation, such as proper cleaning or priming, can lead to peeling, chipping, or uneven coverage over time, regardless of how beautiful the color initially looks. Experts warn that neglecting these steps increases maintenance costs and shortens the lifespan of your paint job; according to a 2020 study by the Painting Contractors Association, thorough preparation can extend paint durability by up to 25%. An advanced mistake many overlook is choosing the wrong type of paint for your specific environment, like using water-based paints in high-moisture areas where oil-based coatings are more durable. Understanding the chemistry and suitability of different paints ensures longer-lasting results and avoids premature deterioration. Consider also the importance of application techniques—using high-quality brushes and rollers, and employing proper tools like sprayers for large surfaces—these details significantly impact finish quality. When it comes to local painting, there’s an added layer of complexity: the choice of products and techniques adapted to your regional climate and architecture. Skilled local painters possess nuanced knowledge about weather variations, humidity, and material compatibility that amateurs often miss. This expertise can elevate your home’s appearance while safeguarding its structure, an idea well-illustrated in this article on local painting’s importance. Ultimately, mastering these hidden nuances involves understanding the intricate interplay between materials, techniques, and environment. Do you know what mistakes homeowners often make when selecting paints or planning their projects? Let me know in the comments!”,
Achieving and maintaining beautiful, long-lasting paintwork requires not just skill but also the right tools and a consistent maintenance routine. As a seasoned DIY enthusiast and professional painter, I can attest that investing in quality equipment and adopting proper care habits significantly extends the life of your paint job. Want to ensure your home looks impeccable for years to come? Let’s dive into the specific tools I recommend and the maintenance practices that keep your walls in top shape.
Investing in Precision Tools for Better Results
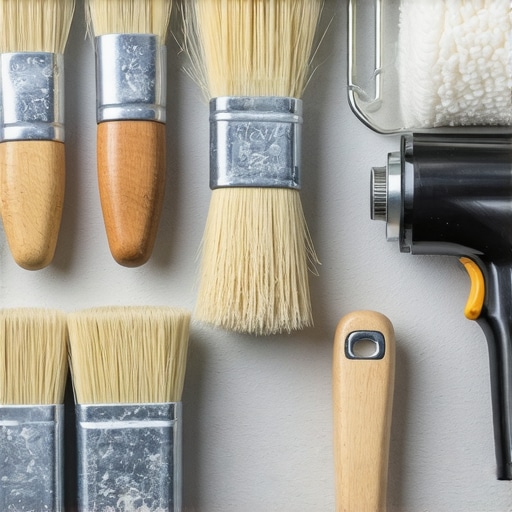
First and foremost, the choice of brushes and rollers makes a tangible difference. I swear by the $20 angled sash brush — it provides superior control and a smoother finish, especially on edges and trim. Cheap brushes tend to shed bristles and produce uneven strokes, which lead to premature peeling or chipping. For larger surfaces, I prefer high-density foam rollers, which offer a uniform coat and reduce streaking, saving both time and paint. Additionally, an airless sprayer, such as the Wagner Control Pro series, is invaluable for exterior walls and ceilings. The consistent spray pattern ensures even coverage, especially on textured surfaces, and reduces fatigue during extended projects.
Power Washers: The Unsung Heroes
Before even considering painting, I always recommend a thorough cleaning with a quality power washer. Removing dirt, mold, and chalking paint prevents adhesion problems down the line. Investing in a unit with adjustable pressure settings allows you to clean delicate surfaces without damage. Regular cleaning not only improves appearance but also helps identify areas needing repair before applying new coats.
< >
>
This combination of quality brushes, rollers, and cleaning equipment forms the backbone of durable, professional-quality paintwork. For detailed tutorials on choosing the right tools, check out these expert painting tips.
Developing a Maintenance Routine to Prolong Your Paint
Maintaining your painted surfaces is equally important. I recommend inspecting your walls every six months for signs of wear—peeling, cracking, or discoloration. A quick wash with mild soap and water can remove surface dirt and extend the lifespan significantly. For outdoor surfaces, a biannual cleaning combined with minor touch-ups prevents the formation of mold and grime, which can compromise the paint’s integrity. According to industry experts, proactive maintenance can double the lifespan of your paint compared to neglect.
Long-term Benefits of Proper Care
Adhering to regular upkeep preserves the look and durability of your paint, saving you money and effort over time. Plus, maintaining your walls prevents minor issues from escalating into costly repairs. It’s a simple yet powerful way to keep your home looking fresh and vibrant. With the right tools and consistent routine, you’ll enjoy stunning results that stand the test of time.
Interested in more advanced strategies? Try applying a clear protective topcoat every few years, especially for exterior surfaces. This extra layer acts as a shield against UV rays, moisture, and dirt, significantly extending your paint’s life. For guidance on selecting the best protective coatings, visit this comprehensive guide.
Plan your maintenance schedule now and arm yourself with high-quality tools — your walls will thank you with years of beauty and protection.
Throughout my years of working in home improvement, I’ve uncovered many insights about wallpaper removal that go beyond the basic instructions. These hidden lessons, born from both successes and mistakes, have become invaluable in achieving flawless walls without gouging the plaster or damaging the surface beneath.
Lessons Hidden in Plain Sight About Wallpaper Removal
- Patience Over Power: Rushing the removal process almost always results in gouges or tears. I’ve learned that a gentle, methodical approach preserves your walls’ integrity and saves money in repairs.
- The Power of Proper Scoring: Making light, controlled scores in the wallpaper allows the stripping solution to penetrate evenly. It’s a small step with a big payoff, preventing damage and making removal smoother.
- Material Matters: Different wallpapers require tailored solutions—whether it’s a vinegar-water mix for stubborn pastes or commercial strippers for vinyl layers. Knowing what works prevents frustration and surface damage.
- Tool Selection Is Key: Using plastic scrapers instead of metal knives has saved me countless plaster repairs. The right tools, combined with patience, make any wallpaper project manageable.
- Surface Inspection Post-Removal: Always check for gouges or residual adhesive. Early detection allows for quick patching and ensures your next painting or wallpaper job looks perfect.
Tools I Trust for Flawless Wallpaper Stripping
- High-Quality Sprayers: I swear by cordless spray bottles for even application of removal solutions, which helps minimize surface stress.
- Plastic Peelers: Durable, gentle tools that prevent accidental gouging during the peeling process.
- Light Sandpaper and Sponges: For smoothing out minor gouges and removing residual adhesive, ensuring a clean surface for your next project.
- Inspection Lights: Bright LED lights help spot imperfections early, making repairs straightforward.
Embrace the Process, Transform Your Space
Stepping into your wallpaper removal project with patience, proper techniques, and the right tools can be a game-changer. Remember, a careful approach today leads to stunning walls tomorrow. With each project, you’ll gain more confidence and insight, transforming not just your walls but your approach to home improvement.
What’s the trickiest wallpaper removal challenge you’ve faced? Share your experiences below—I’d love to hear how you overcame it or explore solutions together!