

I remember the moment vividly—standing in my living room, eyes darting between the deep, blood-red walls that seemed to suck the light right out of the space. I had chosen this daring color because I thought it would add warmth and personality, but after applying my first coat, I was hit with a sinking feeling of regret. The color was uneven, streaky, and I knew I’d need at least three or four coats to even get close to the vibrant look I envisioned. That lightbulb moment hit hard: why is covering such a dark hue so damn challenging, and how can I do it in just two coats?
Why Dark Red Walls Are a Painting Nightmare (And Why It’s Worth Solving)
If you’ve ever tried painting over dark red walls, you know the struggle all too well. The deep pigment tends to bleed through lighter shades, making quick work impossible without multiple coats. This isn’t just about aesthetics; it’s about time, money, and frustration. No matter how skilled you are with a brush, dark hues like red are notorious for stubborn coverage—they can easily turn a promising weekend project into an ordeal that drags on for days.
But here’s the thing—failing to properly cover dark red walls can result in a look that’s patchy or uneven, diminishing your entire room’s vibe. After all, the right color can transform a space, but the wrong application can do more harm than good. My own early attempts were riddled with mistakes, such as skipping primer or using cheap paint, which only worsened the coverage issue. Trust me, I’ve been there. And through trial and error, I’ve uncovered strategies that allow me to get stunning results with just two coats—and I want to share them with you.
Got Dark Red Walls That Refuse to Cover? You’re Not Alone
Many homeowners face this exact dilemma. The good news is, with a few smart tweaks, you can achieve full coverage without sacrificing your weekend or your wallet. But beware: one common mistake early on was rushing the process or choosing low-quality paint, which only extended the battle. To truly master this, tapping into expert tips and proven techniques can make all the difference. For more in-depth advice, check out transforming spaces with local painting solutions.
Ready to banish those stubborn red hues once and for all? Let’s dive into the step-by-step approach that will help you cover dark red walls in just two coats, saving you time, effort, and frustration. The key is understanding the right preparation, primer choices, and application techniques—details I’ll walk you through next.
Prep Like a Pro to Ensure Total Coverage
Recall the time I tackled my crimson statement wall, thinking it would be a quick splash of color. I started with meticulous prep—removing furniture, taping edges, and sanding down glossy surfaces. The most critical step was cleaning with a damp cloth to remove dust and grease, which can cause paint to peel or streak. Remember, a clean surface is like a blank canvas for your paint. Skipping this stage is a common mistake that leads to uneven coverage.
Choose the Right Primer for Dark Hues
Opt for Stain-Blocking or Bonding Primer
I learned from experience that a high-quality, stain-blocking primer is essential when covering dark colors. I used a tinted primer—darker than the paint itself—to neutralize the red undertone. Think of primer as a foundation in architecture: it supports the topcoat, ensuring it adheres properly and masks previous hues effectively. Applying a second thin coat of primer can cut down on the number of actual paint coats needed later. For detailed guidance, explore professional painting secrets.
Apply Paint in Efficient, Overlapping Strokes
When I rolled the first coat, I used a 3/8-inch nap roller, applying paint in W-shaped strokes for even coverage. Overlap each pass by about 50% to avoid streaks and thin spots. Remember, consistency is key—don’t press too hard or go over the same area repeatedly, which can cause drips or uneven texture. Using a high-quality, 100% acrylic paint makes a significant difference—cheap paints often require more coats and won’t provide the desired durability. For more expert tips, consult professional painting techniques.
Use the Right Technique for Fewer Coats
I found that painting in the right sequence saved me coats and time. I started with a slightly lighter shade for the first coat, then applied a second a few hours later in the same direction, followed by a final cross-hatch for uniformity. This approach is like layering for a watercolor artist—each layer deepens the color without increasing coats excessively. Pay close attention to paint consistency; if it’s too thick, thin it slightly with water or a painting medium. This ensures smooth application and better coverage in fewer coats. Dive deeper into local painting strategies at local painting secrets.
Final Tips for Spotless Walls
To finish, inspect your walls under good lighting and touch up any thin spots or uneven patches. Using a brush for edges and corners ensures crisp lines, especially where rollers can miss. I also discovered that lightly sanding between coats smooths out brush marks and enhances adhesion—think of it as giving your paint a little polish before the final layer. Remember, patience and attention to detail turn a shed-worthy project into a professional finish that will wow anyone walking into the room.
With these precise steps, covering dark red walls in just two coats becomes more achievable than ever. Proper preparation, smart primer use, efficient application, and meticulous finishing all contribute to a flawless outcome. Perfect for a bold accent wall or a room makeover, these techniques save you time and money, making DIY painting more satisfying and less frustrating. For additional guidance on enhancing your home’s decor, check out affordable local painting solutions.
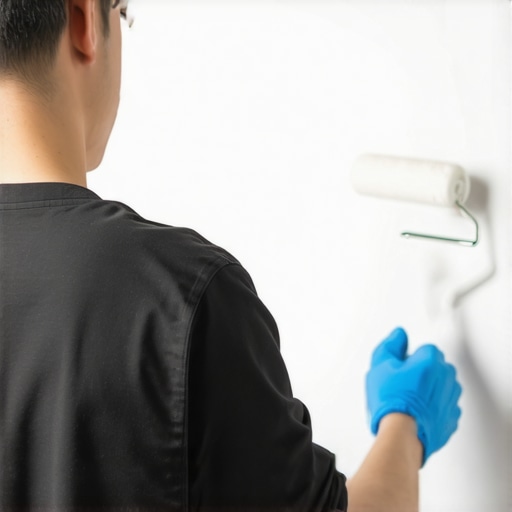 When it comes to house painting, many homeowners rely on popular advice or surface-level tips, but few realize the subtle pitfalls that can sabotage their results. A pervasive myth is that a single coat of high-quality paint is enough to completely transform a room, yet seasoned painters know that proper surface preparation and understanding paint properties are just as important as the paint itself. Skipping surface sanding or ignoring primer recommendations often lead to uneven coverage and premature peeling, which can extend your project timeline and inflate costs. Moreover, many assume that all paints are created equal—when in fact, choosing the right finish and formulation can dramatically influence durability and appearance, especially in high-traffic or moisture-prone areas. Don’t fall into the trap of cheaping out on primers or brushes; these seemingly minor decisions can make a big difference in achieving a flawless, professional-looking finish.
Have you ever fallen into this trap? Let me know in the comments.
It’s also a common mistake to underestimate the impact of lighting conditions. Paint colors can look vastly different at various times of day or under artificial light, affecting your final choice. Always test samples in your space before committing to a color, and consider how natural and ambient light will influence your perception. An advanced nuance often overlooked is the importance of “dry times” and environmental conditions; applying coats too soon or painting in high humidity can cause blisters or uneven drying, resulting in a less smooth surface. Experts recommend checking the manufacturer’s instructions and waiting the appropriate amount of time between coats, especially when working with environmentally sensitive paints like low-VOC formulations. Studies show that optimal environmental conditions during application significantly improve finish quality and longevity.
Another misconception centers around the use of painter’s tape. Many believe that tape guarantees sharp edges, but when improperly applied or removed at the wrong time, it can peel fresh paint or leave behind sticky residues. Proper surface cleaning, applying tape along a damp edge, and removing it when the paint is just barely dry can prevent these issues. For complex projects, employing techniques like the “cardboard shield” can be a game-changer, protecting adjacent surfaces without risking paint bleed. Learn more about such tips in this detailed guide.
Have you ever experienced a messy edge or paint bleed despite using tape? Share your stories!
Beyond these practical tips, understanding the intricacies of paint adhesion and surface compatibility can save you frustration. For example, painting over glossy surfaces without proper deglossing steps typically results in poor adhesion and peeling. Advanced painters often use a deglossing primer or lightly sand before applying new paint, ensuring a durable bond. Recognizing these nuances distinguishes a DIY novice from a seasoned professional, and investing in the right techniques pays off with a better aesthetic and longer-lasting results. For further insights, explore professional-grade tools that elevate your house painting game.
In summary, peeling back the surface reveals that house painting is less about applying color and more about mastering preparation, material selection, and environmental considerations. Challenge conventional wisdom by questioning whether shortcuts could be costing you time and money. Remember, the devil is in the details—so arm yourself with knowledge and avoid these common pitfalls. Your home’s appearance and longevity depend on it.
How do I maintain my painting tools and methods for long-term success?
Investing in quality tools is essential to ensure your house painting projects stand the test of time. Personally, I swear by using high-grade brushes like the 20-dollar angled sash brush because it provides precision and minimizes paint waste, especially in detailed areas. Additionally, a reputable roller—preferably with a 3/8-inch nap—ensures smooth application and even coverage, reducing extra coats and touch-ups.
For larger surfaces, I recommend a high-quality paint sprayer, such as the Graco Magnum, which allows for efficient coverage on exterior siding. Regular maintenance of these sprayers, including cleaning the filters and nozzles immediately after each use, preserves their performance over years. Using a cleaning kit and following manufacturer instructions can extend their lifespan significantly.
Beyond tools, maintaining your painted surfaces involves routine inspections for cracks, peeling, or fading. Addressing these issues early prevents deterioration and costly repairs later. Applying a clear sealant or protective coating periodically, especially in high-traffic or exposed areas, sustains the vibrancy and prevents moisture intrusion.
Trends pointing towards high-tech solutions
Looking ahead, innovations like smart paint that changes color with temperature or moisture levels could revolutionize home maintenance. Incorporating technology through apps that monitor paint durability and alert homeowners when touch-ups are needed is also gaining popularity. Staying informed about these trends can give you a competitive edge in maintaining your property’s aesthetic and structural integrity.
Remember, proper tool upkeep coupled with routine maintenance can dramatically extend the life of your paint job. Try adopting a comprehensive cleaning routine for your brushes and rollers after each project—it’s an easy step that pays off in the long run. For expert advice on local painting strategies, be sure to visit top local painting strategies.
What I Wish I Knew Before My First Red Wall
One of the biggest lightbulb moments was realizing that patience and proper preparation can dramatically cut down on coats and frustration. Rushing through or skipping the primer stage led me to uneven coverage and wasted time. Now, I know that investing time upfront pays off in flawless results later.
Learning from seasoned painters revealed that high-quality, tinted stain-blocking primer isn’t just a luxury—it’s a necessity when covering stubborn dark hues. Using a primer darker than the topcoat masked the red base and made my two-coat dream achievable.
I also discovered that mastery of application technique, like overlapping strokes and correct roller choice, can make or break coverage quality. Applying paint in consistent, overlapping layers spreads color evenly, preventing patchiness and streaks. Once I adopted these habits, covering dark red walls became a smoother, quicker process.
Tools and Resources I Trust for Lasting Results
My go-to toolkit includes a high-quality 20-dollar angled sash brush, perfect for edges and detail work. It provides control and minimizes paint waste—trust me, it’s a small investment for big results. For large surfaces, a reliable roller with a 3/8-inch nap ensures smooth, even coats and reduces the number of coats needed.
Regarding paint, I swear by premium 100% acrylic formulas—they dry faster, resist stains, and give me a professional look. For primers, I tend to use a stain-blocking, tinted primer that neutralizes dark hues efficiently. You can discover more about the importance of choosing the right tools and paints in this comprehensive guide.
Your Colorful Future Starts Now
If you’re tired of battling stubborn dark red walls and want to achieve flawless coverage, remember that patience, preparation, and the right tools are your best allies. Don’t be discouraged by initial setbacks—every expert was once a beginner who refused to give up. Embrace these tips, and you’ll find painting a rewarding, even enjoyable experience that transforms your space in ways you never imagined.
What was your biggest challenge when covering dark walls? Share your experiences below—I’d love to hear how you turned your paint struggles into success stories!