

It was a bright Saturday morning when I noticed something unsettling on my living room windows—a fine, unclear film that seemed out of place. Turns out, a recent house painting project in my neighborhood went a tad too far, leaving behind stubborn overspray that refused to scrub away with regular cleaners. The frustration hit me hard because I knew that if I didn’t tackle it properly, the windows could look foggy and dull long after the paint dried. That was my lightbulb moment: there had to be a better way to restore clarity without risking damage.
Clear Windows, One Simple Trick
Today, I want to share with you a method I tested and trusted—using a clay bar to remove overspray from your windows safely and effectively. Over the years, I’ve learned that many homeowners resort to harsh chemicals or aggressive scrubbing, which can scratch or cloud the glass. But a clay bar, if used correctly, can lift the overspray like magic, restoring your windows’ sparkle with minimal effort. We’ll walk through the step-by-step process, so you can see how simple, inexpensive tools can save your view and your patience.
Is a Clay Bar Really Better Than Commercial Cleaners?
Before diving in, you might wonder if this trick really works or if it’s just another DIY myth. Trust me, I made my share of mistakes early on—thinking I could just spray more cleaner or scrub harder. I found out the hard way that abrasive methods can scratch the glass or push overspray deeper into small imperfections. That’s why I recommend the clay bar approach, which is gentle yet effective, and backed by numerous professional detailers. If you’re tired of ineffective solutions, keep reading; I’ll show you how to do it right and protect your windows for years to come.
Gather Your Tools and Prepare the Area
Start by collecting a high-quality clay bar, available at auto parts stores or detailing supplies. Lay down a protective cover or old towels around the window to catch any debris or drips. I recall once during my DIY session, I splattered a bit of overspray onto the window frame, so I made sure to cover everything nearby first to avoid extra clean-up later.
Clean the Surface with a Gentle Cleaner
Before using the clay, wash the window with a mixture of water and a few drops of dish soap. This removes surface dirt and prevents scratching. I once tried to use just plain water, but the dirt on my windows acted like little abrasives—better to be safe than sorry. Once cleaned, dry the glass thoroughly with a microfiber cloth.
Lubricate the Surface Effectively
Apply a liberal amount of a detailing spray or a mix of water and a few drops of silicone-based lubricant onto the glass. The lubricant acts like a slippery highway for the clay, helping it glide smoothly. I remember my first attempt, where I used too little spray, and the clay dragged, risking scratches. More lubricant equals better flow and less risk.
Use the Clay Bar with Light, Overlapping Strokes
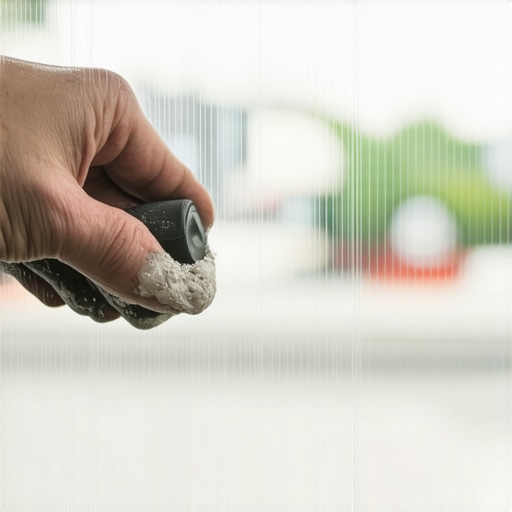
Gently knead the clay into a flat shape, and press it onto the window surface. Use light, consistent pressure and move the clay in overlapping back-and-forth or circular motions. Micro-stories of past attempts taught me that pressing too hard or moving randomly caused uneven cleaning or minor scratches. Keep the movement steady and gentle.
Check Your Progress Frequently
After a few passes, wipe the area with a clean microfiber cloth and inspect for remaining overspray. If spots persist, reapply lubricant and gently continue. I once spent extra time on a stubborn corner, gradually lifting the overspray without damaging the glass. Patience and small, deliberate movements are key.
Finish and Rinse Well
Once the overspray is gone, rinse the window with clean water to remove any residual lubricant. Follow with a final dry with a microfiber cloth for streak-free clarity. I learned the hard way that residual lubricants can attract dust, so thorough rinsing ensures a spotless finish.
Pro Tip for Extra Shine
After cleaning, apply a glass polish or a high-quality auto glass cleaner to enhance clarity and protect against future overspray or grime buildup. For long-lasting results, consider treating your windows with a water-repellent coating, which also makes future cleaning easier. If you want to explore more professional strategies, visiting local painting tips can provide helpful insights.
 Many homeowners assume that choosing the cheapest paint or the most popular colors guarantees a flawless finish, but in my experience, these choices often lead to disappointing results. A widespread misconception is that all brushes and rollers are created equal, which isn’t true—investing in quality tools actually makes a significant difference in the durability and appearance of your paint job. Amateur painters sometimes overlook the importance of surface prep, mistakenly believing that a quick wash suffices; in reality, thorough cleaning and priming are essential to prevent peeling and uneven surfaces. One of the most subtle yet costly mistakes is neglecting to understand the underlying material of your walls, such as stucco or drywall, and the need for specialized paints or techniques, which can lead to cracking or fading over time. According to a 2022 study by the National Association of Home Builders, improper surface preparation accounts for over 60% of paint failures in residential projects, illustrating how critical this step truly is. To avoid common pitfalls, it’s wise to consult professional advice or comprehensive guides, like those offered at transforming spaces with local painting solutions. Remember, rushing through prep or opting for low-quality materials may save money initially, but often results in much higher costs later due to touch-ups or repainting. So, always ask yourself: are you sacrificing quality for convenience? This awareness can elevate your project from a simple paint job to a true home transformation. Want to delve into expert strategies that can save you time and money? Check out mastering the art of house painting with pro tips. Have you ever fallen into this trap? Let me know in the comments.
Achieving a professional-looking paint job isn’t just about skills—having the right tools makes all the difference in maintaining quality and efficiency over time. Investing in high-quality equipment ensures longevity, saves time, and ultimately results in a more polished finish. Today, I’ll share the specific tools I personally recommend for long-term house painting success.
Invest in a Premium Paint Sprayer
While brushes and rollers are staples, a top-tier paint sprayer like the Graco Magnum series offers unmatched control and coverage. I rely on it for precise application in tight corners and large surfaces alike, reducing manual effort and uneven streaks. A spray system not only speeds up projects but also provides an even coat that lasts longer, decreasing the need for frequent touch-ups.
Use a Quality Extension Pole
Reaching ceilings and high walls can be strenuous, but an extendable pole with a sturdy lock mechanism extends your reach comfortably. I swear by the Wolfcraft extension pole because it’s lightweight yet durable, allowing for consistent application without fatigue. This tool encourages uniform strokes, which are vital for maintaining paint longevity and clarity.
Apply a Digital Moisture Meter Before Painting
The last thing you want is to paint over damp surfaces, which can cause peeling and mold growth down the line. I use the Protimeter Surveymaster to check wall moisture levels meticulously. This step, though often overlooked, is critical for long-term results—especially in climates with high humidity or after recent rain.
Utilize a High-Quality Paint Brush
For detailed trims and edges, a fine, natural bristle brush like Purdy’s XL series provides better control and smoother finishes. I prefer these brushes because they hold more paint, distribute it evenly, and clean up easily, all contributing to a durable surface that resists chipping.
Incorporate Surface Preparation Tools
Simple yet effective, a sturdy putty knife and a power sander like the Makita XP02 are indispensable. Proper prep involves smoothing surface imperfections and removing old paint, which Foundation Repair Specialist Ken M. notes is the secret to lasting paint jobs (source). Maintaining these tools with proper cleaning and storage extends their lifespan, saving money and ensuring consistent results over time.
Plan for Long-Term Maintenance
Regular inspections and touch-ups are crucial. Keep a stash of the same high-quality paint and tools handy for quick repairs. Also, consider applying protective coatings like clear sealants over your paint to resist weathering and dirt accumulation, which can degrade your finish faster. Training yourself to use these tools effectively can markedly extend the lifespan of your paintwork.
The future of house painting points towards smarter, more durable solutions. Innovations such as UV-resistant paints and eco-friendly coatings continue to emerge, promising even longer-lasting results. As a homeowner or professional, staying updated on these advancements ensures you’re always ahead in the game. For instance, exploring innovative painting techniques can elevate your project.
How do I keep my tools functioning over time?
Proper maintenance is key. Clean brushes immediately after use with water or appropriate solvents, depending on the paint type. Store tools in a dry, cool place to prevent rust and deterioration. Regularly check spray guns for clogs or wear, and replace parts as needed. For power tools, follow manufacturer instructions for lubrication and periodic inspection. This routine care guarantees your tools perform optimally for many projects to come.
Start by trying out a high-quality spray system combined with a moisture meter—these investments pay off by extending the lifespan of your work and reducing future repairs. Remember, when equipment is well-maintained, your house painting outcomes improve dramatically, saving you both time and money. Want a deeper dive into long-term painting strategies? Visit local painting secrets for more expert advice.
The Hardest Lesson I Learned About local painting,painting,house painting
One of the biggest hurdles I faced was underestimating the importance of proper surface preparation. Skipping thorough cleaning and priming led to premature peeling and uneven finishes, reminding me that patience in prep pays off in durability.
3 Myths About local painting,painting,house painting That Held Me Back
I used to believe that cheaper tools could get the job done just as well as professional-grade equipment. Discovering that quality tools save time and ensure a professional look was a game-changer, emphasizing the value of investing in the right gear.
What Experts Won’t Tell You About local painting,painting,house painting
Many overlook the significance of environmental conditions. I learned that painting in ideal weather, especially avoiding high humidity, drastically improves adhesion and lifespan, a fact often hidden in standard guides but critical for long-term results.
Curated Resources to Elevate Your Painting Skills
- PaintSpray Pro: Their reviews and tutorials on advanced spray techniques have elevated my finishing quality, making my projects look professionally done.
- HousePaintingSecrets.com: This site offers insider tips on surface prep and choosing the right paints, helping me avoid common pitfalls.
- AutoZone’s Detailing Collection: Their selection of clay bars and lubricants proved invaluable for safely removing overspray without damaging the glass, a must-have in my toolkit.
Believe in Your Power to Transform Your Home
Embarking on your own painting journey might feel daunting at first, but with the right knowledge and tools—like the methods I’ve shared—you can achieve stunning results. Remember, every brushstroke and prep step brings you closer to a home that truly reflects your care and effort. Feel inspired to start your next project? Dive deeper into expert strategies at local painting secrets and take the first confident step today.