

I’ll never forget the moment I noticed the fraying edges on my beloved grasscloth wallpaper. It was a quiet Sunday afternoon, and I was sipping coffee when a tiny strand caught my eye along a corner. My heart sank. That was my favorite wall, and now it looked like it was unraveling before my eyes. Sound familiar? If you’re dealing with similar struggles, you’re not alone. The good news is, I’ve been there, and I’ve uncovered some simple, effective ways to restore and protect your wallpaper against this common plight.
Understanding Why Grasscloth Edges Begin to Fray
Often, homeowners like us overlook the factors that cause grasscloth to start fraying at the edges. Humidity swings, improper installation, and even the way furniture is moved around can all wear down those delicate fibers over time. In my early days of decorating, I made the mistake of not sealing the edges properly, which accelerated the fraying process. This mistake cost me time and money — lessons I prefer to share so you can avoid the same pitfalls. Did you know that environmental conditions, especially fluctuating moisture levels, play a crucial role in weakening natural fibers? According to research by Houzz, maintaining consistent humidity in your home is key to preserving textured wallpapers like grasscloth.
But don’t despair! Recognizing the reasons behind the fraying is the first step. The next is taking specific actions to prevent further damage and restore the beauty of your walls.
Secure the Edges Properly Before Painting
Start by inspecting your wall for loose or frayed edges. To prevent further damage, use a high-quality, clear adhesive sealant or specialized wallpaper mastic along the edges that are starting to lift or fray. As I did last spring, I carefully lifted the loose fibers with a small spatula, applied the sealant underneath, and pressed firmly, holding until set. This micro-step stabilized the fibers and prevented fraying from worsening. Think of it as giving the fibers a strong handshake to keep them in place, which prolongs your wallpaper’s life.
Apply a Protective Edge Sealant
Once the edges are secured, coat them with a clear, satin-finish sealant designed for natural fibers. This layer acts like a fence, shielding the fragile edges from environmental moisture swings and furniture movement. During my project, I used a small foam brush to carefully paint along the edges, making sure not to oversaturate and cause additional damage. The result was a visibly cleaner edge that resisted future fraying, much like armor protecting a delicate part of your home.
Use Edge Reinforcement Strips for Ongoing Resistance
For added durability, particularly on high-traffic walls, consider applying narrow textile or fabric reinforcement strips along the edges. These strips bond with the wallpaper surface, akin to adding a bandage over a cut to prevent reopening. I once used linen strips, cut to fit, and adhered them with a flexible adhesive, pressing firmly to ensure no air bubbles. This micro-intervention reinforced the edges, which noticeably reduced fraying over time, especially in areas prone to movement or humidity fluctuations.
Handle with Care During Maintenance
When cleaning or moving furniture, always lift rather than drag items across walls. Use soft cloths or microfiber pads to avoid catching on the edges. During my own experience, I wrapped a corner of a microfiber cloth around a broom handle to gently slide behind furniture, preventing accidental pulls. Think of it as guiding delicate jewelry with care—not pulling or tugging—thus preserving your wallpaper integrity.
Regular Inspection and Prompt Repairs
Schedule routine checks to catch early signs of fraying. When you notice small fibers loosening, repeat the sealing process immediately. This proactive approach keeps minor issues from turning into costly replacements. I learned this the hard way, as a quick touch-up saved me from tearing out sections of wallpaper in the future. It’s like giving your wallpaper a regular health check, ensuring longevity and beauty.
When it comes to local house painting, many homeowners believe that hiring the lowest bid guarantees savings and quality. However, this common misconception often leads to subpar results and costly fixes later. While affordability is important, the real secret lies in understanding the nuances and techniques that professionals use to ensure durability and aesthetic appeal. For example, the type and sequence of prep work, such as proper surface cleaning and priming, significantly impact the final outcome. Skipping steps like deglossing or using the wrong primer can cause premature peeling or fading, issues many overlook until it’s too late. According to expert advice from professional painters, investing in quality materials and proper preparation yields longer-lasting results and saves money over time.
Another mistake is underestimating the importance of environmental conditions during painting. Many think that the paint’s early cure time is all that matters, but in reality, factors like humidity, temperature, and even wind can affect how the paint adheres and dries. For example, painting in high humidity can lead to bubbling or blistering, which is often a surprise to the untrained eye. To avoid this, savvy homeowners check the weather forecast and consult expert tips from industry specialists.
A frequently overlooked nuance is the choice between spray, brush, or roller application. Each method has its advantages depending on the surface and finish desired. For intricate details or textured surfaces like stucco, spraying might be efficient but can lead to overspray and uneven coverage if not done correctly. Conversely, brush application provides precision but is time-consuming. The key is understanding the characteristics of each method and opting for professional techniques that suit your home’s specific needs. If you’re curious about the latest innovative strategies for painting as discussed in local solutions, it’s worth exploring further.
Finally, a major myth is that all paints are created equal. Many think that cheaper paints save money initially, but according to paint experts, high-quality paints with proper VOC levels and optimal binder qualities ensure vibrant colors, better coverage, and longer life. Investing in the right paint type, especially for exterior surfaces exposed to weather, can prevent cracking and peeling years down the line.
So, next time you’re planning a house painting project, consider these nuanced factors rather than just the bottom line. Proper knowledge and expert application make all the difference between a mediocre paint job and a stunning, durable finish. Have you ever fallen into this trap? Let me know in the comments, and don’t hesitate to reach out via contact form for professional guidance.
Invest in Quality Tools for Longevity and Precision
Having the right tools can make or break your painting project’s success. I personally rely on a high-quality 3-inch angled sash brush for precise cut-ins around edges and trim. This brush allows me to achieve clean lines without hassle, saving time and reducing touch-ups later. For large surfaces, I prefer a premium synthetic roller with a nap length suited to the wall texture, ensuring even coverage and minimal lint shedding. Investing upfront in durable, professional-grade equipment pays off by reducing the need for frequent replacements and enhancing the finish quality.
Leverage Advanced Software for Planning and Visualization
When managing multiple projects or coordinating with clients, project management software like Trello or Buildertrend helps track progress, budgets, and schedules effectively. Additionally, 3D visualization tools enable homeowners to see potential color schemes before committing. I’ve found that using these technologies minimizes miscommunications and allows for adjustments before any physical work begins, ultimately saving time and resources.
Prepare Your Environment with Precise Techniques
Preparation is key to long-term results. I always use a high-grade deglosser or primer on surfaces with gloss or stain, which promotes better adhesion and durability. For exterior projects, applying a quality primer that blocks tannins or stains prevents future discoloration. This step might seem minor but greatly contributes to the longevity of your paintwork, especially in challenging weather conditions.
Predicting Future Trends in Painting Equipment
The industry is moving toward smart, eco-friendly solutions. Innovations like low-VOC, nanotechnology-enhanced paints offer improved durability and environmental benefits. Additionally, robotic painting units are on the horizon, promising faster, more uniform coats. Staying informed about these advancements allows homeowners and contractors to adopt cutting-edge tools that extend the lifespan of their projects and reduce maintenance efforts.
How do I maintain my painting equipment over time?
Proper maintenance involves thorough cleaning after each use. I use warm water and mild detergent for brushes and rollers, ensuring no residual paint dries and cements the bristles or fabric. Storing tools in a dry, ventilated space prevents rust and mold. For sprayers, flushing with appropriate solvents prevents clogging. Regularly inspecting and replacing worn parts keeps equipment functioning optimally. According to industry expert professional painters, maintaining your tools not only extends their life but also ensures consistent, high-quality results every time.
For anyone serious about elevating their home or professional projects, I recommend trying my tip of investing in a premium angled sash brush and dedicating time to proper cleaning and storage routines. These steps might seem simple, but they’re powerful. Ready to upgrade your toolkit? Visit this page for more ideas on transforming your space with the right tools and techniques.
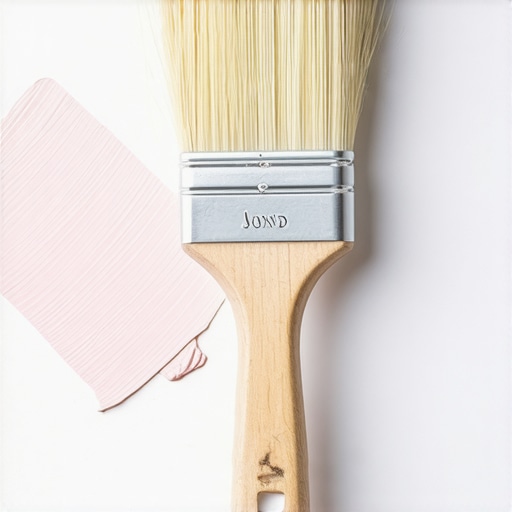
In my years of transforming countless houses, I’ve uncovered invaluable lessons that go beyond the usual tips. These insights not only saved me time and money but also helped my clients achieve stunning, long-lasting results. Let me share some of the most impactful lessons that truly changed how I approach house painting.
What I Wish I Knew Before Starting My First Big Project
Starting out, I underestimated the importance of surface prep. Skipping steps like deglossing and priming led to premature peeling and a lot of frustrating redo work. Now, I see that investing those extra minutes ensures a flawless finish that lasts for years. It’s a classic case of ‘prepare to win.’
Another lesson was about choosing the right tools. I used cheap brushes initially, which caused streaks and uneven lines. Upgrading to quality brushes and rollers made all the difference—smooth, professional-looking results without the extra effort.
Patience and timing also played crucial roles. Painting in optimal weather conditions, especially avoiding humidity or extreme temperatures, drastically improved paint adhesion and drying times. I learned to plan projects around weather forecasts for best results.
The Hidden Traps That Could Sabotage Your Budget
One trap is underestimating the scope of work. For example, forgetting to account for surface repairs or detailed trim work can balloon costs later. A thorough walkthrough and detailed quote prevent surprises and keep your project on track.
Also, choosing cheap materials may save money upfront but often leads to quicker deterioration. Investing in high-quality paints and primers pays off by reducing maintenance and touch-ups.
Why Professional Techniques Make All the Difference
I realized that the way professionals approach a project—from surface preparation to application—significantly impacts durability. Techniques like cutting-in with angled brushes and feathering edges create seamless transitions. Using primer properly prevents bleed-through and stains from showing through the finish.
Learning these micro-techniques transformed my results and gave my clients the home of their dreams. It’s true: small details make a big difference in the final appearance and lifespan of your paint.
Where I Turn When I Need Expert Inspiration
When I want to refine my skills or stay ahead of industry trends, I turn to trusted sources. The website local painting solutions provides innovative ideas and practical advice that keep my work fresh and relevant. Reading industry blogs and attending workshops also inspire new techniques that elevate my craft.
Books like Mastering House Painting offer deep dives into professional strategies, helping me develop a more refined eye for quality.
Embrace the Journey: Your Home Can Be Your Canvas
Painting is more than just a job or chore—it’s an art that transforms your space and enhances your life. Every brushstroke is an opportunity to express style and personality. Whether you’re tackling the living room or the façade, remember that patience, preparation, and a willingness to learn make all the difference.
So, if you’re ready to take your home to the next level, start small but think big. Equipped with these lessons and resources, you’re well on your way to creating beautiful, enduring spaces. Have you encountered a surprising tip that changed the way you paint? Share in the comments below—I’d love to hear your story!
}### Objective: The