

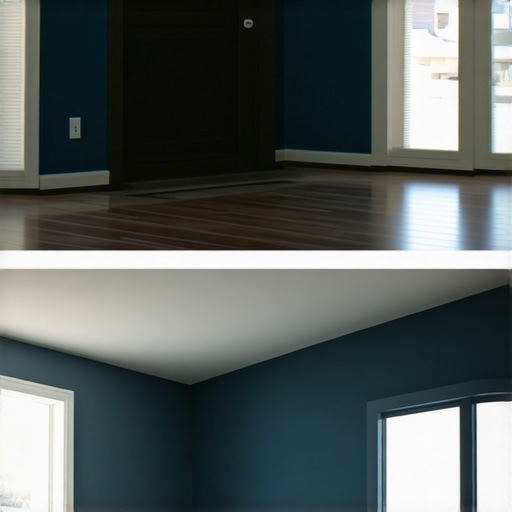
Have you ever stood in your living room on a cloudy afternoon, gazing at your blue walls, only to feel a mysterious wash of dullness and gloom wash over your space? I remember vividly the moment I realized my vibrant blue paint had transformed into a dull, almost-gray hue just because the weather wasn’t cooperating. It was a lightbulb moment—turns out, the changing natural light can dramatically alter how our walls look, making what we thought was a stunning color fall flat in certain conditions.
Getting to the Heart of the Blue-to-Grey Mystery
Understanding why your carefully chosen blue paint appears grey on overcast days isn’t just about aesthetics; it’s about creating a space that feels lively and inviting regardless of the weather outside. This is a common concern I’ve seen in many homes — owners love their color swatches in the store, only to be disappointed when nature’s poor lighting dims the brightness and shifts hues.
Is It Worth the Effort to Tackle This?
My early mistake was assuming the color I picked was flawed or that my walls needed repainting. But after some research and experimentation, I discovered it’s often about lighting conditions and the paint’s undertones. For example, blues with green undertones tend to look cooler and can appear more muted or greyish under cloudy skies. Knowing this, I started selecting paints with carefully considered undertones and finishes—something I wish I had done at the start. Looking into local painting strategies can provide practical options tailored to your home’s specific lighting challenges.
So, if you’ve ever been frustrated by your blue walls losing their vibrancy on a gloomy day, stay tuned. We’re about to explore the factors influencing this phenomenon and share actionable tips to keep your walls looking stunning in any weather. Do you often find your blue walls looking dull when the sky is grey? If so, you’re not alone—and there’s a solution that can help brighten your space every day.
Understanding the Impact of Light and Color
Before we dive into fixes, it helps to grasp why lighting plays such a pivotal role in how we perceive color. Natural light varies significantly throughout the day and weather conditions. On cloudy days, sunlight diffuses and softens, washing away the warmth and vibrancy we see under direct sunlight. This diffusion causes certain hues—especially cooler shades like blue—to appear muted or even shift toward grey or purple tones.
Additionally, the type of paint finish can influence how light interacts with your walls. Satin and semi-gloss finishes reflect more light, which can help retain vibrancy, while matte finishes tend to absorb light, potentially making colors seem duller in low-light conditions. Selecting the right finish, along with understanding undertones, can be your secret weapon against dull, greyed-out walls.
Many homeowners overlook these nuanced factors, but with a little insight, you can make smarter choices that keep your rooms lively all year round. If you’re curious about how to select the perfect paint for your space, check out top local painting strategies for expert advice.
In the next sections, I’ll share practical steps to prevent your beloved blues from turning drab, including color selection tips, lighting tricks, and finishing techniques. Ready to bring back that vibrant hue regardless of the weather outside? Let’s get started!
Choose the Right Paint with Accurate Undertones
Start by selecting a blue paint that has warm undertones, such as teal or turquoise, instead of cool blue shades. During my own project, I visited a local shop and requested samples with different undertones. I painted small patches on my wall and observed them over several overcast days—some shades appeared duller, while others retained vibrancy. This hands-on testing helped me pick a shade that stayed lively even when the weather was gloomy.
Opt for Paint Finishes that Reflect Light
Use semi-gloss or satin finishes for your walls. These finishes reflect light better, helping to bounce available natural light back into the room. I applied a semi-gloss finish to my blue walls, and the difference was remarkable—colors looked brighter on cloudy days compared to matte finishes. Remember, brighter reflections can mask the dullness caused by bad weather, maintaining your room’s vibrancy.
Think of paint finishes as mirrors for your walls—the shinier, the more light they bounce around.
Test Lighting Conditions with Small Samples
Before committing to a full repaint, test your paint choices under various lighting conditions. During one weekend, I painted tiny patches on different walls and observed them during sunlight, evening, and overcast days. This process revealed how each shade reacted, preventing me from choosing a color that would look dull outside. You can replicate this by creating a mini color garden in your space, ensuring your choice maintains its freshness regardless of weather.
Use Proper Contracting Techniques and Local Expertise
Hiring experienced professionals who understand lighting nuances can make the difference. Local painters, like those suggested in local painting strategies, know how to select and apply paint that compensates for your home’s unique lighting. They can advise on shades that won’t fade or shift in tone during dull weather, saving you frustration and repainting costs.
Maximize Artificial Lighting to Brighten the Space
In darker months, supplement natural light with strategically placed artificial lighting. I installed LED daylight bulbs in my ares to mimic natural sunlight, which helped keep the blue hue vibrant. Bright, cool-toned bulbs can emulate daylight, preventing the room from feeling muted or greyish during overcast days. Think of this as your secret weapon—artificial light acts as a consistent, controllable light source that maintains color vibrancy.
Maintain Consistency with Proper Surface Preparation
A smooth, well-prepared wall surface allows paint to appear more even and radiant. Before painting, I deglossed the walls using a dedicated primer, ensuring the paint adhered properly and reflected light uniformly. Skipping prep can lead to uneven color distribution, especially problematic when trying to preserve your blue’s vibrancy in gloomy weather. Use high-quality primers and proper tools, like an angled sash brush, to achieve professional results, as discussed in this guide.
Incorporate Reflective Decor Elements
Adding mirrors, glossy frames, or metallic accents can bounce light around the room. I placed a large mirror opposite my blue wall, which visually doubled the light and made the color pop even when the sky was overcast. These small enhancements enhance your room’s overall light levels, indirectly preserving the vibrancy of your wall color.
Applying these practical steps ensures your blue walls stay bright and lively, no matter the weather outside. Remember, the key is in selecting the right shade, finish, and lighting environment, complemented by professional advice from local experts. The effort you put into these details will pay off in a space that feels inviting and colorful year-round.
 Many homeowners assume that choosing the right paint color and finish is enough for a flawless look, but there’s a deeper layer of nuance that often gets overlooked. The common narrative suggests that selecting quality paint and proper application guarantees success, yet experienced painters know that *even professional results* depend on subtle factors. For instance, a popular myth is that darker shades always require more coats—while partly true, the real issue lies in the type of paint and primer used, especially regarding surface absorption and existing wall conditions. Applying low-quality primer or neglecting surface prep can lead to uneven color distribution and premature peeling, countering your aesthetic goals. Failing to recognize the importance of underlying surface texture can cause unexpected imperfections that only reveal themselves after drying. This is precisely why meticulous surface preparation remains a cornerstone of quality painting—it’s not just about aesthetics but durability. When considering local painting services, many clients focus solely on price, overlooking that experienced professionals bring an understanding of how environmental factors, like humidity or temperature, influence drying times and adhesion. That oversight can lead to unsightly blisters or cracking, especially on exterior walls. A common mistake is assuming that a single coat suffices for all surfaces; however, certain substrates like stucco or drywall demand tailored approaches, including specific primers and sealers, to ensure longevity.
Why do some paints perform better under certain conditions, and how can you leverage this knowledge?
The answer lies in the science of paint chemistry. Experts from companies like Sherwin-Williams emphasize that paint formulation impacts how well it resists cracking, chalking, or fading—especially under challenging conditions. Recognizing these nuances helps you choose products optimized for your climate and surface type, avoiding costly rework. Additionally, many overlook the value of proper drying conditions; painting before adequate temperature and humidity levels are met can trap moisture, leading to bubbling or peeling. This is where understanding local climate patterns becomes critical, aligning with insights from professional painters who adapt their techniques accordingly. For example, painting in high humidity without proper ventilation can prolong drying and compromise the finish. As highlighted in local painting strategies, working with experts who grasp these local nuances ensures that your investment yields durable, vibrant results. Remember, the devil is often in the details—surface prep, environmental conditions, and product knowledge—that separate amateur attempts from professional perfection. Don’t fall prey to the misconception that good results only depend on the right color; instead, embrace the complex science and craft behind high-quality house painting. Having awareness of these hidden nuances empowers you to make informed decisions, saving time and money in the long run. Have you ever fallen into this trap? Let me know in the comments.
Keep It Working: Tools and Maintenance Tips for Lasting Results
Achieving a professional-looking paint job is just the beginning. To ensure your walls stay vibrant and intact over time, proper maintenance and the right tools are essential. Investing in quality equipment not only saves you money in the long run but also makes future touch-ups and cleaning much easier. For example, a high-quality angle sash brush like the one detailed in this guide can significantly improve application precision and reduce paint wastage, especially when painting trim or detailed areas.
Routine inspections of your painted surfaces help identify issues like peeling, chipping, or mold early on. Using a magnifying glass can be surprisingly effective for detecting small cracks or air pockets that could escalate if left unaddressed. Regular cleaning with a mild soap solution and gentle scrubbing using tools like a microfiber cloth not only prolongs paint life but also keeps your walls looking fresh. Remember, harsh chemicals or abrasive scrubbers can damage the finish, so choosing compatible cleaning tools is key.
In terms of ongoing maintenance, applying sealants or clear protective coats every few years helps guard against moisture intrusion and UV damage, especially on exterior walls. Using a roller with a high nap for textured surfaces ensures even coverage of sealants, maximizing protection. For instance, on rough stucco or brick, a thicker nap roller can reach into crevices better than standard rollers, providing a more durable barrier against the elements.
How do I maintain my paint job over time?
Maintaining your painted surfaces requires a proactive approach. Regularly inspect for signs of wear, and clean surfaces at least twice a year to remove dirt, mold, and other debris. Address small issues like cracks or peeling as soon as they appear. Applying a touch-up using matching paint and appropriate brushes can prevent problems from spreading and extend the lifespan of your walls. Additionally, consider consulting local painting experts—like those highlighted in local painting strategies—to perform professional maintenance when needed. These professionals can recommend suitable protective coatings for your specific climate, ensuring your investment remains sound for years to come.
Looking ahead, innovations in eco-friendly and self-healing paints are poised to revolutionize maintenance routines. These paints can automatically repair minor scratches and resist mold more effectively, reducing the need for frequent touch-ups. Embracing such advancements could make upkeep simpler and more sustainable in the future.
Try implementing a maintenance routine that includes regular cleaning and early repairs with quality tools. This proactive approach will keep your walls looking fresh, vibrant, and well-preserved—saving you time and money while enhancing your home’s overall appearance.
Whether you’re caring for interior walls or protecting exterior surfaces, the key lies in the right tools and diligent maintenance. Partnering with experienced local painters, as discussed in local painting solutions, can simplify this process and ensure long-term results. Regular upkeep, using the proper equipment, will make your painted surfaces stand the test of time and weather.
What I Wish I Knew Before Picking That Blue
One pivotal lesson I learned was the significance of testing paint shades under various lighting conditions. I once chose a lovely blue based solely on a swatch in the store, only to find it dull and drab once painted in my living room on overcast days. Doing small sample patches and observing them at different times of day revealed how undertones and finishes can dramatically change appearance, saving me from costly mistakes and repainting. Trusting your eyes and understanding light’s influence can be a game-changer in your painting projects.
Tools and Tips That Transformed My Approach
Having the right tools makes all the difference. An angled sash brush, for instance, ensures precise edges and smooth finishes, especially on trim and corners—something I highly recommend reading about in this detailed review. Pairing quality brushes with proper surface preparation, like thorough priming and sanding, laid the foundation for vibrant, long-lasting results. Incorporating reflectively finished paints and strategic lighting, both natural and artificial, further helped me maintain color vibrancy across seasons.
Don’t Let Dull Walls Steal Your Joy: Act Now
Your walls are more than just surfaces—they reflect your personal style and create the mood of your space. By understanding how light, color undertones, and finish choices interplay, you can keep your blue walls lively and inviting all year round. Remember, sophisticated choices in paint, lighting, and technique are within your reach. So, gather your tools, do those sample tests, and turn your living space into the vibrant haven you envision. It’s time to take action and transform your home with confidence. Have you ever struggled to choose the right shade for your walls? Drop your experiences below—I’d love to hear your stories and solutions.