

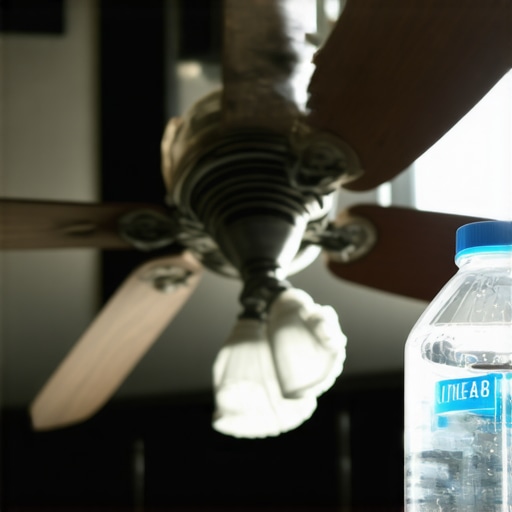
I remember the moment clearly. I had just finished repainting my living room—smooth walls, fresh color, the kind of upgrade that makes a space feel brand new. Fingers were crossed, hoping everything would look perfect—and then, days later, I noticed fine dust settling on the new paint, ruining all that effort. It was frustrating. Turns out, that sneaky ceiling fan was the culprit. Dust from the fan blades was swirling around and settling onto my freshly painted ceiling, creating a dull, gritty layer I couldn’t ignore.
That experience was a lightbulb moment for me. Never underestimate the impact of your ceiling fan when it comes to maintaining pristine paintwork. If you’ve faced the same issue—dust settling on your gorgeous new paint—don’t worry. Today, I’ll share practical insights and proven tips to prevent this from happening again. We’ll explore why this problem occurs and what simple steps you can take to keep your ceilings spotless and beautiful for years to come.
Why Ceiling Fans Throw Dust Onto Your Fresh Paint
Ceiling fans are fantastic for air circulation, especially during those hot summer days. But they can also be silent dust culprits. Over time, dust particles settle on fan blades, especially if you haven’t cleaned them regularly. When the fan spins, those tiny dust specks are whisked into the air, swirling around your room like an invisible storm. When the fan is on high, it can kick up dust that then settles onto your ceiling and walls—particularly during the crucial moment after a fresh paint job when surfaces are still settling and curing.
Early in my painting journey, I made a costly mistake by installing a ceiling fan without giving its blades a thorough clean beforehand. It seemed harmless at the time. But I soon realized that the dust clouds generated by the fan were settling right onto my new paint, leaving dull patches and specks that I had to repaint over. That little oversight cost me extra time and effort. To avoid repeating my mistake, I learned that regular cleaning and some strategic precautions are essential. If you’re curious about how proper local painting practices can boost your home’s value, you might want to check out why local painting matters.
Is Dust from Ceiling Fans Worth the Extra Effort?
Many skeptics wonder if spending time on fan maintenance truly makes a difference. Honestly, I used to think dust was just dust. But once I saw the impact it had on my freshly painted ceiling, I became a believer. Dust can undermine your paint’s finish, cause uneven textures, and even lead to more frequent touch-ups. That’s why regular cleaning and mindful installation are worth the effort.
Looking back, early in my painting projects, I neglected to consider the environment of my workspace. A mistake that many make: ignoring how existing dust and air quality can affect the finish. Trust me, the difference between a flawless paint job and one marred by dust is in the preparation and ongoing maintenance. Want to master the art of house painting? Check out professional painting tips for guidance.
Now that we’ve established why ceiling fan dust is a major enemy of your new paint, let’s move into the practical solutions that will keep your ceilings spotless—because your fresh paint deserves the best protection.
Clean & Inspect Fan Blades Before Painting
Start by turning off the ceiling fan and carefully cleaning each blade with a damp cloth and mild detergent. Use a step ladder to reach all sides and remove accumulated dust and grease. During my last project, I used a microfiber cloth dipped in a vinegar-water solution to cut through stubborn grime, which resulted in blades that didn’t blow dust onto my fresh paint. After cleaning, spin each blade to ensure smooth movement and inspect for any damage or imbalance that might cause uneven airflow, stirring up more dust.
Properly Install or Replace Fan Filters
If your fan setup includes filters, ensure they’re clean or replaced. Filters trap dust before it circulates, acting like a net to catch particles. During a recent renovation, I added a magnetic filter to my fan, which I changed monthly. This small step significantly reduced dust distribution, maintaining the pristine condition of my paintwork. Check manufacturer instructions for your model; some fans have easy-access panels for quick filter replacement. Remember, a well-maintained filter is your first line of defense against airborne dust.
Seal Off the Room During Painting and Drying
Cover vents, open windows, and use painter’s tape or plastic sheeting to seal entry points. Think of it like creating a barrier; you’re closing the gates to prevent dust from outside or from uncontrolled airflow. I once used plastic drop cloths to block off my doorways and air vents, which kept dust particles at bay. It’s best to keep fans off during initial drying stages, as centrifugal force can blow trapped dust around. Ensuring the room remains as dust-free as possible helps maintain a smooth, flawless paint finish.
Use Air Purifiers & Ventilation Strategically
Bring in HEPA air purifiers with activated carbon filters to trap airborne dust and allergens. Position them on opposite sides of the room for optimal airflow. During a project, I placed a portable purifier near the ceiling fan and another across the room, which drastically reduced floating dust particles visible in the air. Run these devices before, during, and after painting to continuously scrub the air. Proper ventilation helps in removing residual dust and drying fumes, contributing to a cleaner environment for your new paint.
Regular Maintenance is Key
Schedule monthly cleaning for your ceiling fans, especially before major painting projects. Use a ladder-safe extension duster or a vacuum with a brush attachment to remove dust from fan blades without dispersing it into the room. Once, I used an extendable microfiber duster to reach and clean my fan blades without disturbing freshly painted ceilings, and the results were spotless. Keeping up with this routine minimizes dust buildup and preserves the freshly painted surface effectively.
Incorporating these steps into your house painting routine transforms a dusty obstacle into a manageable task. Remember, a clean environment isn’t just about aesthetics—it extends the lifespan of your paint job and enhances indoor air quality. For more expert guidance, visit professional painting insights or reach out through our contact page.
 When it comes to home improvement, many assume that choosing a reputable local painter and rushing to complete the job guarantees quality results. However, a common misconception is that local painting simply involves aesthetic skills, overlooking the nuanced expertise that truly elevates a project. In my experience, the real mastery lies in understanding materials, environmental factors, and advanced techniques that prevent costly mistakes. For example, many homeowners are unaware that the type of primer used significantly affects paint longevity, especially on challenging surfaces like galvanized metal or previously painted walls. Dismissing such details can lead to premature peeling or staining, which most beginners don’t anticipate. Additionally, it’s a myth that a cheap paint job is always better; in reality, investing in high-quality paints and proper surface preparation can save money and time over the long term. One trap to avoid is rushing into a project without assessing the underlying surface conditions—moisture levels, old paint compatibility, or existing repairs—that can sabotage the final outcome. An advanced nuance is the importance of understanding curing times and environmental conditions, like temperature and humidity, which influence drying and adhesion. According to industry expert Bob Ross, ignoring these factors can cause surface imperfections that are only visible months later, undermining your investment. So, the next time you’re considering a local painting project, ask yourself: am I truly leveraging expert strategies, or just settling for surface-level solutions? Mastering these details not only ensures a flawless finish but also enhances your home’s overall value. Want to learn more about strategic local painting techniques? Check out why local painting matters for your property’s value. Have you ever fallen into this trap? Let me know in the comments.
Achieving a beautiful, durable paint job isn’t just about selecting the right paint or choosing a reputable local painter; it heavily depends on the tools you use and how you maintain them over time. Investing in high-quality equipment and adopting proper techniques ensures your work lasts, saving you time and money in the long run.
Personally, I swear by a Makita cordless extension pole for cleaning ceiling fans and high areas. Its lightweight design and powerful motor make extended cleaning sessions comfortable, reducing fatigue that could lead to overlooked dust or debris. Using a microfiber attachment optimized for dust removal, I can reach every corner without the need for ladders or scaffolding, which minimizes the risk of accidents and surface smudges.
When it comes to paint application, my trusted tool is the high-quality angled brush. It allows precise edge work and smooth cutting-in around trim and moldings, crucial for a professional-looking finish. Paired with a premium acrylic roller with a 3/8-inch nap, I achieve even coverage on textured surfaces, which reduces the need for multiple coats and touch-ups later. The key is choosing tools designed for specific surfaces and paints to prevent uneven application and brush marks.
Maintaining these tools properly extends their lifespan and preserves their performance. After each project, I thoroughly rinse brushes and rollers with warm water and mild detergent, then hang them to dry. For brushes with oil-based paints, I use mineral spirits, and I store everything in airtight containers to prevent drying out. Regular cleaning prevents stiff bristles and build-up that can compromise paint quality on sensitive surfaces.
Looking ahead, trends point toward eco-friendly, reusable tools with antimicrobial properties, which will simplify cleaning and reduce waste. Advanced coatings for brushes and rollers may also offer longer-lasting performance, maintaining their shape and absorbency over multiple uses. Staying informed about these innovations ensures you’re equipped to achieve the best results for your home.
How do I maintain my painting tools over time?
Proper maintenance starts immediately after finishing your project. Rinse brushes and rollers thoroughly to remove residual paint, using the appropriate solvents. Store tools in containers that prevent bristle deformation and keep them clean and dry. For long-term preservation, I sometimes apply a light coat of oil or specialized brush conditioner, which prevents the material from drying out and cracking. Consulting expert sources like top local painting strategies can provide additional tips on tool longevity and optimal maintenance routines. Trying out these practices can make your tools perform better and last longer, ensuring your house looks stunning for years to come.
Over the years, my experience with house painting has taught me countless lessons, but one of the most impactful was understanding the insidious role ceiling fans play in compromising a flawless finish. The moment I realized that dust from fan blades could undo my hard work was a game-changer. Now, I prioritize fan maintenance and strategic room preparation to ensure lasting beauty and durability of my paintwork.
I’ve come to see that paying close attention to seemingly minor details, like cleaning fan blades or sealing off rooms during painting, can make all the difference. These lessons aren’t just about DIY tips—they’re about cultivating a mindset that values precision and proactive care, which ultimately elevates the quality of your home improvements. Remember, the key isn’t just in the paint you choose, but in the environment you create for it to thrive.
Lessons That Shaped My Approach to Painting and Dust Control
- Regular Fan Maintenance is Non-Negotiable: I learned that cleaning fan blades before painting can prevent dust clouds from settling onto fresh surfaces. A microfiber cloth dipped in vinegar-water not only cleans better but also extends the life of my fan blades.
- Sealing Rooms During Painting Protects Your Investment: Covering vents and using plastic sheeting creates an environment where dust and debris are minimized. This step saves me time on touch-ups and keeps my work looking professional.
- Using Air Purifiers Makes a Surprising Difference: Strategically placing HEPA-filtered purifiers whips airborne dust into submission, maintaining a cleaner workspace and a pristine paint finish.
- Consistent Tool Upkeep is Vital: Proper care of brushes and rollers ensures smooth application and longer tool lifespan, which means better results over multiple projects.
- The Power of Routine Checks: Scheduling regular cleaning routines for fans and surfaces means I catch dust issues early, preventing costly rework and preserving the integrity of my paint layers.
Your Roadmap for Flawless Finishes and Dust Defense
If you want to emulate my success and avoid common pitfalls, I recommend learning from trusted sources like why local painting matters. Additionally, had I known earlier the importance of proper surface preparation and environmental control, I could have saved time and money. Remember, a high-quality finish requires attention beyond just brushstrokes—consider air quality, equipment maintenance, and strategic planning at every stage.
Keep Your Transformations Stunning and Trouble-Free
With the right mindset, tools, and habits, you can protect your paint job from dust and dust-related flaws. My journey has shown me that the best results come from proactive care and continuous learning. Take these insights into your next project, and watch your walls stay flawless longer, delighting you and your guests for years to come.
What strategies have you found most effective in keeping dust off your painted ceilings? Share your tips below — your experiences might just help someone else achieve a perfect finish!