

I’ll never forget the moment I stepped back after finishing a room and saw it—those stubborn wallpaper corners that refused to stay tucked in, overlapping and curling like rebellious little waves. I had spent hours carefully applying the paper, only to realize my corners looked like they’d been through a wind tunnel. It was frustrating, almost enough to make me want to start all over. But I didn’t give up. Instead, I learned a few tricks that transformed my approach and saved my walls—and my patience.
Why Overlapping Corners Drive Us Nuts—and How to Fix Them
If you’ve ever battled with wallpaper that peels or overlaps at the corners, you’re not alone. It’s one of those common nuisances that makes a beautiful room look unprofessional, and I know firsthand how disheartening it can be. The good news? It’s a fixable problem. With the right techniques, you can achieve crisp, clean edges that last. Today, I’m going to walk you through the exact methods I’ve used—methods that will help you tame those stubborn overlaps and get your wallpaper looking flawless.
Is It Really Worth All This Fuss?
Maybe you’re skeptical, thinking, “Is fixing my wallpaper corners really worth the effort?” I get it. When I first faced this issue, I wondered if I was overcomplicating things. But consider this: poorly finished corners can cause your wallpaper to peel or bubble over time, undoing all your hard work. A small investment of time now can save you headaches down the road. Plus, knowing I can fix it myself is empowering. Trust me, I made the mistake early on of rushing the corners too much, which only made things worse. That taught me that patience and proper technique are key—something I wish I’d realized sooner. If you’re curious, check out how proper prep and adhesion make a huge difference, like in our guide on wallpaper adhesion and longevity.
Before we dive into the step-by-step, let’s address the common skepticism: does this really work without special tools or skills? Absolutely. Even if you’re a beginner, these tips will give you a professional-looking finish. Ready to turn that frustrating corner disaster into a showcase feature? Let’s get started.
Prepare Your Tools and Surface
Before tackling those stubborn corners, gather essential supplies: a sharp utility knife, a plastic scraper, a damp sponge, a smoothing brush or roller, and high-quality wallpaper adhesive. I remember a time I rushed into fixing a corner without prepping and ended up with wrinkled edges. That mess taught me the importance of preparation. Clean the corner thoroughly, removing any loose paper or dust, and cut away any excess overlaps with a sharp utility knife for a clean edge.
Align and Overlap Correctly
Apply a thin line of wallpaper adhesive to the overlapping section if needed. Instead of forcing the paper into place, gently fold the excess inward, creating a smooth, even overlap. Think of it like folding a napkin: smooth and deliberate, avoiding creases. I once tried to hide overlaps by pressing hard—resulting in bubbles. Instead, take your time to crease and smooth the overlap, ensuring it aligns perfectly against the wall and other strips.
Use a Smoothing Tool to Secure
Press gently with a smoothing brush or roller, starting from the center of the corner outward to push out air bubbles and excess adhesive. When I first tried this, I was too aggressive, causing tears. Now, I use light, consistent pressure, almost like petting a cat—firm but gentle—leading to a perfectly flat finish. The key is to sweep out any air and excess paste without disturbing the alignment.
Seal and Finish the Edges
After smoothing, use a damp sponge to wipe away any adhesive residue along the corner. Then, run your scraper or a plastic edge along the corner to press down the edges securely. For a professional look, seal the edges with a small bead of clear wallpaper seam adhesive or a specialized edge sealer to prevent peeling in the future. I learned this the hard way when corners started peeling months later, but now, sealing guarantees longevity.
Trim Excess and Final Touches
If there’s extra paper protruding beyond the corner, carefully trim with a utility knife for a sharp edge. Fold the trimmed edge inward to avoid sharp cuts, then press it firmly against the wall. At times, I rushed this step, leaving jagged edges, but patience here results in a seamless seam that looks professionally done. Remember, good corners aren’t built overnight—attention to detail makes all the difference.
Optional: Adding Extra Reinforcement
For high-traffic areas or corners prone to movement, consider applying a small strip of clear seam tape over the joint. This extra layer adds durability and reduces the chances of peeling or curling. Think of it as giving your corner a protective shield, much like a clear coat over a painted surface—modest but effective.
Implementing these concrete steps turned my wallpaper corners around from messy to masterful. Each time I follow this method, I notice a crisper finish and longer-lasting results, saving me from future frustrations. So next time you face those challenging corners, remember: patience, precision, and proper sealing are your best allies.
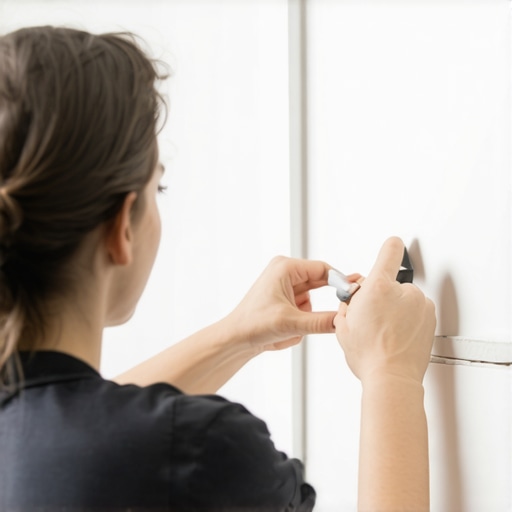 When it comes to house painting, there’s a plethora of advice floating around—some helpful, some misleading. As a seasoned painter, I can tell you that many homeowners and even professionals get caught up in myths that can compromise the final result. Let’s dig deeper into these misconceptions and reveal the nuanced truths behind achieving a flawless paint job.
One common misconception is that all paints and brushes are created equal. Everyone says to “use high-quality brushes,” but in my experience, the type of brush matters far less than how you prepare and handle the surface. For instance, many believe that synthetic brushes are always better for oil-based finishes, but this isn’t universally true. In some cases, a good-quality natural bristle brush can provide smoother application with oil paints, avoiding streaks and brush marks. To understand more about how tools influence paint quality, check this article on [why synthetic brushes might be ruining your oil-based finishes](https://elitepainterpro.com/why-synthetic-brushes-are-ruining-your-oil-based-wood-finishes).
There’s also the myth that multiple coats always mean better coverage. This might be true for low-quality paints, but with high-quality, modern formulas, two coats are often sufficient—even over dark or bold colors. Applying unnecessary coats wastes time and paint and can lead to issues like bubbling or uneven sheen. Be cautious of overly thick coats, which can cause drips and poor adhesion, especially on surfaces like exterior siding. Testing the porosity of your walls, such as with [the chalk test](https://elitepainterpro.com/the-chalk-test-for-checking-exterior-wall-porosity), can help determine the right number of coats and prevent over-application.
Have you ever fallen into the trap of skipping surface preparation? Many rush into painting assuming the surface is ready, only to find later that peeling or uneven texture ruins the look. Prepping thoroughly—removing old flaking paint, filling holes, sanding rough patches—is where the real difference begins. Skipping this step might seem like saving time, but it sets the stage for failure. For example, applying paint over sticky or uneven surfaces without proper priming can cause adhesion issues that appear months down the line.
Another critical nuance is understanding how environmental factors influence drying and curing. Many think that if paint dries quickly, it means a good job, but rapid drying can lead to lap marks and surface imperfections. Conditions like low humidity or high temperatures speed up drying but hinder proper leveling. To avoid this, timing your painting sessions during moderate weather and using the right primers and sealers is essential. For instance, [the drying test](https://elitepainterpro.com/why-your-new-paint-is-drying-too-fast-and-leaving-lap-marks) can help identify if your environment is causing issues.
Finally, beware of the trap of choosing low-VOC or eco-friendly paints without considering coverage. While these options are better for health and the environment, some formulations require more coats or specialized primers to achieve the desired look. For example, [3 eco-friendly paints that actually cover dark colors in two coats](https://elitepainterpro.com/3-eco-friendly-paints-that-actually-cover-dark-colors-in-two-coats) demonstrate that not all ‘green’ paints are equal in performance.
In summary, understanding the nuances of house painting—the type of tools, proper surface prep, environmental influences, and paint technology—can elevate your results from amateurish to professional-grade. Don’t fall into the trap of oversimplification; instead, embrace these details for a smoother, longer-lasting finish. Have you ever fallen into this trap? Let me know in the comments, and share your experiences or questions for more insights.
As a seasoned painter, I can tell you that keeping your tools in top shape is essential for achieving professional-quality finishes and ensuring your investment pays off over time. Proper maintenance of brushes, rollers, sprayers, and other equipment not only extends their lifespan but also preserves the quality of your work. Today, I’ll share the specific tools I recommend and the techniques I personally use to keep everything working smoothly.
Invest in High-Quality Tools, But Maintain Them Religiously
I always opt for premium brushes and rollers because they tend to deliver better results from the start. For brushes, I personally use synthetic brushes for acrylic when working with water-based paints—these are easier to clean and less prone to bristle breakage. But regardless of quality, I reinforce maintenance by cleaning immediately after each session with warm water and mild soap for latex paints or mineral spirits for oil-based finishes. Never let paint dry on your tools; it makes cleaning more difficult and shortens their lifespan.
Effective Cleaning Techniques for Longevity
For brushes, I use a foam shield method—a simple trick that absorbs residual paint and makes cleaning faster. I also invest in good tool-specific cleaners. Regularly changing and thoroughly cleaning your equipment prevents paint buildup, which can cause brushes to become stiff or rollers to shed fibers, ruining your finish. Remember, a clean tool is a happy tool, and happy tools last longer.
Storing Tools Properly
Once cleaned, store brushes and rollers in a vertical position or in specially designed containers to prevent bristle damage. I keep my brushes in clear, airtight containers with a damp cloth for short-term storage if I need to stop mid-project. For longer breaks, wrapping brushes in plastic wrap or foil helps keep their shape intact. Proper storage is crucial to avoid deformities that lead to poor paint application.
Using Modern Equipment to Keep Up
Airless sprayers, for example, require regular maintenance of spray tips and seals. I always carry spare tips and a sealing kit, which I replace or repair as soon as I notice any uneven spray pattern or clogging. According to industry experts, routine inspection and part replacement can prevent major breakdowns and ensure consistent coverage. As the trend towards efficient, high-quality finishings continues, investing in and maintaining reliable equipment becomes more critical.
Predicting Tool Trends and Future Innovations
Looking ahead, I predict that innovations like smart sprayers with built-in self-cleaning mechanisms will become more accessible. These advancements will offer painters real-time feedback and automated maintenance alerts, greatly reducing downtime. Staying updated on these trends can save you time and money, and ensure your projects benefit from the latest in painting technology.
How Do I Keep My Painting Equipment in Top Shape Over Time?
The key to maintaining your tools is consistent, thorough cleaning immediately after every use, proper storage, and staying informed about new maintenance techniques. Taking these steps not only improves your current projects but also ensures your equipment performs reliably for years. If you’re ready to elevate your painting game, try implementing the foam shield method for quick brush cleanups today! This small but advanced tip can significantly impact your workflow and finished quality—give it a shot and see the difference.
The Hidden Lessons Behind Perfecting Your Walls
One of the most eye-opening lessons I learned was that patience truly transforms wall finishes. Rushing through the corner sealing process often leads to peeling or bubbling later. Taking a moment to crease, smooth, and seal might seem small, but it’s the difference between a wall that lasts and one that needs premature repair. Additionally, I realized that understanding the nuances of surface prep—not just the obvious cleaning but also sanding and priming—sets the foundation for flawless results. Lastly, embracing modern tools like high-quality seam sealers and considering micro-reinforcements can make your wallpaper and paint hold up against the test of time, even in high-traffic areas.