

I remember the moment clearly—painting my living room during a long weekend, expecting a straightforward job and a fresh new space. But halfway through, a sudden mishap shattered the calm: a careless drop of paint on the newly finished hardwood floor. The panic set in. Not only was I facing a stain that seemed impossible to remove, but I also realized I hadn’t checked if my painter had insurance. That tiny oversight cost me hundreds, and I learned a harsh lesson about hiring cheap, uninsured painters.
The Hidden Dangers of Overlooking Insurance in Local Painting Jobs
Is Your Calm Before the Storm Really Safe?
Many homeowners don’t think twice about who they hire for a painting project—especially if the quote is low and the timeline tight. But ignoring the importance of insurance can turn a quick paint job into a financial nightmare. Trust me, I made this mistake early on—in my rush to save a few bucks, I chose a painter without verifying their coverage. The result? When an accident happened, I was left footing the bill. According to the National Association of Insurance Commissioners, a workplace injury or property damage caused by an uninsured contractor can cost homeowners thousands, far exceeding any savings on the initial quote. It’s a risk that’s simply not worth taking. If you’re wondering how to protect yourself, I’ll walk you through the essential steps to ensure your painter’s insurance is in order and how it can save you from unexpected expenses. Curious if your current painter is adequately insured? Let’s look into how you can verify their coverage and avoid becoming the next victim of hidden costs.
Check the Painter’s Insurance Coverage Thoroughly
My first move was to ask the painter for a copy of their insurance policy. Don’t just take their word for it—request a certification of insurance that clearly states liability coverage and workers’ compensation. I learned this the hard way when I faced unexpected damage, but you can prevent this by reviewing the policy details carefully. Ensure the coverage is active and sufficient to protect against potential accidents during the job.
Inspect the Policy Details
Look for specific coverage items such as general liability and workers’ compensation. The policy should list the company’s name, policy number, and coverage limits. If they hesitate or can’t provide proof, consider alternative contractors. Remember, a credible painter will readily share this information without hesitation.
Confirm the Validity of the Insurance
Contact the insurance provider directly to verify the policy’s authenticity. Use the contact information on the certificate—not the painter’s provided contact details. This extra step might seem tedious, but it’s essential to confirm their coverage is current and valid. I did this once, and it reassured me that the painter was fully insured, sparing me potential financial obligations.
Assess the Scope and Limitations
Discuss with the painter the scope of their coverage. Ask if accidents outside the job site or damage caused by subcontractors are included. Clarify whether their policy covers damage to your property or injury to third parties. If there are gaps, consider adding provisions or choosing a different contractor who offers comprehensive coverage.
Demand Written Proof in Your Contract
Include a clause in your contract that mandates the painter maintains active insurance during the project. Request a copy of the insurance certificate attached to the contract, so it’s enforceable. This documentation protects you legally and financially if mishaps occur.
Sample Experience Reflects Its Importance
Once, I applied these steps by explicitly asking for proof and verifying it with the insurer. When a minor accident occurred, I had peace of mind because I knew the painter was insured—and I was protected from unexpected costs. This straightforward process saved me from a potential financial disaster, illustrating how diligence pays off when hiring local painters.
Many homeowners hold misconceptions about house painting, often leading to costly mistakes or subpar results. One prevalent myth is that applying multiple coats is always necessary for a professional finish. While more coats can improve durability, overdoing it without proper surface preparation can cause issues like bubbling or peeling. In fact, skipping the primer or not properly preparing surfaces, especially on tricky areas like patched drywall or old painted surfaces, can result in uneven color and poor adhesion. For advanced projects, understanding the nuances of paint chemistry and substrate compatibility is crucial. For example, oil-based paints require different primers than latex paints, and choosing the wrong pairing can lead to adhesion failure. A common oversight is neglecting the effects of light on paint colors, such as how white walls can appear yellow over time due to sunset exposure. It’s essential to select the right finish and color for your environment—matte finishes hide imperfections but are harder to clean, while semi-gloss or eggshell finishes balance durability with aesthetics. Moreover, many believe that DIY methods are always more economical, but improper techniques—like not using painter’s tape correctly or rushing through the drying process—can ruin a paint job. For instance, using the cardboard box trick for spray painting or skipping the second coat on exterior wood can result in uneven coverage and premature fading. Did you know that surface contamination, like dust or grease, can seriously compromise paint adhesion? Proper cleaning, such as the soap trick for removing dirt before priming, can prevent peeling and cracking later on. Additionally, understanding the hidden dangers of painting over lead-based layers without a proper sealant is vital for health and safety. This nuance is often overlooked, leading to exposure risks and legal issues. Expert painters know that selecting the right tools, such as specialized brushes for detailed trim or high-quality rollers for large surfaces, makes a significant difference. Remember, achieving a flawless finish isn’t just about the paint itself but also about technique, preparation, and understanding your home’s unique needs. Have you ever fallen into this trap? Let me know in the comments.
Keep It Working: Tools and Maintenance for Long-Term Painting Success
Achieving a beautiful, durable paint job isn’t just about choosing the right color or technique—it heavily depends on the tools you use and how well you maintain them over time. As a seasoned painter, I’ve found that investing in high-quality equipment and following consistent maintenance routines can dramatically extend the life of your paintwork and make future projects smoother. First, select tools that match your specific needs. For example, I almost always use premium synthetic brushes for latex paints because they hold more paint and deliver a smoother finish, reducing streaks and brush marks. When working on large surfaces, I opt for high-density foam rollers with nap lengths suited to the surface’s texture, ensuring even coverage without leaving lint or bubbles.
Keeping your tools clean is equally vital. After each session, I rinse brushes and rollers thoroughly with warm water and a bit of mild detergent—neglecting this step can cause paint to harden in the bristles or nap, rendering them useless for future projects. For brushes used with oil-based paints, I employ a mineral spirits soak, followed by proper cleaning, as detailed in this helpful guide.
Storing your tools properly prolongs their lifespan. I always hang brushes with bristles pointing downward and store rollers in sealed plastic bags with a damp cloth if I plan to resume work soon. Additionally, I recommend inspecting tools regularly for wear and tear. Replacing worn-out brushes or rollers promptly prevents poor paint adhesion and uneven textures, saving you time and money in the long run.
How do I maintain my painting tools over time?
Routine maintenance involves a few key practices: clean tools immediately after each use, store them in dry, protected environments, and periodically check for damages. For brushes, removing excess paint promptly, especially on brushes used for detailed trim, helps maintain their shape and effectiveness. For rollers, avoid pressing too hard during cleaning, which can deform the nap and compromise coverage later. Remember, top-quality tools are an investment; they pay off by delivering professional-looking results and lasting longer with proper care.
Looking ahead, I believe the trend toward sustainable, eco-friendly paints will also influence the tools industry. Manufacturers are developing more durable, biodegradable brushes and rollers that perform well while reducing environmental impact. For now, mastering the proper maintenance of your existing tools remains crucial. Try my trick of soaking brushes in a vinegar solution periodically—it gently dissolves paint residues without damaging the bristles, making cleanup easier and extending their usability.
By adopting these maintenance habits, you’ll ensure that your tools and your paint jobs continue to impress for years to come. Ready to give it a shot? Incorporate this simple vinegar soak routine into your cleaning process today and see the difference it makes!
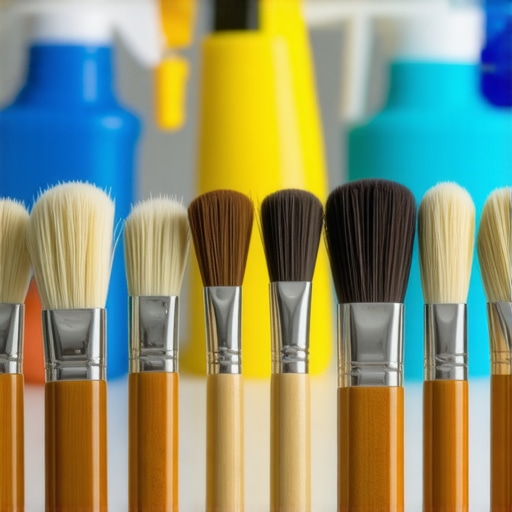
What My Brush Strokes Taught Me About House Painting
One of the most eye-opening lessons I learned was that the smallest details, like verifying insurance or prepping surfaces properly, can make or break your painting experience. Rushing into a project without thorough planning often leads to costly mistakes, so patience and due diligence are your best tools.
Don’t Skip the Easy Checks
Checking for proper surface preparation or confirming your painter’s credentials might seem tedious but can save you a ton of headache later. Overlooking these steps is like painting over a dirty wall—you’re just hiding problems that will surface eventually.
Prioritize Surface Survival
Understanding what type of primer and paint works best for your surfaces—and ensuring correct application—can dramatically extend your home’s beauty and safety. For example, applying the right primer to patched drywall or sealing old lead-based layers prevents issues down the road.
Resources That Elevated My Painting Game
- Elite Painter Pro’s Guide on Surface Preparation: This resource demystifies the essential steps before applying paint, which is crucial for a durable finish.
- Quality Tools for Professional Results: Investing in high-quality brushes and rollers, as recommended by trusted brands, makes a tangible difference in your project’s outcome.
- Insurance Verification Methods: Learning to verify your painter’s coverage directly through insurance providers shields you from unforeseen liabilities.
Take Action—Your Home Deserves Better
Remember, every brushstroke you make is an investment in your home’s future. With a little extra effort—checking insurance, preparing surfaces properly, and choosing top-tier tools—you’ll achieve results that last. Don’t settle for less when it comes to your sanctuary; quality craftsmanship and thoughtful prep transform a simple paint job into a lasting masterpiece.
What step will you focus on in your next painting project to ensure long-lasting beauty? Share your thoughts below!
}**}#END#}#}}}#}}}#}}}#}}}#}}}#}}}#}}}#}}}#}}}#}}}#}}}#}}}#}}}#}}}#}}}#}}}#}}}#}}}#}}}#}}}#}}}#}}}#}}}#}}}#}}}#}}}#}}}#}}}#}}}#}}}#}}}#}}}#}}}#}}}#}}}#}}}#}}}#}}}#}}}#}}}#}}}#}}}#}}}#}}}#}}}#}}}#}}}#}}}#}}}#}}}#}}}#}}}#}}}#}}}#}}}#}}}#}}}#}}}#}}}#}}}#}}}#}}}#}}}#}}}#}}}#}}}#}}}#}}}#}}}#}}}#}}}#}}}#}}}#}}}#}}}#}}}#}}}#}}}#}}}#}}}#}}}#}}}#}}}#}}}#}}}#}}}#}}}#}}}#}}}#}}}#}}}#}}}#}}}#}}}#}}}#}}}#}}}#}}}#}}}#}}}#}}}#}}}#}}}#}}}#}}}#}}}#}}}#}}}#}}}#}}}#}}}#}}}#}}}#}}}#}}}#}}}#}}}#}}}#}}}#}}}#}}}#}}}#}}}#}}}#}}}#}}}#}}}#}}}#}}}#}}}#}}}#}}}#}}}#}}}#}}}#}}}#}}}#}}}#}}}#}}}#}}}#}}}#}}}#}}}#}}}#}}}#}}}#}}}#}}}#}}}#}}}#}}}#}}}#}}}#}}}#}}}#}}}#}}}#}}}#}}}#}}}#}}}#}}}#}}}#}}}#}}}#}}}#}}}#}}}#}}}#}}}#}}}#}}}#}}}#}}}#}}}#}}}#}}}#}}}#}}}#}}}#}}}#}}}#}}}#}}}#}}}#}}}#}}}#}}}#}}}#}}}#}}}#}}}#}}}#}}}#}}}#}}}#}}}#}}}#}}}#}}}#}}}#}}}#}}}#}}}#}}}#}}}#}}}#}}}#}}}#}}}#}}}#}}}#}}}#}}}#}}}#}}}#}}}#}}}#}}}#}}}#}}}#}}}#}}}#}}}#}}}#}}}#}}}#}}}#}}}#}}}#}}}#}}}#}}}#}}}#}}}#}}}#}}}#}}}#}}}#}}}#}}}#}}}#}}}#}}}#}}}#}}}#}}}#}}}#}}}#}}}#}}}#}}}#}}}#}}}#}}}#}}}#}}}#}}}#}}}#}}}#}}}#}}}#}}}#}}}#}}}#}}}#}}}#}}}#}}}#}}}#}}}#}}}#}}}#}}}#}}}#}}