

I remember the first time I casually painted a garage floor without thinking twice about moisture. It was a sunny Saturday, and I was eager to give my space a fresh look. Fast forward a few weeks, and I was staring in disbelief as dark, glossy patches began to bubble and peel. That moment was a lightbulb—realizing I had overlooked one critical step: a proper moisture test. If you’ve ever been tempted to slap on a coat of paint without knowing whether your garage floor is dry enough, you’re not alone. Many homeowners and even some professional painters skip this vital step because they underestimate how much moisture can sabotage their efforts.
So, what’s the big deal? Well, sealing in moisture trapped beneath the surface can cause paint to delaminate, crack, or peel—sometimes within just a few months. It’s frustrating, costly, and can turn your hoped-for shiny new floor into a nightmare. But here’s the good news: with just a bit of knowledge and a simple test, you can avoid these pitfalls entirely.
Why Skipping Moisture Tests Could Ruin Your Garage Floor
Many people jump straight to choosing the right paint or decorative finish, assuming their concrete is ready to go. I made this mistake early on myself, thinking that if the surface looked dry, I was good to go. Turns out, moisture can lurk underneath the surface for months—especially if your garage is below ground level or in a humid climate. According to industry experts, moisture vapor coming up through concrete is one of the leading causes of paint failure in garage floors. In fact, a study by the Painting and Decorating Contractors of America highlights that failure to perform moisture testing is a common reason why epoxy coatings and other sealants fail prematurely.
To prevent wasting time, money, and effort, it’s essential to do a proper moisture test before you even think about painting. The last thing you want is to see your work bubbling up, similar to what I experienced, and realize you could have caught it early. Fortunately, moisture testing isn’t complicated—it’s just often overlooked. Lucky for you, I’ll walk you through the simple steps to ensure your garage floor is truly dry and ready for transformation.
Are you tired of seeing peeling paint that makes your garage look worse than before? Have you faced wasted effort on floors that seemed dry but weren’t? If so, keep reading. We’re about to dive into the practical steps that will save your project from disaster and guarantee a flawless finish.
Get Closer and Feel for Moisture
Start by visually inspecting your garage floor for damp spots or a whitish, powdery residue called efflorescence—these signs indicate moisture issues. Then, press a flat, dry piece of plastic or a piece of painter’s plastic sheeting firmly against the concrete, sealing the edges with painter’s tape or duct tape. Leave it in place for 24 to 48 hours. During this period, avoid any foot traffic on the plastic to prevent false readings.
Interpret the Plastic Test Results
If, after 24-48 hours, you see moisture beads or a dampness on the underside of the plastic, your concrete is too moist for painting. I once applied this test and found water droplets forming beneath the plastic after just one day, which saved me from a disaster. In that case, I waited another week before re-testing, which then showed no moisture, and I was able to proceed confidently.
The Why Behind the Test
This plastic sheet method is like putting a plastic bag over a wet sponge—you can detect unseen moisture hidden beneath the surface. If moisture is present, it can cause paint to bubble or peel, much like how water causes mud to crumble when it dries unevenly. For a more precise measurement, consider using a commercial moisture meter, but the plastic test remains a reliable, inexpensive way for most DIYers.
Handling Moisture if Detected
If you detect moisture, you have a few options. First, increase ventilation by opening doors and windows, or run a dehumidifier to lower humidity levels. Wait until the moisture evaporates, which could take days depending on conditions. During this period, avoid painting or sealing the floor to prevent trapping moisture beneath your coating. For chronic moisture issues, consult a professional for additional solutions like applying a moisture barrier membrane or addressing drainage problems.
Timing Your Painting Session Perfectly
Plan your painting for a day with low humidity and no rain forecast. Check the weather forecast or use online tools like the humidity rule you can find at this resource to determine optimal conditions. Dry, mild days with low dew points are ideal because they minimize moisture around your garage and ensure proper curing of your paint. Remember, even if your floor passes the moisture test, avoid painting during extreme temperature fluctuations, which can also compromise adhesion and finish.Many homeowners assume that choosing the right paint color or brush is the most challenging part of painting projects. However, even seasoned DIYers and some professionals often overlook critical nuances that can make or break a finish. One widespread misconception is that all paints are created equal; in reality, the quality and formulation of the paint significantly influence durability and appearance. High-end paints may cost more but often contain advanced binders and additives that improve adhesion and resistance to environmental factors, as highlighted in a study by Sherwin-Williams. In contrast, inexpensive paints can dry unevenly, crack, or peel prematurely because they lack these enhancements.
Another frequent mistake involves surface preparation. It’s tempting to skip steps like sanding or cleaning, believing the paint will cover imperfections. But improper preparation can lead to uneven textures, bubbles, or peeling down the line. For example, applying paint over dusty or greasy surfaces is a surefire way to create a bond failure. This is especially true for exterior siding, where underlying issues can cause bubbling in sunlight, as discussed in my article on [why your exterior siding is bubbling in the sunlight](https://elitepainterpro.com/why-your-exterior-siding-is-bubbling-in-the-sunlight).
A less obvious pitfall is neglecting temperature and humidity conditions during painting. Many people think that as long as the temperature is above freezing, painting is safe. However, this overlooks the importance of humidity levels. Painting in high humidity can trap moisture in the walls or siding, leading to issues down the road. The recommended humidity for painting is generally below 85%, and you can verify if conditions are suitable using the [humidity rule](https://elitepainterpro.com/the-humidity-rule-when-it-is-actually-too-damp-to-paint-outside). For advanced painters, understanding the dew point and its impact on drying times is crucial, preventing problems like peeling or mildewing.
Beware the trap of fast-curing paints or low-VOC formulas claiming to quicken the process. While they reduce project timelines, they may compromise adhesion, especially on challenging surfaces. A study published in the Journal of Coatings Technology underscores that paint formulations with proper resin content ensure long-term adhesion, which is often sacrificed for quick drying. Rushing the process can cause a finish that looks good initially but deteriorates rapidly.
And finally, one of the most overlooked nuances is choosing the correct tools for each job. Using cheap brushes or rollers might save money upfront but can lead to uneven coats and visible brush marks. The difference between professional and amateur results often boils down to equipment. For a high-quality finish, investing in the right brushes and rollers—like those recommended in [the real difference between cheap and expensive paint brushes](https://elitepainterpro.com/the-real-difference-between-cheap-and-expensive-paint-brushes)—is essential.
Are you guilty of any of these misconceptions? Or maybe you’re already aware and want to refine your technique? Remember, mastering these nuances can elevate your project from ordinary to professional-grade. Don’t forget to check out additional tips on surface preparation and finishing in my other articles. Let me know your experiences in the comments, and share which myths you’ve debunked in your painting journey!
Keep Your Equipment in Peak Condition
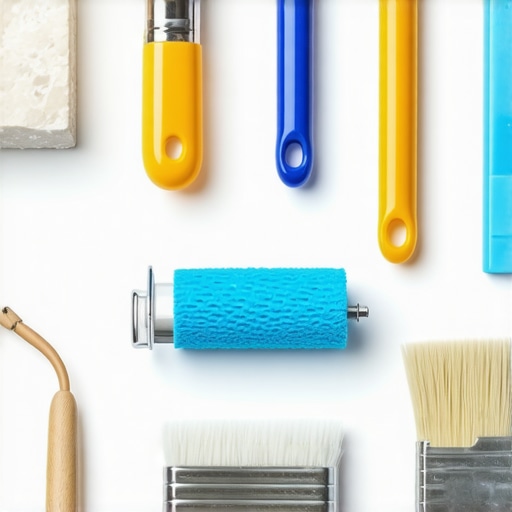
Maintaining your painting tools is critical for achieving consistent, high-quality results over the long term. I swear by using high-grade synthetic brushes, especially for exterior work where durability is key. These brushes maintain their shape longer, provide smoother application, and are easier to clean—saving you money and time on replacements. Regular cleaning immediately after each job with warm water and a few drops of dish soap prevents paint buildup, which can damage bristles and diminish performance. For oil-based paints, I recommend using a solvent like mineral spirits for cleaning; just be sure to wear gloves and work in a well-ventilated area. Remember, properly cleaned tools last longer and deliver cleaner lines, reducing rework.
Additionally, investing in a quality painter’s roller with a cover tailored to the surface’s texture factors significantly into smooth finishes. I prefer microfiber covers for smooth walls because they hold more paint without drips, allowing for better control. For rougher surfaces, a thicker nap roller ensures complete paint coverage and reduces jumping or splattering. Keep your rollers clean in a dedicated bucket or container with a lid to prevent them from drying out between uses, especially during long projects.
For storing leftover paint, I use the mason jar hack—filling clean jars with a tight-fitting lid and sealing them tightly preserves paint’s consistency. This simple method allows you to reuse paint for touch-ups weeks or months later without waste. When it comes to touch-up jobs, ensure you double-check your stored paint to match the original color precisely, perhaps using the dry-down test for color matching without needing old labels or manufacturer details.
Next, check your spray equipment if you use it regularly. Properly rinsing and maintaining spray guns, filters, and hoses prevents clogging and extends their lifespan. Using a compressor with adjustable pressure settings tailored to different coatings results in smoother finishes and less overspray. Consistent maintenance not only prolongs your equipment’s life but also ensures the efficiency and quality of your work.
How do I maintain my painting tools over time?
Developing a routine maintenance schedule includes cleaning your brushes and rollers immediately after each use, inspecting for wear or damage before starting a new project, and storing equipment properly—preferably hung or in protective covers. Check your spray guns regularly for clogs or leaks, and perform a thorough clean with appropriate solvents. Regularly replacing worn-out brushes and roller covers ensures maximum performance. These small investments in maintenance pay off through improved finish quality and longer tool lifespan.
Looking ahead, the trend toward eco-friendly paints is influencing tool design, encouraging manufacturers to develop brushes and rollers that handle new formulations more effectively. Staying updated on these innovations can give you an edge in delivering both quality and environmentally responsible work.
If you want an edge in your results, try implementing the cleaning routine I detailed above, especially the quick cleaning with specialized tools and eco-friendly products. Well-maintained tools are the backbone of professional-quality finishes, saving you time and money in the long run. For more in-depth tips, explore how to choose the right equipment for different surfaces and projects.
Painting Smarter, Not Harder: Lessons From My Learning Curve
One of the toughest lessons I learned in house painting was the importance of patience and thorough preparation, especially when it comes to moisture testing. Rushing to finish a project can lead to costly mistakes—peeling paint, bubbles, and a finish that doesn’t last. Discovering this early in my journey taught me to always check for hidden moisture, which has saved me time and money later. It’s a reminder that taking the extra step, like performing a simple plastic test, can make the difference between a professional-looking floor and a disaster.
Tools That Changed How I Approach Garage Floor Prep
If you’re serious about achieving a durable paint job, I highly recommend investing in a quality moisture meter. While the plastic sheet method is a great DIY approach, a reliable moisture meter provides precise readings, giving you confidence in your results. I trust the [digital moisture meters](https://elitepainterpro.com/why-your-exterior-siding-is-bubbling-in-the-sunlight) because they tell me exactly if my concrete is ready, helping me avoid guesswork. Additionally, keeping your tools in top shape, like brushes and rollers, ensures your finish remains smooth and long-lasting. Proper maintenance routines and understanding which tools suit your project can elevate your work to a professional level.
Your Confidence Boost Starts Now
Remember, mastering moisture testing is just one step toward a flawless garage floor. When you combine diligent preparation with the right tools and timing, your project will reflect the effort you’ve invested. So, next time you’re tempted to skip the moisture test, think about the long-term benefits—avoid costly repairs, save money, and enjoy a beautiful, durable finish. Your garage transformation awaits—start with the right foundation, and the results will speak for themselves.