

I remember the moment clearly. It was a warm spring morning, and I stepped onto my deck, expecting to enjoy a relaxing weekend. Instead, I was met with a bizarre sight: huge strips of my once-beautiful stain peeling away like shedding skin. My heart sank. I’d spent hours choosing the perfect stain, and now, it looked like my deck had caught a horrible case of dandruff.
How Could I Let This Happen?
For a DIYer like me, this was frustrating—and frankly, embarrassing. But it was also a wake-up call. Soon, I discovered that peeling stain isn’t just about aesthetics; it can compromise the integrity of your wood, leading to costly replacements if not addressed early. And believe me, I learned the hard way that simple mistakes—like skipping prep work or applying stain in unsuitable weather—can turn your beautiful project into a peeling nightmare.
Today, I want to share what I’ve learned from my experience so you don’t have to go down the same path. If your deck looks like it’s shedding its skin, stick with me. We’ll uncover the main causes of stain peeling, and I’ll show you practical, easy-to-follow steps to fix and prevent this problem. Trust me, with a little guidance, you can salvage your deck and restore its former glory.
Could Your Deck Be Soaked in Mistakes?
One thing I wish I’d known earlier is that the early stages of staining are critical. For example, I once assumed that just cleaning the deck was enough. But I skipped the step of thoroughly removing old, peeling stain and didn’t check the moisture content of the wood, which I now know is vital. If the wood isn’t properly prepared, even the best stain will peel off in giant strips over time. You can learn more about why proper prep matters in this detailed article.
Understanding these nuances can save you both time and money—and avoid that heartbreaking peeling mess I faced.
Natural weather conditions also play a major role. Applying stain just before rain or during high humidity drastically reduces adhesion. Did you know that the ideal humidity level for staining is between 50-70%? Exceeding this range can cause the stain to fail prematurely, which is part of why my deck peeled so badly this spring.
So, if your own deck has begun peeling in giant strips, know that you’re not alone—and more importantly, you’re not doomed to repeat my mistakes. Up next, I’ll walk you through the essential steps to identify the root of your problem and restore your deck’s beauty for good.
Prepare the Surface for Re-Staining
First, remove all peeling stain by power washing the deck thoroughly, using a stiff-bristled brush for stubborn areas. Let the surface dry completely—at least 48 hours in warm, dry weather—to prevent sealing in moisture. This meticulous cleaning is like scrubbing a dirty pan before baking; skipping it will ensure your new stain won’t adhere properly, leading to quick peeling. I once rushed this step and ended up with peeling again within months, wasting time and money. For best results, check the moisture content with a moisture meter—aim for below 15%. You can see this article for detailed cleaning techniques.
Prime Before Applying Stain
After cleaning, apply a high-quality wood primer designed for decks. Primer acts like a sandwich filling—creating a bond between the wood and the stain that lasts. I applied primer on a humid day once, which caused the stain to peel even faster. Wait for the primer to dry thoroughly, typically 24 hours, and ensure the weather will stay dry for at least 48 hours afterward. This step is especially crucial if the wood has any repairs or previous stain leftover. Primer not only promotes adhesion but also seals in old contaminants that could cause peeling later. For more insights on prepping wood surfaces, visit this guide.
Choose the Right Stain and Climate Conditions
Select a high-quality, all-weather stain suitable for your climate and deck type. Oil-based stains penetrate deeply and usually last longer, but they require proper ventilation and drying times. Water-based stains dry faster but might need more frequent touch-ups. I once opted for a cheap stain during a humid spell, and it peeled within a year. Always check the weather forecast; avoid applying stain if rain is expected within 48 hours, and aim for days with humidity between 50-70%. Applying stain in optimal conditions ensures better adhesion and longer-lasting results. Learn more about optimal staining conditions at this article.
Apply Stain Correctly for Longevity
Use a quality brush or roller designed for decks, working in the direction of the wood grain to prevent streaks. Don’t overload your brush—dip slightly and wipe excess to avoid drips that can cause uneven absorption and peeling. I recommend working in manageable sections to maintain a wet edge, reducing lap marks. Take your time and avoid applying thick coats; multiple thin coats cure better than a single thick one. After staining, keep the area protected from rain and heavy foot traffic for at least 48 hours. Remember, patience here pays off in durability. For advanced techniques, see this guide.
Maintain and Reapply as Needed
Inspect your deck regularly—look for signs of wear or peeling, especially after harsh weather. Clean the surface annually with gentle soap and water, avoiding abrasive scrubbers that can damage the stain. When peeling starts, sand lightly to smooth out rough areas before reapplying stain. If you notice persistent peeling, consider stripping the old stain entirely and re-prepping the surface from scratch to ensure a fresh bond. Proper maintenance can extend the life of your stain for years to come. For more on handling peeling issues, check this article.Many homeowners think they understand the basics of painting—selecting the right color, preparing the surface, and applying a few coats. However, even experienced DIYers often fall prey to subtle pitfalls that compromise long-term results. A common myth is that multiple thin coats are always better than a single thick coat, but in reality, this can lead to uneven drying and peeling if not done correctly. Additionally, some believe that surface preparation is just cleaning; but neglecting proper priming or sanding can cause adhesion issues that surface immediately, leading to peeling or bubbling years later. For example, applying paint over a glossy finish without proper de-glossing is a surefire recipe for uneven bond, which can be easily avoided by knowledgeable surface prep. Did you know that using the wrong type of paint—like water-based over oil-based surfaces without proper priming—can cause persistent adhesion failures? Experts like those cited in industry studies warn that mismatch of paint types drastically reduces durability, even if the surface initially looks fine. Be cautious of shortcuts like skipping primer, which might seem negligible but is actually one of the leading causes of peeling and cracking down the line. Also, many overlook climate considerations; painting during high humidity or extreme cold can trap moisture, resulting in blistering and peeling. This is why understanding the environmental nuances can save you time and money.
Another nuance many miss is finishing techniques—using the wrong brush or roller can leave texture inconsistencies or remove the fresh coat of paint prematurely, especially if the technique isn’t suited for your surface. Did you know that synthetic brushes are often terrible for oil-based paints, causing uneven application and environmental contamination? It’s crucial to match your tools with your paint type for the best finish.
For those tackling exterior projects, the minute details matter even more. Applying paint over wet or unprepared wood can cause bubbling and cracking early on, a major mistake that shortens lifespan. Even the choice of finish—matte, eggshell, satin, or semi-gloss—affects how well the paint resists dirt and humidity, impacting long-term maintenance. A recent study highlights that improper finish selection reduces washability and increases the need for early repainting.
Don’t forget, peeling or bubbling can also be a symptom of deeper issues like moisture infiltration or poor ventilation, which won’t be fixed by paint alone. Always address underlying problems before repainting, or you’ll waste your effort and money.
In summary, let’s dig deeper into the pitfalls that can sabotage your painting projects, and ensure you’re equipped with the knowledge to do it right the first time. Has your experience taught you lessons about surface prep or paint selection? Share your story in the comments! Remember, proper preparation and understanding advanced nuances are key to achieving a professional-looking, lasting finish.
Keep It Working: Essential Tools for Long-Lasting Results
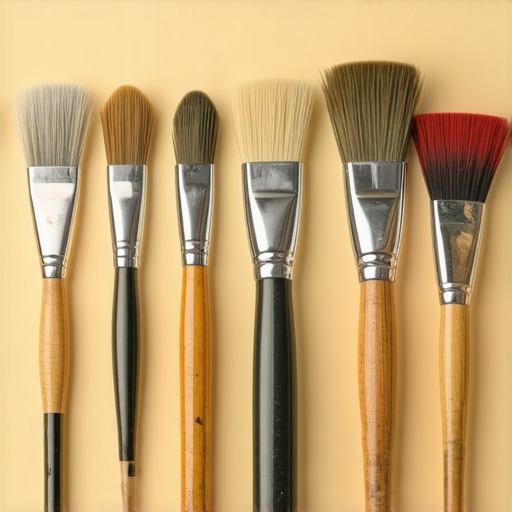
Achieving a professional-quality paint job isn’t just about choosing the right color or proper surface prep—it’s equally about using the right tools and maintaining them properly over time. High-quality brushes, sprayers, and cleaning equipment can make the difference between a smooth, durable finish and a job that chips or peels prematurely. I personally swear by a set of natural bristle brushes for oil-based paints, which offer superior control and less streaking. Regularly cleaning your tools after each use prevents old paint buildup, ensuring optimal performance on your next project, and using a shop-vac or compressed air to remove dust from brushes keeps them in top shape. Staying organized with tool racks or dedicated storage prevents accidental damage and makes sure your gear is ready for the next project.
Investing in the right equipment, like a quality electric paint sprayer, can speed up large projects while ensuring an even coat. However, it’s critical to maintain the sprayer properly: flush it after each use and check the filters and nozzles regularly. This proactive maintenance extends the lifespan of your tools and guarantees consistent application quality, ultimately saving time and money.
How do I maintain my tools over time?
Proper maintenance begins with thorough cleaning immediately after each project. Use the recommended solvents—water for latex paints and mineral spirits for oil-based paints—to remove residuals. Store brushes and rollers in a dry, dust-free environment to prevent mold and corrosion. Periodically inspect your tools for wear, replacing worn foam rollers or frayed brushes, which can mar your finish. Applying a light coat of oil or conditioner on metal parts prevents rust and corrosion—especially important for tools stored in humid areas. For sprayers, thin out paint properly to avoid clogging and follow the manufacturer’s maintenance schedule rigorously, as outlined in their technical documentation. Regular maintenance of your tools not only preserves their performance but also extends their lifespan, making every project easier and more reliable.
Thinking about the future of painting tools, trends like smart sprayers with automatic clog detection or self-cleaning brushes are starting to emerge, promising even better maintenance and performance. These innovations could dramatically reduce prep time and hassle, making professional-grade results accessible to DIY painters alike.
Next time you undertake a painting project, challenge yourself to implement a monthly tool maintenance routine. For instance, try applying a protective oil to your brushes after cleaning, as recommended by industry experts. That small investment will pay off with smoother application and longer-lasting tools.
Remember, quality tools combined with consistent maintenance are the backbone of durable, beautiful paintwork. So go ahead—give your tools the care they deserve and see how much longer your projects will stay looking fresh and flawless. If you’re interested in advanced tips for maintaining your painting equipment, explore this article about wall cleaning tools, or experiment with cleaning techniques from industry guides for best results.
What I Wish I Knew Before My First Deck Stain
- Skipping proper surface preparation, like thoroughly removing old stain, almost guaranteed future peeling. Learning to use a moisture meter helped me identify the optimal time to stain and avoid mishaps like peeling in sheets.
- The weather truly controls staining success. I ignored humidity levels, applying stain during high humidity which led to premature failure. Now, understanding that ideal humidity is between 50-70% makes all the difference.
- Priming is often overlooked but is essential. I used to assume cleaning was enough, but priming with a quality deck primer gave my stain the better grip it needed for longevity.
- Applying stain in the right conditions is crucial. Waiting for dry days without rain and temperatures above 50°F ensures better adhesion, something I neglected early on, resulting in peeling and fading.
- Multi-coat application, with thin layers, beats thick coats. Patience in application means longer-lasting results. I learned that rushing leads to peeling within months.
Key Resources That Saved My Deck
- Moisture meters: A simple tool that helped me determine the right time to stain. Trust me, checking the moisture content prevents lots of headaches. Find out more at this article.
- High-quality deck primers: They create a lasting bond between wood and stain. Choosing the right primer for your climate improved my deck’s durability. Learn about primer choices in this guide.
- Weather forecasting apps: These helped me plan staining days, avoiding rain and high humidity. Proper scheduling is vital for lasting results, and you can see how to plan effectively at this resource.
- Low-lap coats techniques: Multiple thin coats, applied with a wet edge, prevented my previous streaky finishes. Mastering this technique made my stain absorb evenly, boosting longevity. Check out this article for expert tips.
Your Turn to Transform Your Deck
Painting and staining projects often feel daunting, but with the right knowledge and tools, you can create a finish that lasts for years. Remember, the key lies in proper prep, choosing suitable products, and timing your work precisely.
If my lessons have inspired you to tackle your own deck care or painting projects, I’d love to hear your story. Have you ever experienced peeling stain or struggled with weather conditions? Share your experiences below and let’s learn from each other. Your next project can be smoother and more successful—start with the right approach today!