

Ever found yourself opening your freshly painted kitchen cabinets only to be greeted by a tacky, sticky surface? I mean, you spent so much time selecting the perfect color, carefully applying the paint, and now, just a few weeks later, you’re stuck with a grimy-looking surface that sticks to your hands and feels downright unpleasant. It’s a frustrating problem that I encountered personally, and I bet many homeowners have faced the same disheartening experience.
Understanding the Sticky Situation
When my cabinets first felt sticky, I thought I had done something wrong. Turns out, I was just unaware of the sneaky mistakes that lead to this problem. The good news? It’s a common issue with straightforward solutions. Today, we’re going to uncover why your cabinets feel this way and, more importantly, how to fix it so your kitchen feels fresh and inviting once again.
Is Sticky Paint Just a Myth or Reality?
Some folks dismiss sticky cabinets as a minor annoyance, but it can actually be a sign of poor-quality paint or improper application. An early mistake I made was trusting a cheap paint that promised to be ‘easy to clean,’ but in reality, it never cured properly. This is why I always recommend learning about the quality of your paint, such as checking contractor-grade paint before starting your project.
Research shows that improper curing or using low-quality paints can leave a residue that remains tacky long after drying, creating that sticky feeling. So, what causes this when paint should ideally be hard and smooth? Stick around, because next, we’ll explore the steps to solve this issue—starting with identifying the root cause and ending with practical tips to restore your cabinets’ elegant finish.
Sanding Before You Repaint
Start by gently sanding the sticky surface with fine-grit sandpaper (220-grit works well). This helps strip away the tacky top layer and creates a rough surface for the new paint to grip. I once tried to skip this step, thinking the paint would bond on its own, but the result was a patchy finish that quickly peeled. Sanding is crucial for proper adhesion.
Cleaning Thoroughly to Remove Residues
After sanding, wipe down the cabinets with a damp cloth or tack cloth to eliminate dust and debris. Use a mixture of warm water and a mild detergent, or a mix of vinegar and water for an eco-friendly cleanup. This step is vital because leftover dust or grease repels paint. I once missed this and painted over a greasy spot, which caused bubbling later. Ensuring the surface is spotless guarantees a smooth finish.
Testing the Surface with Alcohol
Next, perform the rubbing alcohol test to determine if your existing paint is oil- or water-based. Dampen a cloth with isopropyl alcohol and wipe a small area. If the paint softens or comes off, it’s oil-based. Knowing this helps choose the right primer. I found out mine was latex after this test, saving me from applying the wrong primer and ending up with sticky patches.
Choosing the Right Primer
Select a high-quality, bonding primer suited to your paint type. For glossy or oil-based paints, a de-glosser or oil-based primer works best. For latex, a good latex primer will provide a solid base. Primer prevents the new paint from peeling or remaining sticky. Applying it evenly with a brush or roller ensures proper coverage. I used a roller for efficiency, avoiding streaks or missed spots.
Applying the Paint Correctly
Use high-quality, 100% nylon or polyester brushes for smooth application. It’s better to have a set of brushes (like these quality brushes) rather than cheap ones that shed bristles. When painting, follow the grain and avoid overloading the brush to prevent drips. Use thin coats—multiple lightly brushed layers dry faster and resist tackiness better than thick coats.
Drying and Curing Time
Allow each coat to fully dry—usually 2–4 hours—before applying the next. Ensure good ventilation to speed this process. Remember, the painted surface only cures fully after several days; avoid heavy contact during this period. I once rushed to open my cabinets, which caused smudges and a sticky feeling later, so patience here pays off.
Finishing with a Clear Coat (Optional)
For extra durability and a smooth feel, consider applying a clear polyurethane or topcoat suitable for cabinetry. This adds a hardened surface that resists stickiness and fingerprints. Follow the manufacturer instructions carefully. If you’re unsure about matching sheen levels, learn how to match existing paint colors without a manufacturer’s name here.
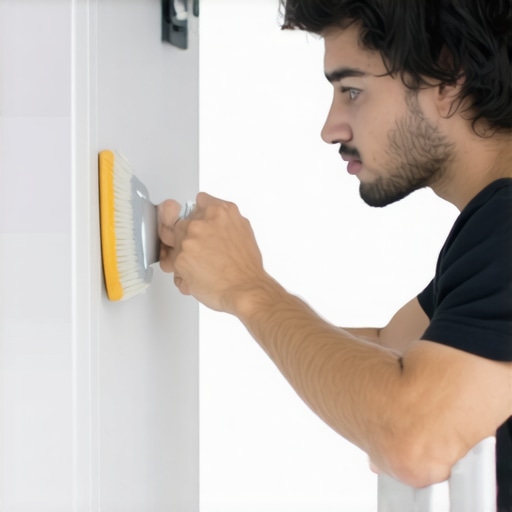
Many homeowners believe that selecting the right paint color and applying a few coats guarantees a flawless finish, but in reality, there’s a complex array of nuances that most overlook. One common myth is that all paints are created equal; however, the quality and formulation can dramatically influence the durability and appearance of your walls. For example, using inexpensive, watered-down contractor-grade paint can lead to disappointing results, as detailed in this insightful guide. Moreover, many assume that a single coat suffices for vibrant, lasting color, but proper painting demands meticulous surface preparation—including sanding, cleaning, and priming—to ensure adhesion and longevity, especially over glossy or stained surfaces.
One widespread mistake during painting projects is neglecting to test the existing paint’s compatibility with new coats. Performing the rubbing alcohol test can reveal whether you’re dealing with oil- or water-based paint, guiding your choice of primer and topcoat. Skipping this step often results in poor adhesion or a sticky, uneven finish that detracts from your home’s aesthetic.
Advanced Questions: Why Do Some Paints Still Fail Despite Proper Application?
Even with perfect techniques, some paints fail prematurely. Environmental factors, such as high humidity or temperature fluctuations, play a significant role. For instance, painting in humid conditions can trap moisture beneath the new coating, leading to bubbling and flaking, as explored here. Additionally, substrate issues like residual stains or previous paint incompatibilities can cause adhesion failures if not addressed thoroughly. Proper surface prep, including stain sealing and choosing compatible paints, is essential to prevent these problems. Experts emphasize that understanding the nuances—like paint sheen levels and drying times—is crucial for superior results and reducing costly rework later. Research from industry specialists reveals that neglecting these details can halve the lifespan of your paint job, making it a false economy to ignore them. So, before your next project, dig deeper into the specifics rather than relying solely on surface-level tips. Remember, a good paint job isn’t just about appearance; it’s about understanding and managing these hidden nuances. Have you ever fallen into this trap? Let me know in the comments.
Keep It Working: Essential Tools for Professional Results
Achieving a flawless, durable paint job isn’t just about choosing the right paint; it largely depends on the tools you wield and how you maintain them. I personally swear by high-quality brushes like the best brushes on the market, because they hold more paint, distribute it evenly, and last longer when properly cleaned. Using inferior brushes may save money initially, but they shed bristles and produce streaks, leading to uneven finishes and higher rework costs.
In terms of rollers, I opt for those with tightly woven nap suitable for the surface type. For smooth surfaces, a short nap roller offers a sleek finish, while textured surfaces demand a thicker nap. Matching the roller to your wall texture streamlines the process and results in cleaner lines, saving you time and effort. Remember, always clean and store your tools correctly after each use to extend their lifespan, following methods like soaking brushes in vinegar, which can revive stiff brushes.
For achieving uniform color and avoiding mismatch, I use a double-priming technique that ensures better adhesion, especially over glossy surfaces. This practice, coupled with quality tools, minimizes the chances of peel or tackiness over time, making your project more resilient.
How do I maintain my painting tools over time?
Proper maintenance extends your tools’ life significantly. Wash brushes immediately with warm, soapy water if used with latex paints, or mineral spirits for oil-based paints. After cleaning, reshape the bristles and store brushes flat or hanging to prevent warping. For rollers, wash thoroughly and let dry completely before storing. A handy trick I employ is keeping brushes moist overnight in a five-gallon bucket—this prevents the bristles from hardening, especially when working on long projects. Regularly inspecting your tools for wear and tear before starting a session reduces unexpected failures, keeping your job smooth and professional.
Looking ahead, new tool innovations such as smart brushes capable of measuring paint thickness or digital rollers that adjust nap on the fly might become more mainstream. Staying updated on these advances can give you a competitive edge in local painting jobs or DIY projects.
Want to boost your efficiency? Try the cardboard template trick for pristine edges—it’s a game-changer for neat, professional-looking results with minimal effort. Incorporating high-quality tools and proper maintenance not only cuts down on rework but also ensures your finish remains vibrant and smooth for years to come. Invest now in the right gear, and your projects will thank you in the long run.
Scaling and Long-Term Results
Consistency is king in house painting. By maintaining your tools well and investing in durable equipment, you set the stage for long-lasting results. Regularly inspecting your brushes and rollers, replacing worn-out parts, and cleaning thoroughly after each project keeps your tools at peak performance. This approach reduces the need for frequent touch-ups and helps your paintjobs withstand the test of time, especially in high-traffic areas or challenging climates.
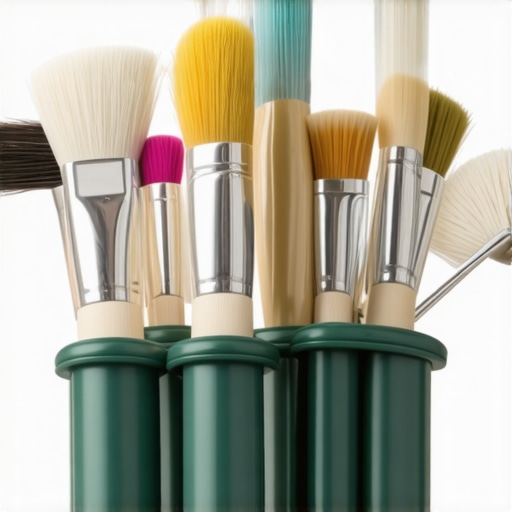
In the end, the secret to a lasting paint job lies in both selecting quality tools tailored to your specific project and dedicating time to maintain them. Not only does this save money in the long run, but it also ensures your work looks professional and stands the test of time. Remember, the right tools, combined with thoughtful care, are the backbone of any successful painting endeavor.
Lessons That Changed My Approach to Painting
- Realizing that surface preparation is more crucial than I thought, I now always prioritize thorough sanding and cleaning before painting, which prevents many sticky finish issues.
- Understanding the importance of testing my existing paint with the rubbing alcohol test saved me from choosing incompatible primers, avoiding future adhesion problems.
- Learning that environmental conditions like humidity can hinder curing taught me to schedule painting projects during optimal weather, ensuring durability.
- Knowing that quality brushes and proper tool maintenance make a significant difference in achieving smooth, professional-looking results has transformed my approach to tool selection and care.
- Recognizing common myths, such as all paints being equal, has made me more diligent in choosing high-quality products tailored to my specific surface, saving time and money in the long run.
Tools and Resources I Trust for Painting Success
- High-quality brushes: I swear by the best brushes on the market because they distribute paint evenly and last longer when properly maintained.
- Professional primers: I rely on durability and adhesion, often choosing contractor-grade primers for challenging surfaces.
- Painting tutorials and guides: Websites like expert blogs help me understand nuances like sheen matching and techniques for difficult surfaces.
- Tool cleaning hacks: The vinegar trick for reviving brushes has saved me money and time, keeping my tools in top shape.
Your Next Step in Achieving Flawless Cabinet Finish
Embarking on a painting project with the right knowledge and tools isn’t just about aesthetics—it’s about creating a durable, beautiful space that lasts. The insights gained here can elevate your skills and help you avoid common pitfalls like sticky surfaces or flaky paint. Remember, every brushstroke is an investment; treat your tools with care and understand the nuances of every surface you work on. Don’t wait for problems to surface—start with the essentials today, and watch your cabinets transform into timeless statements of craftsmanship. What’s your biggest challenge when painting cabinets, and how do you plan to overcome it? Share your thoughts below!”}#}#}#}#}#}#}#}#}#}#}#}#}#}#}#}#}#}#}#}#}#}#}#}#}#}#}#}#}#}#}#}#}#}#}#}#}#}#}#}#}#}#}#}#}#}#}#}#}#}#}#}#}#}#}#}#}#}#}#}#}#}#}#}#}#}#}#}#}#}#}#}#}#}#}#}#}#}#}#}#}#}#}#}#}#}#}#}#}#}#}#}#}#}#}#}#}#}#}#}#}#}#}#}#}#}#}#}#}#}#}#}#}#}#}#}#}#}#}#}#}#}#}#}#}#}#}#}#}#}#}#}#}#}#}#}#}#}#}#}#}#}#}#}#}#}#}#}#}#}#}#}#}#}#}#}#}#}#}#}#}#}#}#}#}#}#}#}#}#}#}#}#}#}#}#}#}#}#}#}#}#}#}#}#}#}#}#}#}#}#}#}#}#}#}#}#}#}#}#}#}#}#}#}#}#}#}#}#}#}#}#}#}#}#}#}#}#}#}#}#}#}#}#}#}#}#}#}#}#}#}#}#}#}#}#}#}#}#}#}#}#}#}#}#}#}#}#}#}#}#}#}#}#}#}#}#}#}#}#}#}#}#}#}#}#}#}#}#}#}#}#}#}#}#}#}#}#}#}#}#}#}#}#}#}#}#}#}#}#}#}#}#}#}#}#}#}#}#}#}#}#}#}#}#}#}#}#}#}#}#}#}#}#}#}#}#}#}#}#}#}#}#}#}#}#}#}#}#}#}#}#}#}#}#}#}#}#}#}#}#}#}#}#}#}#}#}#}#}#}#}#}#}#}#}#}#}#}#}#}#}#}#}#}#}#}#}#}#}#}#}#}#}#}#}#}#}#}#}#}#}#}#}#}#}#}#}#}#}#}#}#}#}#}#}#}#}#}#}#}#}#}#}#}#}#}#}#}#}#}#}#}#}#}#}#}#}#}#}#}#}#}#}#}#}#}#}#}#}#}#}#}#}#}#}#}#}#}#}#}#}#}#}#}#}#}#}#}#}#}#}#}#}#}#}#}#}#}#}#}#}#}#}#}#}#}#}#}#}#}#}#}#}#}#}#}#}#}#}#}#}#}#}#}#}#}#}#}#}#}#}#}#}#}#}#}#}#}#}#}#}#}#}#}#}#}#}#}#}#}#}#}#}#}#}#}#}#}#}#}#}#}#}#}#}#}#}#}#}#}#}#}#}#}#}#}#}#}#}#}#}#}#}#}#}#}#}#}#}#}#}#}#}#}#}#}#}#}#}#}#}#}#}#}#}#}#}#}#}#}#}#}#}#}#}#}#}#}#}#}#}#}#}#}#}#}#}#}#}#}#}#}#}#}#}#}#}#}#}#}#}#}#}#}#}#}#}#}#}#}#}#}#}#}#}#}#}#}#}#}#}#}#}#}#}#}#}#}#}#}#}#}#}#}#}#}#}#}#}#}#}#}#}#}#}#}#}#}#}#}#}#}#}#}#}#}#}#}#}#}#}#}#}#}#}#}#}#}#}#}#}#}#}#}#}#}#}#}#}#}#}#}#}#}#}#}#}#}#}#}#}#}#}#}#}#}#}#}#}#}#}#}#}#}#}#}#}#}#}#}#}#}#}#}#}#}#}#}#}#}#}#}#}#}#}#}#}#}#}#}#}#}#}#}#}#}#}#}#}#}#}#}#}#}#}#}#}#}#}#}#}#}#}#}#}#}#}#}#}#}#}#}#}#}#}#}#}#}#}#}#}#}#}#}#}#}#}#}#}#}#}#}#}#}#}#}#}#}#}#}#}#}#}#}#}#}#}#}#}#}#}#}#}#}#}#}#}#}#}#}#}#}#}#}#}#}#}#}#}#}#}#}#}#}#}#}#}#}#}#}#}#}#}#}#}#}#}#}#}#}#}#}#}#}#}#}#}#}#}#}#}#}#}#}#}#}#}#}#}#}#}#}#}#}#}#}#}#}#}#}#}#}#}#}#}#}#}#}#}#}#}#}#}#}#}#}#}#}#}#}#}#}#}#}#}#}#}#}#}#}#}#}#}#}#}#}#}#}#}#}#}#}#}#}#}#}#}#}#}#}#}#}#}#}#}#}#}#}#}#}#}#}#}#}#}#}#}#}#}#}#}#}#}#}#}#}#}#}#}#}#}#}#}#}#}#}#}#}#}#}#}#}#}#}#}#}#}#}#}#}#}#}#}#}#}#}#}#}#}#}#}#}#}#}#}#}#}#}#}#}#}#}#}#}#}#}#}#}#}#}#}#}#}#}#}#}#}#}#}#}#}#}#}#}#}#}#}#}#}#}#}#}#}#}#}#}#}#}#}#}#}#}#}#}#}#}#}#}#}#}#}#}#}#}#}#}#}#}#}#}#}#}#}#}#}#}#}#}#}#}#}#}#}#}#}#}#}#}#}#}#}#}#}#}#}#}#}#}#}#}#}#}#}#}#}#}#}#}#}#}#}#}#}#}#}#}#}#}#}#}#}#}#}#}#}#}#}#}#}#}#}#}#}#}#}#}#}#}#}#}#}#}#}#}#}#}#}#}#}#}#}#}#}#}#}#}#}#}#}#}#}#}#}#}#}#}#}#}#}#}#}#}#}#}#}#}#}#}#}#}#}#}#}#}#}#}#}#}#}#}#}#}#}#}#}#}#}#}#}#}#}#}#}#}#}#}#}#}#}#}#}#}#}#}#}#}#}#}#}#}#}#}#}#}#}#}#}#}#}#}#}#}#}#}#}#}#}#}#}#}#}#}#}#}#}#}#}#}#}#}#}#}#}#}#}#}#}#}#}#}#}#}#}#}#}#}#}#}#}#}#}#}#}#}#}#}#}#}#}#}#}#}#}#}#}#}#}#}#}#}#}#}#}#}#}#}#}#}#}#}#}#}#}#}#}#}#}#}#}#}#}#}#}#}#}#}#}#}#}#}#}#}#}#}#}#}#}#}#}#}#}#}#}#}#}#}#}#}#}#}#}#}#}#}#}#}#}#}#}#}#}#}#}#}#}#}#}#}#}#}#}#}#}#}#}#}#}#}#}#}#}#}#}#}#}#}#}#}#}#}#}#}#}#}#}#}#}#}#}#}#}#}#}#}#}#}#}#}#}#}#}#}#}#}#}#}#}#}#}#}#}#}#}#}#}#}#}#}#}#}#}#}#}#}#}#}#}#}#}#}#}#}#}#}#}#}#}#}#}#}#}#}#}#}#}#}#}#}#}#}#}#}#}#}#}#}#}#}#}#}#}#}#}#}#}#}#}#}#}#}#}#}#}#}#}#}#}#}#}#}#}#}#}#}#}#}#}#}#}#}#}#}#}#}#}#}#}#}#}#}#}#}#}#}#}#}#}#}#}#}#}#}#}#}#}#}#}#}#}#}#}#}#}#}#}#}#}#}#}#}#}#}#}#}#}#}#}#}#}#}#}#}#}#}#}#}#}#}#}#}#}#}#}#}#}#}#}#}#}#}#}#}#}#}#}#}#}#}#}#}#}#}#}#}#}#}#}#}#}#}#}#}#}#}#}#}#}#}#}#}#}#}#}#}#}#}#}#}#}#}#}#}#}#}#}#}#}#}#}#}#}#}#}#}#}#}#}#}#}#}#}#}#}#}#}#}#}#}#}#}#}#}#}#}#}#}#}#}#}#}#}#}#}#}#}#}#}#}#}#}#}#}#}#}#}#}#}#}#}#}#}#}#}#}#}#}#}#}#}#}#}#}#}#}#}#}#}#}#}#}#}#}#}#}#}#}#}#}#}#}#}#}#}#}#}#}#}#}#}#}#}#}#}#}#}#}#}#}#}#}#}#}#}#}#}#}#}#}#}#}#}#}#}#}#}#}#}#}#}#}#}#}#}#}#}#}#}#}#}#}#}#}#}#}#}#}#}#}#}#}#}#}#}#}#}#}#}#}#}#}#}#}#}#}#}#}#}#}#}#}#}#}#}#}#}#}#}#}#}#}#}#}#}#}#}#}#}#}#}#}#}#}#}#}#}#}#}#}#}#}#}#}#}#}#}#}#}#}#}#}#}#}#}#}#}#}#}#}#}#}#}#}#}#}#}#}#}#}#}#}#}#}#}#}#}#}#}#}#}#}#}#}#}#}#}#}#}#}#}#}#}#}#}#}#}#}#}#}#}#}#}#}#}#}#}#}#}#}#}#}#}#}#}#}#}#}#}#}#}#}#}#}#}#}#}#}#}#}#}#}#}#}#}#}#}#}#}#}#}#}#}#}#}#}#}#}#}#}#}#}#}#}#}#}#}#}#}#}#}#}#}#}#}#}#}#}#}#}#}#}#}#}#}#}#}#}#}#}#}#}#}#}#}#}#}#}#}#}#}#}#}#}#}#}#}#}#}#}#}#}#}#}#}#}#}#}#}#}#}#}#}#}#}#}#}#}#}#}#}#}#}#}#}#}#}#}#}#}#}#}#}#}#}#}#}#}#}#}#}#}#}#}#}#}#}#}#}#}#}#}#}#}#}#}#}#}#}#}#}#}#}#}#}#}#}#}#}#}#}#}#}#}#}#}#}#}#}#}#}#}#}#}#}#}#}#}#}#}#}#}#}#}#}#}#}#}#}#}#}#}#}#}#}#}#}#}#}#}#}#}#}#}#}#}#}#}#}#}#}#}#}#}#}#}#}#}#}#}#}#}#}#}#}#}#}#}#}#}#}#}#}#}#}#}#}#}#}#}#}#}#}#}#}#}#}#}#}#}#}#}#}#}#}#}#}#}#}#}#}#}#}#}#}#}#}#}#}#}#}#}#}#}#}#}#}#}#}#}#}#}#}#}#}#}#}#}#}#}#}#}#}#}#}#}#}#}#}#}#}#}#}#}#}#}#}#}#}#}#}#}#}#}#}#}#}#}#}#}#}#}#}#}#}#}#}#}#}#}#}#}#}#}#}#}#}#}#}#}#}#}#}#}#}#}#}#}#}#}#}#}#}#}#}#}#}#}#}#}#}#}#}#}#}#}#}#}#}#}#}#}#}#}#}#}#}#}#}#}#}#}#}#}#}#}#}#}#}#}#}#}#}#}#}#}#}#}#}#}#}#}#}#}#}#}#}#}#}#}#}#}#}#}#}#}#}#}#}#}#}#}#}#}#}#}#}#}#}#}#}#}#}#}#}#}#}#}#}#}#}#}#}#}#}#}#}#}#}#}#}#}#}#}#}#}#}#}#}#}#}#}#}#}#}#}#}#}#}#}#}#}#}#}#}#}#}#}#}#}#}#}#}#}#}#}#}#}#}#}#}#}#}#}#}#}#}#}#}#}#}#}#}#}#}#}#}#}#}#}#}#}#}#}#}#}#}#}#}#}#}#}#}#}#}#}#}#}#}#}#}#}#}#}#}#}#}#}#}#}#}#}#}#}#}#}#}#}#}#}#}#}#}#}#}#}#}#}#}#}#}#}#}#}#}#}#}#}#}#}#}#}#}#}#}#}#}#}#}#}#}#}#}#}#}#}#}#}#}#}#}#}#}#}#}#}#}#}#}#}#}#}#}#}#}#}#}#}#}#}#}#}#}#}#}#}#}#}#}#}#}#}#}#}#}#}#}#}#}#}#}#}#}#}#}#}#}#}#}#}#}#}#}#}#}#}#}#}#}#}#}#}#}#}#}#}#}#}#}#}#}#}#}#}#}#}#}#}#}#}#}#}#}#}#}#}#}#}#}#}#}#}#}#}#}#}#}#}#}#}#}#}#}#}#}#}#}#}#}#}#}#}#}#}#}#}#}#}#}#}#}#}#}#}#}#}#}#}#}#}#}#}#}#}#}#}#}#}#}#}#}#}#}#}#}#}#}#}#}#}#}#}#}#}#}#}#}#}#}#}#}#}#}#}#}#}#}#}#}#}#}#}#}#}#}#}#}#}#}#}#}#}#}#}#}#}#}#}#}#}#}#}#}#}#}#}#}#}#}#}#}#}#}#}#}#}#}#}#}#}#}#}#}#}#}#}#}#}#}#}#}#}#}#}#}#}#}#}#}#}#}#}#}#}#}#}#}#}#}#}#}#}#}#}#}#}#}#}#}#}#}#}#}#}#}#}#}#}#}#}#}#}#}#}#}#}#}#}#}#}#}#}#}#}#}#}#}#}#}#}#}#}#}#}#}#}#}#}#}#}#}#}#}#}#}#}#}#}#}#}#}#}#}#}#}#}#}#}#}#}#}#}#}#}#}#}#}#}#}#}#}#}#}#}#}#}#}#}#}#}#}#}#}#}#}#}#}#}#}#}#}#}#}#}#}#}#}#}#}#}#}#}#}#}#}#}#}#}#}#}#}#}#}#}#}#}#}#}#}#}#}#}#}#}#}#}#}#}#}#}#}#}#}#}#}#}#}#}#}#}#}#}#}#}#}#}#}#}#}#}#}#}#}#}#}#}#}#}#}#}#}#}#}#}#}#}#}#}#}#}#}#}#}#}#}#}#}#}#}#}#}#}#}#}#}#}#}#}#}#}#}#}#}#}#}#}#}#}#}#}#}#}#}#}#}#}#}#}#}#}#}#}#}#}#}#}#}#}#}#}#}#}#}#}#}#}#}#}#}#}#}#}#}#}#}#}#}#}#}