

Sometime during my early days of DIY painting, I distinctly recall a wall that looked perfectly smooth and ready to go. Confidently, I applied primer and started painting, only to discover later that dust particles had settled right into the paint, causing unsightly bumps and uneven textures. That lightbulb moment revealed a simple yet often-overlooked step: checking for dust before priming. Now, I swear by a habit that’s become my secret weapon for flawless walls—the Rub Test. If you’ve ever faced similar frustrations, stick around, because today I’m going to show you how a little plastic and some firm pressure can save your project from disaster.
Why Dust on Walls Can Ruin Your Painting Results
Dust and debris on walls might seem minor—after all, dust is everywhere, right? But in reality, even a tiny speck can sabotage your paint job. When dust particles are trapped under a fresh coat, they create bumps, uneven textures, and sometimes even peeling over time. This not only wastes your time and money but can also undermine your confidence in your DIY skills. The key to achieving professional-looking results, especially when adding a sleek primer or topcoat, is to ensure your surface is spotless beforehand.
Early on, I made the mistake of skipping this crucial step, thinking a quick wipe down was enough. Turns out, dust can settle onto walls rapidly, especially in dry or high-traffic areas. An even better approach I’ve learned? The Rub Test. It’s a straightforward method where you gently press a piece of plastic—like a plastic bag or a glue spreader—against the wall, and then inspect what it picks up. If dust adheres to the plastic, it’s a sign that your wall isn’t ready for primer yet. To minimize surprises and rework, I encourage you to incorporate this simple test into your prep routine.
Curious if your walls are truly clean? I’ve found that using this technique consistently makes a huge difference, and it’s backed by painting experts who emphasize meticulous surface prep. For instance, proper wall preparation prevents patchy results.
Is the Rub Test Really Necessary on Every Project?
Initially, I thought skipping this step wouldn’t matter much—big mistake. I learned the hard way that dust can be invisible to the naked eye but glaringly apparent once paint dries. Early mishaps taught me that taking the time for this quick check ensures fewer touch-ups and reapplications later. Trust me, with just a few seconds of pressing and inspecting, you can dramatically improve your final outcome.
Do you routinely face issues with dust or particles ruining your freshly painted walls? If so, theRub Test might just be the game-changer you need. Now, let’s dive into how exactly to perform this simple but powerful test and stay ahead of dust to keep your walls looking impeccable.
Performing the Rub Test Step-by-Step
Start by gathering a piece of plastic, like a shopping bag or a plastic spreader from your toolbox. I recommend using a sturdy, wrinkle-free piece to get consistent results. Stand close to the wall, ensuring good lighting, and press the plastic firmly against the surface with your hand, applying moderate pressure—think of pressing down to pick up dust particles like a sticker. After a few seconds, lift the plastic and examine what you’ve collected.
Interpreting the Results Accurately
If the plastic comes away with a visible layer of dust, debris, or even fine powder, your wall isn’t clean enough for primer or paint. This is especially important in recent renovations or high-traffic areas where dust settles quickly. Conversely, if the plastic is clean—no dirt or particles—you can confidently proceed.
Dealing with Dust-Contaminated Walls
If your test reveals dirt, you’ll need to thoroughly clean the surface. Use a damp microfiber cloth or a mild detergent solution, scrubbing gently to remove dust and grease. For stubborn spots, a mixture of vinegar and water can cut through grime without leaving residues that hinder paint adhesion.
Timing and Routine for Best Results
Perform the Rub Test immediately before priming or painting. In my own experience, I once skipped this step, assuming a quick wipe-down was enough. The result was a textured, uneven finish that required sanding and repainting, costing extra time and money. Now, I do the test after dusting and before applying paint—it’s quick, reliable, and can save you from those costly mistakes.
Additional Tips for Dust-Free Walls
Always use a clean cloth or dusting tool, and avoid sweeping or dusting a wall just before painting, as this can stir up particles. In dusty environments or dry seasons, consider using an air purifier nearby to limit airborne particles settling on your freshly cleaned walls.
Remember, the key is consistency. Incorporate the Rub Test into your routine, and over time, you’ll notice a marked improvement in your wall finishes, with smoother surfaces and fewer touch-ups. For more expert strategies on surface prep, check out this guide on ceiling paint finishes.
While many homeowners and even some professional painters focus on the basics—like choosing the right paint or prepping the surface—there are subtler aspects often overlooked that can dramatically impact the outcome of your project. Let’s dig deeper into these hidden nuances, dispelling common myths and revealing advanced mistakes that can sabotage even the most well-intentioned DIY efforts.
One widespread misconception is that applying thicker coats of paint will speed up the project and improve coverage. In reality, this is a surefire way to cause peeling, uneven textures, and long-term durability issues. Experts advise multiple thin coats, allowing proper drying time between layers, which ensures a smoother finish and better adhesion. For a closer look at how coat thickness affects finish quality, check out this guide on ceiling paint finishes.
Another trap many fall into is underestimating the importance of proper lighting during painting. Natural light reveals the true color and texture of paint, while inadequate lighting can mask imperfections. Painting in poorly lit spaces may lead you to miss drips, uneven strokes, or color inconsistencies. An advanced mistake is neglecting the temperature and humidity conditions, which can affect drying time and surface adhesion. High humidity can cause paint to dry slowly or develop a matte or cloudy finish, especially with latex paints. It’s crucial to paint during optimal weather conditions—and using a hygrometer can help monitor environmental factors. According to industry research, controlling humidity levels improves the lifespan and appearance of your paint job.
How Can Overlooking Surface Preparation Cost You More?
Many homeowners believe that just a quick wipe or dusting is sufficient before painting. However, failing to thoroughly clean and prime surfaces—especially problematic areas like drywall seams, cracks, or previous paint—can lead to peeling, blistering, or uneven color. For those dealing with glossy or oil-based finishes, proper sanding or chemical deglossing is often necessary to ensure a solid bond. Not investing in meticulous prep can turn a beautiful finish into a short-lived mess. This is why professional painters emphasize surface prep as a cornerstone of quality work, aligning with findings that proper surface conditioning enhances adhesion and durability.
If you’re tackling a high-stakes project, paying attention to primer quality, using the right type for your surface (see epoxy over concrete), and ensuring a clean, dust-free environment is critical. Overlooking these details often means wasting time on multiple corrections later, which can cost money and morale.
Finally, advanced painters make a note of edge control. As simple as it sounds, improper edging techniques—like inconsistent brush pressure or ragged tape lines—can ruin the clean look of a painting job. Using specialized tools, such as cardboard shields, can help achieve razor-sharp lines without stress. It’s these small but significant details that differentiate an amateur result from professional-quality work.
Have you ever fallen into this trap? Let me know in the comments. The more we share these insights, the fewer mistakes we make, and the better your next painting project will turn out!
Investing in the right tools and establishing an effective maintenance routine can dramatically extend the lifespan of your paint job, especially when working with local painting projects. Over the years, I’ve refined my toolkit to include equipment that not only boosts efficiency but also ensures top-tier quality and durability. For example, I swear by using high-quality paint sprayers like the Wagner Control Pro 130, which provides even coverage and reduces overspray, saving time and paint. These sprayers are particularly beneficial for large surfaces or textured walls, where roller marks can be more apparent. Compared to traditional brushes, a good sprayer delivers a professional finish and ensures that paint penetrates all crevices, which is essential for long-term durability.
Another essential tool I recommend is a moisture meter, such as the ThermoPro TP50, which helps monitor environmental conditions. Many homeowners overlook humidity levels, unaware that excessive moisture can cause paint to bubble, peel, or develop mold over time. By checking humidity before and during painting, you can prevent these issues from the outset. With climate control becoming increasingly crucial—especially in regions with unpredictable weather—investing in a reliable hygrometer allows you to plan your projects during optimal conditions, as recommended in industry standards.
Maintaining your painted surfaces isn’t just about selecting the right tools; it also involves regular care. A practical tip is to inspect your surfaces periodically for signs of wear or damage, like chipping or fading, and address them early. This might mean touching up areas affected by weather exposure or cleaning dirt and grime with gentle scrub brushes. Implementing a simple cleaning schedule—using mild detergents and soft cloths—keeps walls looking fresh and prevents dirt from embedding into the paint layers, which can degrade the finish over time.
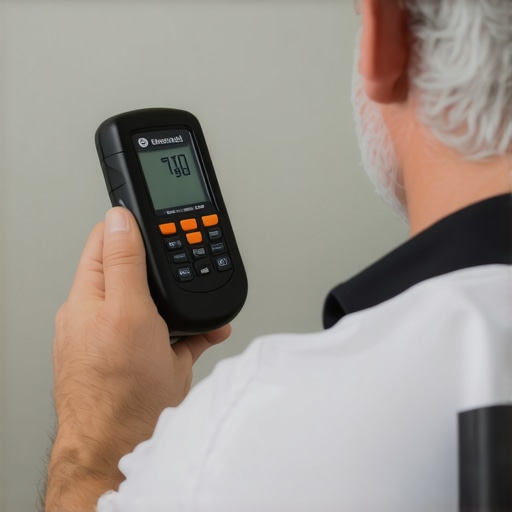
Looking ahead, the trend in local house painting points toward smarter, more sustainable solutions. Some professionals are adopting eco-friendly paints with built-in antimicrobial properties that guard against mold and bacteria, reducing the need for frequent repainting. Advancements in paint formulations also promise longer-lasting finishes that resist fading, cracking, and peeling, even under harsh environmental conditions. These innovations not only save homeowners money in the long run but also promote better indoor and outdoor air quality.
How do I keep my paint jobs looking fresh as years go by?
Proper maintenance involves more than just initial prep and application. Regular inspections, cleaning, and prompt touch-ups are vital. For high-traffic or exposed areas, consider applying a clear protective coating, like a polyurethane sealant, which can add an extra layer of resilience. Remember, planning your projects with future upkeep in mind saves both time and money. Incorporate tools like the moisture meter into your routine to assess environmental risks, and invest in quality equipment that simplifies ongoing maintenance. As technology evolves, staying informed on new products—such as extended-curing paints and eco-friendly primers—can give your home a durable, beautiful finish for years to come. For detailed guidance, check out helpful resources like this professional advice on ceiling maintenance. Now, I challenge you to incorporate a moisture meter into your next project to see how environmental monitoring can make a difference. Your walls will thank you over the long haul for the extra care and the right tools.
What I Wish I Knew Before Painting Walls
One of the most valuable lessons I’ve learned from years of DIY painting is that surface prep is more than just a quick dusting—it’s about realizing how much unseen dust and particles can sabotage your entire project. I used to believe that wiping with a damp cloth was enough, but discovering how easily dust can settle unnoticed was a game-changer. Embracing techniques like the Rub Test taught me that meticulous checking can spare countless reworks and frustrations, transforming the way I approach every paint job.
Another insight I treasure is understanding that environmental factors—like humidity and lighting—are stealthy foes that can undermine even the best-prepared walls. Using a moisture meter or painting during optimal weather conditions might seem small, but these steps have profoundly impacted my streak-free, long-lasting finishes.
Finally, I learned that leveraging proper tools—like high-quality sprayers and edge-control methods—can elevate my work from good to professional-grade. Recognizing the hidden nuances, such as avoiding over-thick coats or ensuring correct primer adhesion, made me appreciate that great results stem from attention to detail in every little step.
Tools and Tips That Changed My Painting Routine
Over the years, I’ve curated a set of trusted tools that make the entire painting process more effective and enjoyable. My top pick is the Wagner Control Pro 130 spray gun—its even coverage saves time and ensures smooth walls, especially on textured surfaces. For consistency in environmental conditions, a moisture meter like the ThermoPro TP50 is invaluable for avoiding paint failures caused by unexpected humidity spikes. For cleaning brushes and fixing stubborn paint spills, simple household items like dish soap and old rags work wonders when paired with proper technique. To refine my edge work, my go-to is the cardboard shield from this guide, which helps create razor-sharp lines without stress. Investing in these tools hasn’t just made my projects smoother—it’s extended the life of my painted surfaces, saving me money and effort in the long run.
Keep Your Walls Looking Fresh, No Matter the Year
The journey to flawless walls doesn’t end with the last brush stroke. Regular inspection and maintenance are key to preserving that pristine finish. Think of it as a form of self-care for your walls—touching up small chips before they become major issues, or applying a protective sealant in high-traffic areas, can keep your surfaces vibrant for years. The real secret lies in making maintenance a habit, with simple routines like gentle cleaning and environmental monitoring. Embracing eco-friendly paints boasting antimicrobial properties or utilizing long-lasting formulations can further ensure your walls stay beautiful despite the challenges posed by weather and daily wear. Remember, a well-maintained wall is a testament to your dedication and eye for detail—your home’s canvas, looking its best over time. Now, I challenge you to implement one new routine in your ongoing maintenance: perhaps checking humidity levels before your next project or trying an advanced edge-control technique—you’ll be surprised at the results. How will you start preserving your walls’ beauty today?