

Nothing is more frustrating than spending hours painting your interior doors only to end up with a dull, uneven surface that looks nothing like the smooth, professional finish you see in stores or magazines. I remember my first attempt—dipping my brush with confidence, only to see streaks, drips, and a finish that felt more homemade than flawless. It was a lightbulb moment for me: I needed a better approach.
Getting that perfect, smooth look on interior doors isn’t just about aesthetics; it can significantly boost your home’s overall appearance and value. Whether you’re renovating or just freshening up a room, achieving that seamless, factory-like finish can make all the difference. But let me be real—without the right technique, even experienced DIYers end up with results that fall short.
Today, I promise to guide you through proven methods to get that polished, professional look. From prepping your door surface to the finishing touches, I’ll share the tips, tricks, and insights that helped me finally achieve a flawless finish. Trust me, after trying countless methods and making plenty of mistakes (some of them embarrassing), I’ve learned what truly works—and you can benefit from that knowledge.
Why the Right Preparation Makes All the Difference
Before you even think about applying paint, the real magic begins with preparation. This step is often overlooked, but I learned the hard way that skipping or rushing through it leads to a finish riddled with imperfections. The biggest mistake I made early on was rushing to paint without properly cleaning or sanding the surface, resulting in poor adhesion and visible bumps.
To get a smooth, durable finish, you need to prepare your door meticulously. Start with clean surfaces—dirt, grease, and dust create barriers for paint. I recommend using a mixture of soap and water to wash the doors thoroughly; this simple step can be the difference between a glossy smooth surface and a dull, uneven one. Want to double-check if your door is truly clean? Try the soap and water test for wall cleanliness before priming.
Once cleaned, lightly sand the surface using fine-grit sandpaper to smooth out any imperfections. Don’t skip this step! Sanding creates a key for the paint to grip onto, preventing future peeling or bubbling. After sanding, wipe down the surface with a damp cloth or tack cloth to remove dust. For hidden dust or residual particles, I prefer the wet rag test—if the surface stays clean after wiping, you’re good to go.
Thinking of skipping the primer? Think again. Proper priming seals the surface, fills in tiny imperfections, and promotes an even topcoat. It’s a small investment with huge benefits. For even better results, consider using high-quality primer designed for your door material.
If you follow these prep steps, you’ll create the perfect canvas for painting, setting yourself up for success. Want to make sure your paint adheres perfectly? Check out how to spot a contractor watering down paint—trust me, it’s a sneaky trick that can ruin your finish.
Now that your surface is primed, clean, and prepped, you’re ready to move on to applying paint with confidence. In the next section, I’ll show you how to choose the right paint and tools for a smooth, even coat that looks like it came straight from the factory.
Choose the Right Tools for a Smooth Finish
Select high-quality brushes and rollers—synthetic bristles work best for latex paint, while natural bristles excel with oil-based options. Opt for a 3/8-inch nap roller for flat surfaces, but switch to a finer nap or brush for detailed edges and panels. Remember, cheap tools can leave fuzz or brush marks, so investing upfront saves time and frustration later.
Master the Cutting-In Technique
Start with a tapered brush, about 2-3 inches wide, to paint edges and corners. Dip the brush lightly—only about one-third into the paint to prevent overload. Use steady, controlled strokes to ‘cut in’ along the edges, creating a crisp line. When I painted my first door, I struggled to keep a straight line, but practicing slow, deliberate strokes made a huge difference. Think of this step as outlining a picture; precision here sets the stage for a perfect finish.
Apply the First Coat Correctly
Pour your paint into a tray, load your roller or brush evenly, and work in sections—top to bottom or side to side. Use overlapping strokes to avoid streaks. Don’t press too hard; gentle, even pressure results in smoother coats. For panels and hard-to-reach areas, use a small brush or detail brush. I once rushed this step and ended up with uneven textures, so take your time to ensure even coverage. Remember, thin coats dry faster and adhere better than thick ones.
Sand Between Coats for Perfection
Once the first coat is dry—usually after 2-4 hours—lightly sand the surface with fine-grit sandpaper (220 grit). This step smooths out imperfections, drips, or brush marks. I learned this the hard way after a glossy finish turned bumpy because I skipped sanding. For best results and to avoid imperfections, wear a dust mask and ensure the area is free of dust before applying the next coat. Think of this as smoothing out wrinkles on a shirt before ironing—it creates a more polished look.
Apply the Final Coat and Achieve a Mirror Finish
After sanding, remove dust using a tack cloth, which picks up residual particles without leaving lint. Now, apply your second (or third) coat using the same technique: even pressure, overlapping strokes, and a steady hand. This layer is what transforms your work from decent to professional. Use a high-quality paint for the best results—low-VOC options are available that perform just as well. I recommend checking out [how to store paint cans properly](https://elitepainterpro.com/the-proper-way-to-store-paint-cans-to-keep-them-fresh-for-years) to keep your paint fresh for future touch-ups.
Remove Painter’s Tape Carefully
Timing is everything when removing tape—wait until the paint is dry to touch, usually after 24 hours. Peel the tape back slowly at a 45-degree angle, avoiding a quick rip that can tear your crisp lines. For clean edges and avoiding rips, I use a technique from [the secret to removing blue tape without ripping the finish](https://elitepainterpro.com/the-secret-to-removing-blue-tape-without-ripping-the-new-finish). This ensures your edges remain sharp and your doors look professionally painted.
Many DIY enthusiasts and even seasoned painters fall into common traps, believing they know everything about house painting. However, certain nuanced mistakes can sabotage your results, leading to costly reworks or subpar finishes. Let’s dig deeper beyond the basics and explore some overlooked aspects that can make or break your project.
Is Your Paint Mix Watered Down and You Don’t Know It?
One of the most insidious mistakes is diluting paint beyond recommended levels, often disguised as a trick to spread paint further. Many assume a thinner mix dries faster and spreads more smoothly, but in reality, it compromises adhesion and durability. Professional painters always test their paint consistency — the classic “bucket test” — to ensure proper thickness. An overly watered-down paint can lead to uneven color, visible brush strokes, and premature peeling. To avoid this, check out this guide on accurately testing your paint and avoid the temptation of cutting corners.
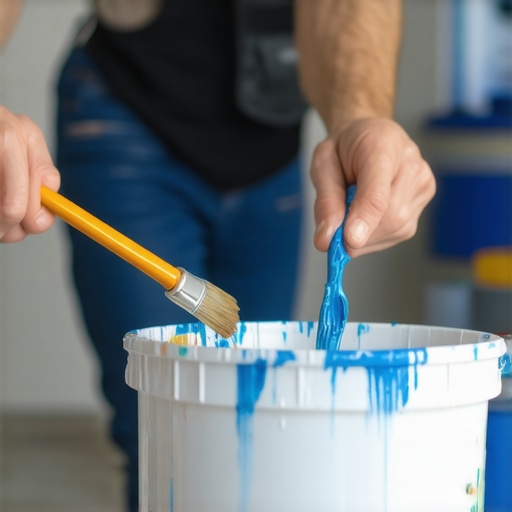
Expert tip: Always stir your paint thoroughly before application. If you suspect dilution, do a simple drop test on a piece of cardboard — it should bead up or sit flat without spreading thin like water. Remember, high-quality primer and paint are investments in longevity, so don’t compromise by diluting them.
Think All Light Colors Cover Equally? Think Again
A popular myth in house painting is that light-colored paints require fewer coats and are easier to hide. The truth is, light or dark, coverage depends heavily on the paint quality and the primer used. Lighter shades can actually reveal imperfections or uneven primer application more prominently. This is especially true if the underlying surface wasn’t properly prepped or if a low-quality paint was used. According to color experts, choosing a primer with high hiding power can reduce the number of coats needed — saving you time and money.
Additionally, be aware that some pigments have poor opacity and can require multiple coats, no matter how careful you are. For nuanced surfaces, professionals often apply a tinted primer close to the final color. For guidance on primer selection, check out this primer primer for different surfaces.
Advanced tip: Always test your paint color on a small area before committing. Light colors can sometimes look different when dry, especially if the previous coat wasn’t pure white or if there’s underlying stain.
Avoid the Trap of Overconfidence When Painting Edges
One area where many painters make a crucial mistake is in the finishing touches—particularly the edges and corners. It’s tempting to rush the ‘cut-in’ process and assume straight lines are enough, but this can lead to overlapping issues, visible brush strokes, or color mismatches at the boundaries. Professionals take extra care, often using high-quality angled brushes, and perform a technique called “feathering” to blend the edges smoothly.
Furthermore, neglecting to prepare masking tape or expecting it to do all the work can cause paint bleed or lift the primer underneath. To achieve flawless lines, pre-tape carefully and remove the tape at just the right moment—wait until the paint is dry to the touch but not fully cured. For tips on perfect masking, explore this article.
Have you ever fallen into this trap? Let me know in the comments. Addressing these nuances will elevate your painting projects from DIY to professional-looking results. Remember, the devil is in the details, and understanding these hidden pitfalls can save you time, money, and frustration in your next house painting endeavor.Maintaining your painting tools and investing in the right equipment are essential for achieving professional, long-lasting results. Durability and precision start with choosing quality tools designed for specific surfaces and paints. I personally prefer high-grade synthetic brushes for latex paints because they maintain their shape and distribute paint evenly, reducing streaks and brush marks. When using rollers, I recommend opting for 3/8-inch nap covers—they strike a perfect balance between coverage and finish, especially on smooth surfaces. Investing in a professional-grade extension pole makes reaching high ceilings effortless and maintains control, which is crucial for clean edges.
To keep tools in top condition, thorough cleaning is non-negotiable. After each project, clean brushes and rollers with warm water and a mild detergent if using latex paint. For oil-based paints, mineral spirits are necessary. Proper cleaning prevents dried paint from clogging bristles or rollers, extending the lifespan of your equipment. Store your brushes upright in a container with water or in airtight plastic bags to prevent them from drying out and deforming. I also recommend regularly inspecting your tools for wear—damaged brushes or rollers can cause uneven application, defeating the purpose of quality equipment.
Equipment maintenance extends beyond brushes and rollers. For example, storing paint cans correctly—tightening lids and keeping cans in a cool, dry place—ensures they stay fresh for future touch-ups. To keep your paint in optimal condition, consider using a paint can stopper or even glazing a plastic wrap over the open lid before sealing to prevent air from spoiling the paint. You can learn more about proper storage techniques in this helpful guide.
Looking ahead, I believe the trend in house painting tools will lean heavily toward automation and smart technology. Innovations like cordless electric paint sprayers with adjustable flow rates, integrated filters, and simple cleanup features are becoming increasingly accessible. These tools not only save time but also produce a more consistent, high-quality finish—especially useful for larger projects.
> How do I maintain my painting tools over time?
Regular maintenance involves cleaning tools immediately after each use and inspecting for damage. For brushes, combing out dried bristles with a brush comb can restore shape, while rollers should be checked for tears or flattening. Use a dedicated cleaning station to minimize mess and ensure your workspace stays organized. Applying a protective coating or conditioner on brushes before storage can also help preserve their flexibility. This simple routine will save you money and keep your tools ready for your next project. Remember, well-maintained tools outperform cheap, neglected ones, and investing in the right equipment pays off in the quality of your work.
With the right tools and proper upkeep, you’ll find house painting becomes much more manageable, and your results will look truly professional. For specific tips on storing your paint for long-term use, check out this guide. Ready to elevate your painting game? Try the tip of cleaning your brushes immediately after use—they’ll thank you with better performance and longevity.
Over my years of house painting, few lessons have been as eye-opening as realizing that the smallest details make the biggest difference in achieving a professional-looking finish. The journey from amateur attempts to expert results taught me invaluable insights that I now eagerly share with you.
Lessons I Wish I Didn’t Have to Learn the Hard Way
- Preparation is everything: Skipping steps like thorough cleaning and sanding can sabotage your entire project. Once I realized that a meticulous surface prep was non-negotiable, my results instantly improved.
- High-quality tools save time and frustration: Investing in good brushes, rollers, and tape paid off by giving me smoother coats and cleaner edges, reducing touch-ups later on.
- Patience in drying and sanding: Rushing to coat too soon or skipping sanding between layers led to bubbles and uneven surfaces. Giving each coat adequate drying time and light sanding made a visible difference.
- The importance of testing: Small tests on a corner or scrap material prevented major mistakes, especially with color matching and primer coverage.
- Understanding your paint: Knowing whether my paint was properly mixed and not watered down was key to avoiding streaks or peeling, which can be a common trap for DIYers.
Tools and Resources That Elevated My Work
- Proper paint storage guides kept my paints fresh and ready for touch-ups, saving me money and effort.
- High-quality brushes with synthetic bristles provided smoother application, especially on trim and corners.
- Advanced masking techniques from professional articles helped me achieve crisp, clean lines without paint bleed.
- Testing tools like the soap and water test ensured my surfaces were properly cleaned before priming and painting, which is vital for durability.
Your Next Colorful Step Ahead
The world of house painting is full of nuanced techniques and insider tips that can elevate your work from good to stunning. Embrace patience, invest in quality, and don’t hesitate to learn from trusted sources. Your home deserves that perfect, smooth finish, and with these insights, you’re more than capable of achieving it. Remember, every brushstroke brings you closer to a professional result—so start your next project today with confidence!
What has been your biggest challenge in painting interior doors? Share your experiences below and let’s learn together!
,