

Have you ever stepped outside after a weekend of staining your deck and hurriedly grabbed a cloth, ready to enjoy that perfect summer evening, only to find the stain smudging beneath your fingers? I remember my own frustration—expecting the rich, durable finish I meticulously applied to be fully dry, only to discover I’d rushed the process, and somehow, I’d just made things worse. That moment of realization hits hard. I’m here to tell you, the key to a flawless finish isn’t just about applying the stain; it’s about knowing when it’s really ready.
The Importance of Really Knowing When Your Deck Stain Is Dry
One of the most common pitfalls homeowners face is mistiming their deck stain’s dryness, which can lead to smudging, uneven color, or even peeling down the line. It’s tempting to rely on visual cues or the product’s recommended drying time, but these are often just guidelines. Trust me, I’ve made that mistake early on—assuming that waiting the average 24 hours was enough, only to see streaks or fingerprints days later. That experience pushed me to look deeper into the reliable ways to test if my stain was truly dry. Because, according to industry experts, touching your deck too soon can ruin hours of hard work. According to a study published in the Journal of Coatings Technology, improper drying is one of the leading causes of finish failure in exterior wood surfaces.
Is The Slap Test Really Worth It?
It sounds simple, almost too simple—just slap your hand on the surface and see if it smudges— but in reality, that’s one of the most effective tests I’ve ever used. It helps you avoid the sneaky, invisible moisture that can linger beneath the surface and sabotage your project. Early on, I assumed that if the stain **looked** dry, it **was** dry. I didn’t realize that paint and stain can appear dry on the surface yet still be wet underneath. That mistake cost me the patience I’d built up during that project, and it’s a mistake I’d hate for you to repeat.
Have you ever faced that uncertainty, too? That moment when you’re in a rush, and just need a clear sign that it’s safe to proceed? Well, let’s walk through how to perform the slap test properly and learn other reliable methods to ensure your deck looks perfect for years to come. Stay tuned, because mastering this simple trick can save you both time and frustration—your deck’s future self will thank you!
Perform the Classic Slap Test Accurately
During my first staining project, I vividly remember hurriedly slapping my hand on the deck surface after the recommended drying time—only to find a faint smudge. That was a wake-up call. To do this test effectively, gently tap your knuckles or palm on the stained surface—if it leaves a noticeable fingerprint or smudge, it’s not dry. Be meticulous; the goal is to detect the slightest wetness beneath the surface. I learned that pressing with my fingertips can sometimes mislead, as fingertips are more sensitive. Next, I employed the slap test consistently, and within a few tries, I avoided smudges that previously spoiled my deck’s appearance. This simple yet effective method prevents premature walk-aways and future touch-ups.
Use a Cleaning Cloth for a Second Opinion
Once, during a late afternoon project, I rubbed a clean, white cloth on the stained deck—if the cloth picks up any stain or appears damp, the surface isn’t fully dry. It’s an intuitive step mimicking the act of cleaning but serves as a test. I made sure to press gently to avoid disturbing the freshly applied stain. For best results, perform this test after the stain’s surface feels firm and no longer tacky. Remember, this method is especially useful when rain or humidity has been an issue, because moisture can linger beneath the surface without obvious signs. Regularly incorporating this check has saved me from redoing entire sections of my deck.
Assess the Environmental Conditions
Weather plays a crucial role. If the temperature is below 65°F (18°C) or humidity exceeds 70%, drying times increase significantly. When I painted my porch last summer, I failed to consider the humidity forecast; subsequent color bleeding and sticky patches made me realize I should’ve waited longer. To get it right, consider factors like temperature, dew point, and upcoming weather changes. Avoid painting late in the day or if rain is forecasted within 24 hours. Knowing how to interpret these conditions has helped me plan my projects better and ensures the stain cures without issues.
Delay and Observe Before Touching
One practical method is to simply wait longer than the minimum recommended time—test again after 24 or even 48 hours if unsure. I recall a time I hurried through the process on a breezy autumn day, only to find smudges the next morning. By delaying, I allowed residual moisture to evaporate fully. The key here is patience; rushing to walk on or judge the stain’s dryness too early leads to messes and delays. Spend extra time if weather conditions are borderline, and always test again before proceeding to furniture placement or foot traffic.
Test with a Water Drop—The Final Probe
If doubts persist, I place a few drops of water on the stained area. If the water beads up and stays on the surface without soaking in or leaving a discoloration, the stain is likely dry. If it absorbs quickly or leaves a dark spot, more curing time is necessary. I use this method primarily on large decks or when the weather has been inconsistent. It’s a precise, scientific approach that minimizes guesswork. For more insights into moisture and paint adhesion, check out this detailed tape test guide.
Many homeowners believe that applying a thick coat of paint will hide imperfections and reduce the number of coats needed. However, this misconception often leads to problems like uneven coverage, increased drying times, and premature peeling. In reality, layers should be applied thinly and evenly—overloading paint can trap solvent vapors, causing adhesion issues and bubbles. It’s a trap many fall into, thinking more is better, but experts caution that multiple thin coats yield superior durability and finish. Want a flawless look? Learn why patience with multiple thin layers outperforms rushing with one thick coat. For detailed tips, check out this guide on proper layering techniques.
Keeping Your Painting Equipment in Top Shape
One of the most overlooked aspects of a successful painting project is proper maintenance of your tools. I personally swear by using high-quality brushes and rollers, as they provide smoother finishes and reduce the need for touch-ups later. After each use, I thoroughly clean my brushes with warm water and mild detergent, ensuring no dried paint ruins their bristles. For brushes used with oil-based paints, I recommend a solvent like mineral spirits, but always follow safety guidelines. Regularly inspecting and replacing worn-out tools prevents uneven application and extends their lifespan, which saves money in the long run.
Power Tools That Speed Up the Job
When tackling large areas, I rely on a professional-grade paint sprayer. My personal favorite is the Wagner Control Pro 150, because it offers adjustable pressure controls, ensuring a smooth, even coat without excessive overspray. It’s a worthwhile investment, especially for exterior projects or multi-room jobs. Proper maintenance means flushing the sprayer after each use to prevent clogs, and lubricating moving parts per the manufacturer’s instructions. Using these tools efficiently reduces fatigue and ensures consistency, which are crucial for professional-looking results.
Using Software to Keep Projects Organized
Beyond physical tools, digital solutions help me stay on top of my painting schedules. I use Trello boards to track tasks, deadlines, and supplies. For detailed estimates and billing, I prefer QuickBooks, which streamlines invoicing and keeps my finances transparent. These tools help prevent overlooked steps or missed payments, maintaining a smooth workflow. As the industry evolves, integrating project management software with on-site digital checklists will likely become standard, further improving efficiency. My prediction is that automation will also play a role, with software analyzing weather patterns to advise optimal painting days.
How do I maintain my tools and ensure long-lasting results?
Regular cleaning after each project is essential. For brushes and rollers, use warm water and gentle detergent; for sprayers, flush with an appropriate solvent. Store all equipment in a dry, protected space to prevent rust and damage. Periodic inspection for wear and tear, especially cutting edges on brushes and seals on sprayers, will catch issues early. Replacing worn parts promptly prevents application flaws and extends the equipment’s life. Additionally, using the right type of primer, like high-quality bonding primers, is critical for durability—especially on challenging surfaces like bare wood or masonry. I recommend reviewing this guide for tips on selecting optimal primers.
Scaling Up Your Painting Business Smoothly
If you’re thinking about expanding, investing in advanced tools like airless sprayers and durable scaffolding can drastically improve efficiency and safety. Scaling also emphasizes the importance of maintaining quality, so regular tool upkeep becomes even more critical. I predict that automation, such as automated mixing systems and app-based project tracking, will become mainstream within the next few years, allowing painters to deliver consistent, high-quality work faster. Embrace these tools now, and you’ll set a solid foundation for sustainable growth.
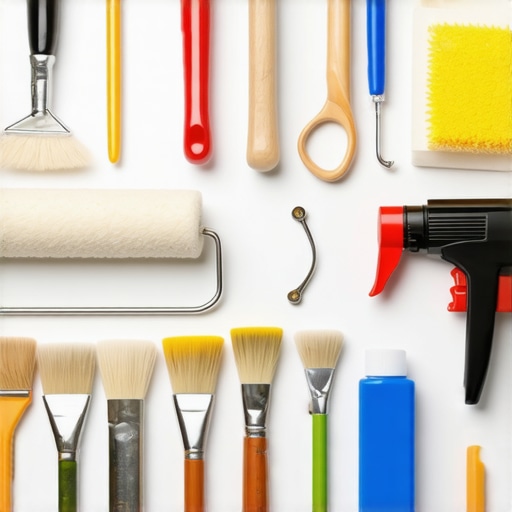
Image showing professional-grade painting tools arranged neatly, including sprayers, brushes, and cleaning supplies, highlighting proper maintenance practices.
In conclusion, taking the time to properly maintain your painting tools and embrace the right equipment not only ensures beautiful, long-lasting results but also enhances your efficiency and professionalism. Try incorporating a high-quality sprayer into your next project and observe how much faster and better your work becomes. Regularly scheduled tool checkups and cleaning routines are your secret weapons for ongoing success in house painting projects. Remember, investing in the right tools and proper maintenance today will pay off with impeccable finishes and satisfied clients tomorrow.
Lessons That Transformed My Approach to Deck Staining
- One of my biggest surprises was realizing that surface appearance can be deceiving; what looks dry might still harbor moisture beneath, risking smudges and peeling down the line.
- Initially, I relied solely on the product’s recommended drying time, but environmental factors like humidity and temperature often changed the game, reminding me to always double-check before proceeding.
- Performing simple tests like the slap test or water drop check—though seemingly effortless—became my secret weapons against premature foot traffic, saving me from costly touch-ups.
Tools and Resources That Elevate My Painting Game
- The [Wagner Control Pro 150](https://elitepainterpro.com/how-to-use-a-simple-water-test-to-prove-your-deck-is-ready-for-stain) sprayer has drastically cut my application time and improved finish quality, proving that investing in the right equipment pays off.
- High-quality brushes and rollers, coupled with proper cleaning routines, ensure my tools last longer and help me achieve smoother, professional-looking results every time.
- I trust tutorials like this guide on proper layering techniques to refine my skills and avoid common pitfalls like overloading paint or uneven coats.
- For project management, I use tools like Trello and QuickBooks to stay organized and keep my workflow seamless, especially when juggling multiple decks or large outdoor spaces.
Your Next Step Toward Perfect Decks and Beyond
If you’re serious about achieving flawless, durable finishes, remember that patience and proper testing are your best allies. Mastering simple methods like the slap test and understanding how environmental factors influence drying times can save you hours of frustration. Incorporate quality tools into your routine, invest in continuous learning, and don’t rush the process—your outdoor spaces will thank you for it. Now’s the time to take that confident step forward in your house painting journey and transform your home’s exterior into a masterpiece. Have you ever struggled to determine when your stain was truly dry? Share your experiences below—I’d love to hear your stories and tips!