

I remember the day I finally decided to give my house a fresh coat of paint—thinking it would be a straightforward weekend project. Fast forward to a few months later, and I was scratching my head over why my crisp white trim looked dull, uneven, and just… off. Turns out, my painter had skipped the crucial second coat on the trim, and I had no idea how to tell. That lightbulb moment made me realize: if you don’t know what to look for, small mistakes hide just beneath a fresh layer of paint, and they can ruin the entire look of your home.
Why Spotting the Second Coat Slip Is More Important Than You Think
Getting a flawless paint job isn’t just about choosing the right color or buying the best brush. It’s about the details—the kind that separate a professional finish from a botched job. A skipped second coat, especially on trim, can lead to peeling, uneven color, or worse, the need for costly rework. And trust me, I’ve been there. Early on, I mistakenly believed that a single coat could do the trick—only to see it fade or chip within a few months. This was a rookie mistake I don’t want you to make. For real insights into how paint can perform with one coat, check out this detailed guide.
Has This Ever Happened to You?
If you’ve ever noticed patchy spots, uneven gloss, or a quick peeling job, you’re not alone. Many homeowners get caught off guard because they don’t know what signs indicate a second coat should have been applied. But don’t worry—I’ll walk you through exactly how to spot these issues before they turn into bigger headaches.
Prepare the Surface for Inspection
Before you even pick up a brush, make sure the walls are clean and dry. Use a damp sponge and mild detergent to remove dust, grease, or dirt. Let the surface dry completely—this is crucial because imperfections can be hidden by dirt or grime. In my own experience, skipping this step led me to miss early signs of paint failure, causing me to redo sections later. For thorough cleaning, consider the soap and water test.
Use the Fingerprint Test to Detect Thin or Failing Layers
Lightly press your fingertip onto the painted surface and lift it quickly. If a fingerprint remains after wiping, it indicates insufficient coating or poor adhesion—possibly a skipped second coat. I once applied only one coat of paint to a bedroom wall, and the fingerprint test revealed uneven coverage, prompting me to add a second layer. This small step saves time and prevents peeling issues long-term. Don’t forget to check adhesion details.
Observe the Sheen for Uniformity
Walk across the room and look for patches where the gloss varies. A single coat might appear uneven—glossier in some spots and dull in others. I remember painting my living room and noticed the trim’s sheen was inconsistent; pinpointing these areas led me to realize a second coat was necessary. Proper lighting enhances this inspection; use a bright, raking light to catch subtle differences. If you see inconsistencies, it’s a clear sign to apply another coat for evenness.
Check for Visible Color or Texture Variations
Hold a level or use a straightedge to scan your walls for dips or ridges. Uneven textures suggest the paint hasn’t fully cured or that too few coats were applied. I once missed this during an initial paint job, resulting in noticeable flaws after drying. Applying a second coat in these areas sealed the surface and smoothed out imperfections, leading to a professional-looking finish. For specific paint types, see dark paint coverage tips.
Perform a Drying and Curing Check
Touch the surface after the recommended drying time—usually 24 hours. If the paint feels sticky or tacky, it may still need curing or an additional coat. I learned this the hard way when I painted my hallway; impatience led me to accept a dry surface that peeled days later. Waiting for full cure and applying a second coat if needed prevents future peeling. Remember, some paints require multiple coats to achieve durability and color richness. Discover more about best practices at painting durability tips.
Revisit and Confirm Before Final Touches
After completing these steps, do a walk-around inspection. Use a bright light to catch missed spots or thin coverage areas. I once missed a section under a window sill, which became obvious a week later. Correcting these issues early ensures you don’t have to redo entire walls. Remember, patience and keen observation are your best tools in identifying whether a second coat is necessary—saving both time and money in the long run.Even experienced painters sometimes fall prey to misconceptions that can compromise a project’s quality. Many believe that choosing a trendy color or the cheapest materials guarantees a successful paint job, but in reality, the nuances lie in the preparations, technique, and understanding of material properties. For example, a widespread myth is that premium paints can cover flaws or uneven surfaces without proper surface prep. In fact, according to industry experts, no matter how expensive the paint, inadequate surface preparation always results in aesthetic and durability issues. Overlooking this fact can lead to costly reworks and dissatisfaction.
Another often misunderstood aspect is the belief that a single coat of paint is enough for interior walls. While some modern formulations claim to offer excellent coverage in one coat, this isn’t universally true—especially over dark colors or primer stains. Rushing with one coat can result in uneven color, texture, or adhesion problems, which surface inspection techniques like the soap and water test or sheen consistency checks can help you detect early. Remember, the initial application is just a foundation; a second or even third coat might be necessary for optimal results.
A common trap is assuming that all paint types behave similarly across different surfaces. Oil-based, latex, and specialty paints each have unique curing times, adhesion properties, and susceptibilities to environmental factors like humidity and temperature. Ignoring these differences leads to failures such as peeling, bubbling, or rapid fading. Consulting expert resources or reliable guides—such as detailed articles on [the truth about single-coat paints](https://elitepainterpro.com/the-truth-about-using-one-coat-paint-on-dark-interior-walls)—can prevent these mistakes.
Detractors often recommend using painter’s tape immediately after painting, but this can backfire if the paint isn’t fully cured. Removing tape too soon can peel fresh paint, especially on delicate surfaces like baseboards or trim. Wait times vary depending on paint type and conditions; generally, waiting at least 24 hours ensures that the finish is stable. For tips on proper masking techniques, see [tips on avoiding tape pull-offs](https://elitepainterpro.com/stop-putting-painters-tape-on-freshly-painted-baseboards).
Finally, understanding the importance of environmental factors is crucial. Humid conditions or improper ventilation during or after painting can hinder curing, leading to surface defects or mold growth. Recognizing these hidden risks goes beyond basic knowledge, showing your expertise. Consider using advanced techniques or products like bio-resin coatings—discussed in [5 bio-resin tactics for interior painting in 2026](https://elitepainterpro.com/5-bio-resin-tactics-for-interior-house-painting-2026-test)—to achieve superior durability and finish.
Make no mistake—these subtle nuances and myths have the potential to sabotage even seasoned painters. Being aware of common pitfalls and understanding advanced tips will elevate your craftsmanship. Have you ever fallen into this trap? Let me know in the comments.
Maintaining your home’s paintwork requires more than just a steady hand—having the right tools and a solid maintenance routine can significantly extend the lifespan of your paint job. As a seasoned painter, I rely on specific equipment that ensures precision, durability, and efficiency. One such tool is a high-quality handheld paint sprayer, like the
How do I keep my tools in top shape over time?
Regularly inspecting and cleaning brushes, rollers, and sprayers is crucial. For brushes and rollers, I prefer high-density foam or microfibers—they keep paint wet longer, preventing drying out and bristle damage. Storing tools properly, such as hanging brushes with bristles facing down and keeping rollers in sealed plastic bags, helps maintain their shape and function. Additionally, investing in a good quality paint strainers reduces debris that could clog your sprayer or ruin your finish.
Using advanced methods like an airless sprayer with a variable pressure control not only improves finish quality but also reduces the time spent in touch-ups. For example, I recommend the fingerprint test to check for adhesion before committing to long-term maintenance, ensuring your tools work optimally on the prepared surface.
Preparing for Future Projects
Long-term results depend heavily on your upkeep routines. Schedule regular inspections—preferably quarterly—to identify early signs of wear or damage. For instance, pressure washing your house with a low-pressure setting can remove dirt and grime, reducing the chances of paint peeling prematurely. Future trends suggest that eco-friendly, low-VOC paints combined with smart tools—such as digital moisture meters—will become standard for optimizing durability, especially in humid or variable climates.
Scaling Your Painting Efforts Without Compromising Quality
If you plan to take on larger projects or multiple properties, consistency becomes key. Creating a standardized maintenance checklist—covering surface prep, tool calibration, and environmental conditions—helps maintain quality while scaling. Incorporating cooling paints and other innovative products can also enhance long-term performance and reduce ongoing upkeep costs.
Remember, the better your tools are maintained, the longer your paint lasts and the less you’ll need to redo. Don’t overlook this vital aspect—by investing time in upkeep and employing the right equipment, you set your projects up for success today and for years to come. Why not try cleaning your sprayer with the exact solvents recommended for your paint type this weekend? It’s a simple step that pays big dividends in longevity!
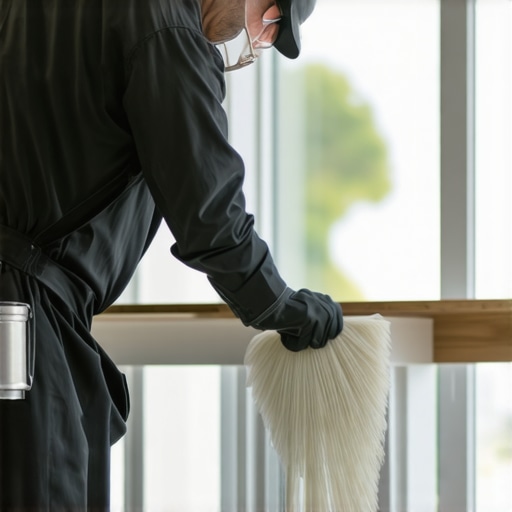
What I Wish I Knew Before Starting My Painting Journey
- One of the most valuable lessons I learned is that even the tiniest overlooked detail, like skipping a second coat on trim, can compromise the whole project. Paying close attention to surface prep and inspection techniques is essential for a professional finish.
- Myths about single-coat paints often tempt homeowners into rushing, but true mastery involves understanding when additional coats are necessary. Trust your inspection methods over marketing claims.
- Tools and environmental awareness can make or break your results. Using the right test (like the soap water or fingerprint test) helps catch issues early, saving you time and money.
- Patience during drying and curing stages isn’t optional; it’s the secret to enduring beauty that lasts years, not months.
- Even seasoned painters benefit from revisiting their process and tools regularly—technology like moisture meters or eco-friendly paints can elevate your craft further.
Tools and Insights That Transformed My Work
- Investing in quality sprayers like the handheld paint sprayer improved coverage and reduced errors. Regular maintenance keeps them performing at their best.
- From detailed guides on bio-resin techniques to surface preparation checklists, trusted sources have been invaluable in refining my approach.
- Understanding paint chemistry, especially differences between oil-based and latex paints, has helped me choose the right products for each project, preventing peeling and ensuring longevity.
- Knowing when and how to perform the proper tape removal prevents damage to fresh paint, a small step I now never skip.
- Environmental awareness, like inspecting humidity levels with a moisture meter, ensures perfect curing, avoiding issues like bubbling or peeling down the line.
Take Action and Elevate Your Painting Skills
This journey shows that attention to detail, proper tools, and continuous learning are crucial for achieving flawless walls. Don’t shy away from inspecting, testing, or taking your time—these steps lead to results that truly stand out. Remember, mastering the art of quality painting isn’t about shortcuts but about embracing the process. So, are you ready to implement these inspection techniques on your next project? Share your experience or questions below—I love hearing how homeowners improve their craft!