

I remember the first time I noticed my freshly painted living room looked dull and patchy just a few months after the job was done. Turns out, my painter had used a low-quality paint, and I felt cheated. That lightbulb moment made me realize: not all paint is created equal, and sometimes, what you pay for isn’t what you get. Many homeowners overlook this crucial detail, only to find their walls fading or bubbling prematurely. Today, I’ll share how to spot the signs early and avoid being duped into paying for premium paint but getting a lower-grade product instead.
Spotting the Signs of Subpar Paint on Your Walls
Imagine peeling back the layers of your latest painting project—what are you really seeing? It’s more than just a color mismatch or a few brush strokes. The truth is, lower-grade paints often have telltale signs that are easy to overlook unless you’re aware. These signs include uneven sheen, poor adhesion, and quick discoloration, among others. Recognizing these early can save you money and frustration down the line. If you’re wondering whether your painter might be cutting corners, keep an eye out for these red flags, which I’ve encountered firsthand when my walls started to peel within months.
Is DIY Detection Worth the Hassle?
One common skepticism I hear is, “Can’t I just tell by looking?” Honestly, sometimes you can. But more often than not, paint quality requires a closer look—like checking the thickness or testing adhesion. I made the mistake early on of trusting a painter purely by their recommendations, only to discover the hard way that cheap paint was used on my siding, leading to peeling and chipping earlier than expected. For homeowners serious about protecting their investment, knowing these subtle signs early makes all the difference. For more insights into how paint quality affects durability, you might find [this article about the hidden dangers of cheap exterior paint](https://elitepainterpro.com/why-your-exterior-trim-is-rotting-underneath-the-new-paint) illuminating.
Now that you understand what to look for, the next step is learning how to verify the quality of your paint before it’s too late. Trust me, catching these signs early is far better than dealing with costly repairs or repainting sooner than planned.
Inspect the Paint Sheen and Consistency
Start by examining the sheen of your walls or a painted patch. Run your hand over the surface—smooth and uniform paint indicates good quality. If you notice uneven gloss or dull patches, it’s a sign of cheap paint or poor application. I once tested a fresh section of my living room wall with a flashlight at an angle; inconsistencies in shine revealed uneven paint layers, prompting me to request a recoat from my contractor. This flashlight trick is invaluable for homeowners.
Check Adhesion and Thickness
Use a small utility or putty knife to gently scrape an inconspicuous corner or existing paint patch. If the paint peels easily or flakes off, it’s likely low adhesion quality—an issue often caused by inferior formulations. Also, pressing a finger lightly onto the wall can help; if paint dents or marks easily, the layer might be too thin. During my last project, I performed a quick “thumb test” to ensure the paint pulled away cleanly; it reaffirmed the paint’s durability. For a more precise assessment, consider purchasing a paint thickness gauge, similar to how this simple tape test is used.
Evaluate Drying and Curing Time
High-quality paint typically dries evenly and cures properly within recommended periods. If your paint remains tacky or appears uneven after the advised drying time, it might be of lower grade or improperly applied. I once noticed my newly painted wall feeling sticky even after 24 hours, which prompted me to contact the painter—turns out, the paint was watered down. Understanding the typical drying time helps you distinguish between poor quality and misapplication. Regarding color stability and longevity, click here to discover how inferior paints compromise exterior finishes.
Ask for Technical Data and Labels
Request the manufacturer’s technical datasheet, which includes pertinent details like VOC content, pigment volume concentration, and durability ratings. Low-cost paints often lack this transparency, hinting at subpar ingredients. When I bought paint for my garage, the absence of proper labeling raised a red flag. Upon inspecting the VOC labels, I realized it contained hidden chemicals that could affect indoor air quality. Always scrutinize product labels and opt for certified paints to ensure quality.
Observe the Application Process
Professional painters start at the top of a house for a reason—they manage gravity and drips efficiently. Watching the application helps you gauge quality and technique. I once oversaw a DIY project on my fence; applying paint in thick, uneven strokes led to runs and uneven coverage, which I fixed by reapplying with proper technique. Take note if the painter misses spots, overlaps poorly, or neglects edges—these are signs of amateur work. To prevent common pitfalls like tape tearing or drips, here’s a trick I use during touch-ups.
While many homeowners believe that choosing the right color or hiring a professional guarantees a perfect finish, the reality involves intricate details often overlooked. A prevalent myth suggests that all paints cure equally overnight, but in truth, factors like humidity and paint formulation can dramatically affect drying and durability. For instance, using low-quality paint or improper application methods can lead to peeling or fading even with the best techniques. An advanced mistake many make is neglecting surface preparation, which is crucial for long-lasting results. Skipping steps like sanding or priming can cause issues that only become visible months later, such as bubbling or uneven texture. Moreover, understanding the chemistry behind paints reveals that VOC content and pigment quality significantly impact longevity and safety—yet, many skip reading labels or dismiss certification marks. This oversight can compromise indoor air quality and financial efficiency. An insightful study from the Journal of Coatings Technology emphasizes that high-quality pigments provide better color stability and resistance to environmental stressors, a nuance often missed by DIY painters. Additionally, misconceptions around the importance of starting at the top of a house or overreliance on painter-grade materials can lead to avoidable failures. For example, many underestimate the importance of proper surface cleaning before painting; dirt, grease, or mildew can impair adhesion, resulting in premature failure. Want to ensure your painting project stands the test of time? Be cautious of using watered-down paints or cheap primers as shortcuts—they usually produce a subpar finish and double your work in the long run. For more practical tips on avoiding these pitfalls, visit our guide on how professional painters approach preparation and material selection. Remember, subtle nuances like the right application technique, surface prep, and material quality make all the difference. Would you like to learn how to spot poor-quality paint before it’s too late? Let me know in the comments! 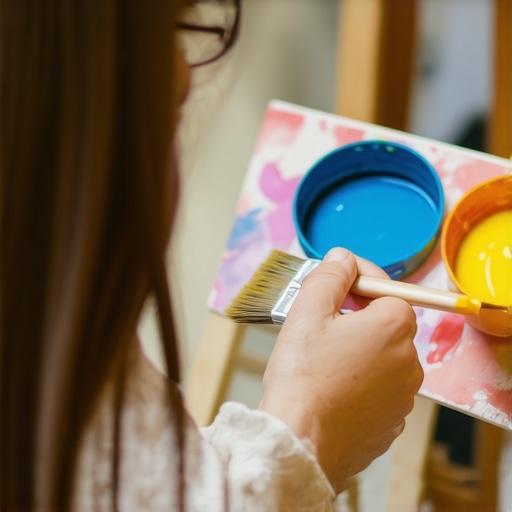 When it comes to achieving a professional, durable finish in house painting, having the right tools isn’t just a convenience—it’s a necessity. Over the years, I’ve refined my toolkit to include equipment that ensures precision, efficiency, and longevity of the paint job. One indispensable item is a high-quality paint sprayer. Unlike brushes or rollers, a sprayer provides even coverage on large surfaces and hard-to-reach areas, reducing uneven coats that can peel or fade prematurely. I personally swear by the Wagner Control Pro 150, which offers adjustable pressure settings for different surfaces and minimal overspray, making it both versatile and economical. For delicate trim and edges, a fine-detail brush like the Purdy Angel Sash Brush has been a game-changer. Its tapered bristles allow for crisp lines without drips, which is essential for long-lasting results, especially when avoiding touch-ups caused by uneven application. Additionally, I use a paint thickness gauge when prepping or inspecting painted surfaces. This small device helps me verify that the application density meets manufacturer specifications, directly influencing durability and resistance to environmental stressors. Keeping your tools clean is vital; I recommend a mixture of 1 part vinegar to 3 parts warm water for cleaning brushes and rollers—it’s an eco-friendly method that prevents paint buildup, ensuring tools last longer and perform consistently. As technology advances, software like Benjamin Moore’s Color Portfolio app assists in choosing the right color combinations and finishes, which can affect the paint’s longevity. Proper knowledge about surface preparation tools, such as sanding blocks with fine grit (220 or higher) and expansion primers, also plays a crucial role in enabling paint to adhere properly and resist peeling over time. Looking ahead, I predict that smart painting tools incorporating sensors will become mainstream, offering real-time feedback on application thickness and even environmental conditions to optimize curing. To truly keep your painting projects working for years, I recommend consistently investing in quality tools and maintaining them diligently. For a more thorough approach, check out this detailed review of advanced painting equipment to elevate your home improvement game. And here’s an advanced tip: always perform a test patch with your sprayer at varying pressures to fine-tune coverage and minimize waste—this small step can make a significant difference in the long-term durability of your paint job.
Lessons Only Experienced Painters Realize
One of the hardest lessons I learned was that rushing surface preparation is a false economy; skipping proper cleaning or sanding leads to peeling and bubbling down the line. I also discovered that trusting gut feelings over technical data—like paint labels and VOC info—can cost you dearly in durability and safety. Another lightbulb moment was realizing that even subtle application flaws, like uneven pressure during rolling, create issues that only reveal themselves months later. Finally, understanding the chemistry behind different paints has helped me choose products that resist fading and mildew, saving time and money in repairs.