

There was a time I nearly lost my mind over a simple house painting mishap. I had just finished a meticulous job, excited to finally see my freshly painted walls and floors. But as I stepped back, my eyes caught a horrible sight: tiny, glossy drips of paint scattered across my pristine hardwood floors. It was as if the paint had decided to rebel, leaving behind glossy fingerprints of carelessness. That frustrating moment sparked a lightbulb in my head — there had to be a better way to handle those stubborn drips, especially on delicate hardwood surfaces.
The Revolutionary Putty Knife Trick That Saved My Floors—and Can Save Yours Too
If you’ve ever battled paint drips on your hardwood floors, you know how stubborn they can be. No matter how careful you are, these little blobs seem to appear out of nowhere, ruining your flawless finish. Fortunately, I discovered a surprisingly simple yet effective method: the putty knife trick. With just a few quick, gentle strokes, I found I could lift those paint drips without damaging my flooring. And trust me, this technique isn’t just for pros; it’s accessible to anyone willing to give it a shot. Today, I promise to show you exactly how to master this trick so you can keep your floors looking fresh and flawless.
Will This Trick Really Work On All Types Of Paint and Floors?
Early on, I made the mistake of assuming it would be a one-size-fits-all fix. Turns out, that’s not true. Different paints and floor finishes require different approaches. For example, latex paint is more forgiving, but oil-based paints can be a bit trickier to remove without scratching. I learned this the hard way when I gouged my floor trying to scrape off a stubborn drip with a blunt tool. Since then, I’ve refined my method and tested various techniques, and I’ve come to realize that patience and the right tools are key. For more tips on protecting your hardwood, check out this guide on painters tape. Understanding these nuances will help you avoid common pitfalls and ensure a flawless finish every time.
Now that you’re aware of what’s possible, let’s dive into the practical steps I use to zap those annoying drips away quickly and safely, without risking damage to my beautiful floors. Because, after all, a little knowledge and the right tools can make all the difference between regret and satisfaction when it comes to home painting projects.
Preparing Your Workspace to Prevent Future Drips
Before tackling the current paint drips, set the stage by protecting your floors and furniture. Lay down a drop cloth or old towels to catch any accidental spills during the cleanup. Remove nearby furniture or move it to the center of the room, covering with plastic sheeting if necessary. Wearing gloves and eye protection ensures safety as you work. Think of this step like preparing a battlefield—every protection measures your victory against messes.
Softening the Drips for Easier Removal
Apply a small amount of denatured alcohol or spirits (appropriate for the type of paint) onto a clean cloth. Gently dab the paint drip, allowing the solvent to soften the hardened paint. For oil-based paints, patience is key; it may take a few minutes for the solvent to penetrate fully. I once accidentally used too much pressure and gouged my floor, so gentle taps are better than aggressive scrubbing. The goal is to make the paint pliable, like rubber, so it lifts easily without damage.
Using the Putty Knife Effectively
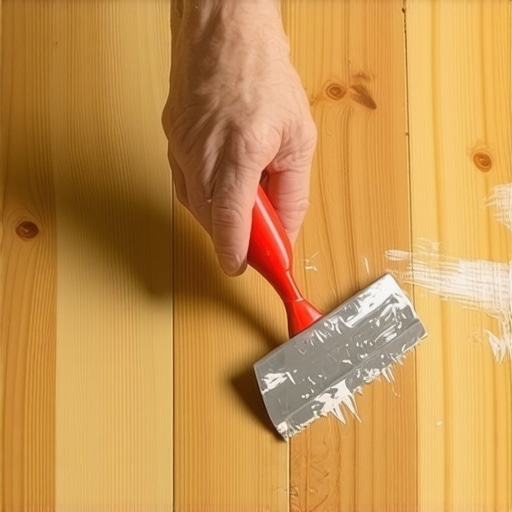
Select a plastic or metal putty knife with a flexible blade. Hold it at a low angle—about 30 degrees—and gently slide it underneath the softened paint as if prying open a stubborn lid. Start at the edge of the drip and work in small, controlled strokes. I remember once trying to scrape off a large drip in one go, only to scratch my floor; consistency and patience matter. Like peeling a stubborn sticker, work slowly until the paint lifts uniformly.
Tip: Steady the Knife for a Smooth Finish
Keep your hand steady as you work, applying even pressure. If resistance increases sharply, stop and re-apply solvent. For particularly stubborn drips, re-soak and wait again. The key is to avoid forcing the tool, which can cause microscopic scratches. Think of it like pruning a delicate bonsai—gentle, deliberate movements yield the best results.
Cleaning Up Residual Paint and Debris
Once the drip is lifted, wipe the area with a clean cloth dampened with water or a mild cleaner to remove any residue. Inspect your work; if any paint remains, repeat the softening and scraping process. For any tiny leftover spots, a fine grit sanding block can smooth edges, but only lightly. Remember, over-sanding can dull or damage your floor’s finish. It’s best to keep it minimal and delicate—like buffing a jewel.
Final Touches to Restore Shine and Protect
After all the paint is removed, apply a small amount of hardwood floor polish or wax to restore the luster. This seals the cleaned area and blends it seamlessly with the rest of the floor. My last project involved a stubborn white paint drip right in front of my door, and after this process, it looked as good as new—no trace of the mishap. With patience and the right tools, you can restore your floors to pristine condition without costly refinishing or replacement.
To explore more on protecting your floors from future paint mishaps, check out this guide on painter’s tape. Remember, preparation is half the battle in any painting project—preventing drips is as crucial as removing them.
 Many homeowners believe that applying a fresh coat of paint is straightforward, but in reality, there are nuanced pitfalls that can compromise your results. One widespread misconception is that all paints and surfaces are interchangeable, which is far from the truth. For instance, using regular latex paint on kitchen cabinets without a proper bonding primer often leads to peeling and chipping within months. Experienced painters know that specialized primers, like those containing bonding agents, dramatically improve adhesion, especially on glossy or oily surfaces. Ignoring this critical step can undo your hard work and incur additional costs. To understand the importance of surface preparation and primer selection, check out this guide on priming kitchen cabinets. Furthermore, many underestimate the significance of proper surface cleaning. Dust, grease, and even tiny residues can prevent paint from sticking adequately, leading to uneven finishes or premature failure. A common mistake is skipping the cleaning phase altogether. This oversight can be particularly damaging when repainting over previously painted walls that haven’t been primed properly. A simple test like the soap-and-water wash can reveal whether your surface is ready for a new coat. Don’t let these subtle errors sabotage your project. Instead, take the time to understand the nuances that separate a DIY disaster from professional-quality results. Remember, thorough preparation, correct material choices, and attention to detail make all the difference in achieving a flawless finish. With these insights, you’re better equipped to avoid costly mistakes and ensure your home’s paint job lasts for years to come. If you’re curious about more advanced tips, such as the hidden effects of different paints or environmental factors, explore this detailed primer testing method. Have you ever fallen into this trap? Let me know in the comments.
Keeping Your Painting Equipment in Prime Condition
To ensure long-term success in your painting projects, maintaining your tools is essential. I highly recommend investing in high-quality brushes and rollers, such as premium synthetic brushes that maintain their shape and give smooth finishes over time. Regular cleaning after each job prevents paint buildup, which can cause bristle damage and uneven application. Use warm, soapy water for latex paints and solvents like mineral spirits for oil-based paints, depending on your project. A well-maintained roller frame can be reused multiple times if cleaned properly and stored in a dry, dust-free environment. Long-term, these habits not only extend the lifespan of your equipment but also guarantee that each project starts with the best possible tools.
How do I maintain my painting tools over time?
Routine cleaning is the cornerstone. After painting, rinse brushes and rollers thoroughly to remove all paint residue. For brushes, combing out excess paint and reshaping the bristles before drying ensures they keep their form. Store brushes hang them upside down or flat to prevent deforming the bristles. For rollers, remove the core and wash thoroughly; keep them dry and airtight if you plan to reuse them soon. Additionally, periodically check for signs of wear or damage, replacing worn-out equipment promptly. This approach keeps your tools performing optimally, making future projects smoother and more professional-looking. In the future, I predict smart, sensor-equipped painting tools may alert you when cleaning or maintenance is due, further streamlining the process. For now, diligent care remains the gold standard. For more insights on tool longevity, check out this guide on protecting your surfaces during painting.
Selecting the Right Paint for Long-Lasting Results
Choosing durable, high-quality paints is half the battle. I personally favor brands with proven longevity—products that resist chalking, mildew, and fading. For instance, premium exterior paints with zinc oxide additives outperform cheaper options, providing better UV resistance and weatherproofing. Store your leftover paint properly in a cool, dark place, tightly sealed, to prevent spoilage over the years. Using the correct primer and applying the right number of coats based on the surface type ensures optimal adhesion and durability. Don’t skimp on preparation; cleaning and priming properly creates a solid foundation for lasting beauty. My tip: always test your paint’s scrubbability using the coffee test—wipe a small area with a damp cloth to see how well it withstands cleaning without damage. Long-term, this preparation minimizes touch-ups and maintains your home’s curb appeal. Prediction-wise, advanced nanotechnology paints future-proof your surfaces, but for now, stick with proven high-quality products and diligent prep routines. For more on surface preparation, visit this comprehensive primer guide.
What I Wish I Knew Before Starting
- Lesson one: Never underestimate the power of proper surface preparation. Skipping steps like cleaning and priming can lead to costly mistakes and uneven finishes. My biggest breakthrough was realizing that even a tiny speck of dust or grease can ruin an entire wall’s look, so investing time in meticulous surface prep pays off in the long run.
- Lesson two: Choose your tools and materials wisely. High-quality brushes, rollers, and paints might seem pricier upfront, but they deliver smoother, more durable results. I once used cheap brushes, only to spend double the time fixing streaks and brush marks. Upgrading my toolkit transformed my results and boosted my confidence.
- Lesson three: Patience is your best friend. Rushing through coats or skipping drying times can cause peeling, bubbling, or uneven color. Embracing a steady, methodical pace ensures a professional-looking finish that lasts years. I learned this the hard way, but now I savor each step, knowing it leads to excellence.
- Lesson four: Embrace small, controlled steps when removing paint drips or imperfections. Using a putty knife gently, combined with the right solvents, enables you to fix mistakes without damaging your floors or walls. This delicate approach saves money and preserves your home’s beauty.
- Lesson five: Protect your work area thoroughly. Covering furniture, securing drop cloths, and masking edges prevent messes and accidental smudges. Properly prepared spaces make the painting process smoother, more enjoyable, and less stressful.
Tools and Resources That Elevated My Painting Game
- Specialized primers truly make a difference on tricky surfaces, ensuring adhesion and longevity. I trust this resource because it’s based on proven techniques that save time and prevent future chipping.
- The coffee test became my go-to method for testing paint durability. It helps me choose the best scrubbable paints for high-traffic areas, which pays dividends over time.
- Painter’s tape hacks are essential for achieving crisp lines without mess. Over the years, I’ve refined my technique and now get professional-looking edges every time, saving me the cost of rework.
- Proper surface cleaning and patience during application protect against peeling and fading. These insights have extended the lifespan of my exterior paint jobs beyond expectations.
Your Next Move Toward Perfect Painting
Embarking on a painting project can feel daunting, but with the right knowledge and mindset, you’re capable of stunning, durable results. Remember, the key is in the details—preparing surfaces thoroughly, selecting quality materials, and working patiently will set you apart. Don’t let common mistakes hold you back; instead, approach each project with confidence and a willingness to learn. Your home deserves the best finish, and with these insider insights, you’re well on your way to mastering the craft. Have you ever tried a small trick that made a big difference in your paint jobs? Share your stories below and let’s grow together in this painting journey!
About the Author
Aqil Ahmad
Leading Elite World Travel and Tourism L.L.C with ...
Aqil Ahmad is a seasoned professional with a distinguished background in high-level service management and operational leadership. As a key contributor to elitepainterpro.com, he brings a wealth of experience from his tenure leading Elite World Travel and Tourism L.L.C, where he cultivated a deep understanding of hospitality and premium service standards. His career is marked by a commitment to excellence, having spearheaded major initiatives across international markets, including the USA. This global perspective allows Aqil to provide unique insights into the professional painting industry, focusing on quality control, client satisfaction, and the meticulous attention to detail required for elite-level home transformations. With a proven track record in managing complex operations and delivering superior results, Aqil serves as an authoritative voice for homeowners and professionals seeking to elevate their property's aesthetic and value. He leverages his hospitality expertise to ensure that every project discussed on elitepainterpro.com meets the highest benchmarks of professionalism. Aqil is deeply passionate about helping others achieve their vision through expert guidance and high-quality craftsmanship.