

It was a typical Saturday afternoon when I realized I had barely touched my paint can after finishing a facelift on my living room trim. The leftover paint sat in the can, half-used, threatening to dry out or spoil. I’d been there before—popping the lid, only to find a crusty, unusable mess. Frustration bubbled up because not only did I waste money, but I also hated the idea of tossing paint, especially when I’d need a touch-up months down the line.
Then, I had my lightbulb moment: what if I could *store* leftover trim paint in a way that kept it fresh and ready for next time? That’s when I discovered the power of the simple mason jar hack. It’s surprisingly effective and has saved me time, money, and headaches.
In this post, I’ll share how a small, inexpensive trick transformed my approach to leftover paint and how it can do the same for you. Whether you’re a weekend warrior or a seasoned painter, proper storage means less waste and more peace of mind.
Why Properly Storing Leftover Paint Really Matters
Many DIYers and even pros underestimate the importance of sealing leftover paint correctly. Leftover trim paint is often still good for touch-ups or future projects, but exposure to air causes it to dry out and form skin, making it unusable. And if the paint gets contaminated or dried up in the can, it’s almost like throwing money down the drain.
Using a mason jar with a tight-fitting lid is one of the simplest yet most effective ways to keep your leftover paint fresh. It creates an airtight seal that prevents moisture loss and exposure to air, extending the paint’s lifespan significantly. According to recent research, improperly stored paint can dry out in as little as a few days—so quick that you might not even realize it until it’s too late.
From personal experience, I once threw away an entire quart of custom-mixed trim paint because I forgot to seal it well. The next time I needed a tiny touch-up, I had to buy a new can, costing me both time and money. That’s when I vowed to change my storage habits.
If you’re tired of wasting paint or cringing at the thought of tossing perfectly good leftover paint, this simple trick might be just what you need. Plus, it’s cost-effective and reduces environmental waste, making it a win-win. Curious about the details? Stick around—I’ll guide you through the process of using mason jars to preserve your paint in a way that’s practical and efficient.
And before you dismiss this as just another homeowner tip, consider this: many professional painters swear by airtight storage containers, including mason jars, as part of their standard practice to maintain paint quality. It’s a small step that can make a big difference.
Have you ever faced the frustration of dried, unusable paint after a project? If so, you’re not alone. Let’s dive into how you can master this simple hack and keep your leftover trim paint in tip-top shape for months—sometimes even years—down the line.
Choose the Right Container for Preservation
Start by selecting a clean, empty mason jar with a tight-fitting lid. I once found an old jam jar in my kitchen, and it turned out to be perfect for this purpose. Clean the jar thoroughly to remove any residue or odors, then dry it completely. This creates a fresh environment, free from contaminants that could spoil your paint.
Prepare Your Paint for Storage
Stir the leftover paint thoroughly with a paint stir stick or a clean wooden paddle. This ensures that any settled pigments and binders are evenly mixed, preventing separation and drying out. If there are any skin layers on the surface, gently scrape them off before pouring. Think of it like preparing ingredients before cooking—uniformity is key to quality preservation.
Transfer Paint Carefully
Use a clean pouring spout or a funnel to transfer the paint into the mason jar. Anchor the jar on a stable surface, and pour slowly to avoid spills. Filling the jar close to the brim minimizes the airspace inside, reducing oxidation. I once spilled a bit of paint on my workbench when rushing; since then, I always pour carefully and fill the jar just enough to cover the remaining paint.
Seal and Label Immediately
Secure the lid tightly on the mason jar, ensuring it’s airtight. Then, label the jar with the color, finish, and date of storage. This quick step prevents confusion later and helps track how long the paint has been stored. I use a waterproof marker and write directly on the glass—simple but effective.
Store in a Temperature-Stable Area
Place the jar in a cool, dark spot away from direct sunlight and temperature fluctuations—such as a basement or closet. Extreme heat can cause the paint to thicken or spoil, while freezing temperatures might damage its consistency. I learned this the hard way when I stored paint in my attic, and it turned into a sticky mess come summer. Proper storage extends the paint’s usability, sometimes for years.
Reviving Stored Paint Before Use
When ready to use the stored paint, shake the jar vigorously or stir with a paddle to remix any separated components. If it feels thick, add a small amount of the appropriate thinner or water (for latex paints), then stir again until smooth. I once opened a jar after a year and was able to touch-up my trim without any issues, thanks to proper stirring and a quick stir stick.
Identify Contaminated or Dried Paint
If the paint appears chunky, has a foul smell, or if removal of crusty layers is necessary, it’s best to discard it. For instance, I once kept paint that developed a sour smell—an unmistakable sign it spoiled. Properly stored paint can last months or even years, but if it shows signs of deterioration, it’s safer to replace it than risk a poor finish or project failure.
By following these concrete steps, you ensure that your leftover trim paint remains usable long after the initial project. This simple hack with mason jars not only saves money but also reduces waste. For more expert tips on maintaining your paint quality, visit this guide on dust removal before priming or explore techniques for painting over challenging surfaces.
Most people assume that painting is simply about selecting the right color and applying it evenly. Yet, beneath this surface level lies a complex web of nuances that can significantly impact the final result. One common misconception is that multiple coats always guarantee durability; however, applying too many thin layers can actually cause issues like bubbling or uneven texture. According to industry experts, understanding the right number of coats and proper surface preparation is essential for a lasting finish (read more about proper priming and coating techniques).
Another frequently overlooked detail is the importance of surface adhesion. Many assume that if the paint appears to stick, it’s secure. But in reality, poor adhesion often stems from unclean surfaces or incompatible primers. For instance, painting over peeling paint without proper removal traps moisture, leading to future failures like bubbling or mold. It’s a trap many fall into, often blaming the paint itself when the root cause is surface prep (learn how to prepare walls effectively).
What advanced techniques can improve your house painting outcomes?
While novices focus on color choices and brushes, seasoned painters leverage advanced methods like proper color sequencing and understanding environmental factors. For example, selecting a finish that complements room lighting can make spaces appear larger or cozier. Moreover, timing your paint jobs when humidity and temperature are optimal prevents issues like blistering or cracking. Experts also consider the substrate type, adjusting formulations accordingly, especially on challenging surfaces like stucco or concrete.
One underrated nuance involves understanding how air circulation during application can affect drying times and finish quality. Poor ventilation traps moisture, resulting in inconsistent coverage or long-term deterioration. As noted in studies, controlling environmental conditions during painting can extend your project’s lifespan and reduce rework (discover tips for exterior surface painting).
Be mindful of common pitfalls like rushing through surface prep or neglecting the use of quality primers. These small oversights accumulate into costly mistakes. Remember, even the best paint can fail prematurely if applied under improper conditions or over unsuitable surfaces. If you want your investments to last, pay attention to these subtle but critical details — it’s where craftsmanship meets longevity.
Have you ever fallen into this trap? Let me know in the comments. Improving your technique by mastering these hidden nuances can elevate your results from average to professional-quality craftsmanship.
,
Invest in Quality Tools for Longevity
One of the key factors in ensuring your house painting lasts over time is using the right tools. I personally swear by high-quality, professional-grade brushes and rollers, as they provide smoother finishes and reduce paint wastage. For interior walls, a 3/8-inch nap roller covers textured surfaces effectively, while a ½-inch nap is better for semi-rough exteriors. Additionally, a good extension pole minimizes ladder use, improving safety and precision during high or hard-to-reach areas.
Maintain Your Equipment to Save Money
Regular cleaning of brushes and rollers extends their lifespan significantly. After each painting session, rinse brushes thoroughly with warm water for latex paints or specialized solvents for oil-based paints. Store brushes upright or hanging to prevent deformation of the bristles. I also recommend using a stiff wire brush to remove dried paint from tools periodically—this prevents buildup that can affect future finishes. Proper tool maintenance reduces the need for costly replacements and ensures consistent quality over multiple projects.
Use Reliable Storage Solutions for Leftover Paint
Storing leftover paint correctly is crucial for future touch-ups. My go-to method involves transferring small amounts into airtight mason jars, as mentioned earlier. To keep paint usable for months or even years, I also add a layer of plastic wrap directly on the surface of the paint before sealing. This extra barrier minimizes oxygen contact, preventing skin formation. Label your containers clearly with color and date. These simple steps make it easy to reuse paint, saving money and contributing to environmentally friendly practices.
Plan Your Long-Term Painting Schedule
Consistency is vital for maintaining a fresh look. Over time, sunlight or weather exposure can cause paint to fade or peel. To combat this, I recommend inspecting painted surfaces biannually, particularly in harsher climates. Touch up areas showing signs of wear before they escalate into bigger problems. For exterior surfaces, consider applying a clear sealant or protective coating every few years—this acts as a barrier against moisture and UV damage. Staying proactive with maintenance ensures your investment in house painting pays off for years to come.
Future Trends in House Painting Maintenance
As technology advances, smart paints with self-cleaning or UV-resistant properties are becoming more accessible. Moreover, digital tools such as paint color analyzers and moisture meters can help identify issues early, before they become costly repairs. I predict that integrating such devices into regular maintenance routines will become standard practice, reducing the need for extensive repainting.
How do I maintain my tools over time?
Consistently cleaning and storing your tools properly is key. Use warm water and mild soap for latex paints, and dedicated solvents for oil-based paints. Keep brushes bristle-side up or hanging, and avoid drying them in direct sunlight. Sharpen or replace worn-out rollers and brushes to preserve the quality of your finishes. Regular maintenance of tools not only extends their life but also ensures each project begins with optimal equipment. Want to see how using professional-grade brushes improves your results? Give it a try on your next project and notice the difference.
The Hardest Lesson I Learned About House Painting and Proper Prep
One of the most valuable lessons I discovered was the importance of thorough surface preparation. Skipping steps like cleaning, sanding, or priming might save time initially, but it costs you quality and durability in the long run. I once painted over a wall without removing dust or peeling paint, only to see bubbles and cracking months later. Now, I always prioritize proper prep, ensuring a smooth, lasting finish. This insight changed my entire perspective on house painting, emphasizing that patience in prep pays off with professional-looking results.
3 Myths About House Painting That Held Me Back from Better Results
- Myth 1: All paint is created equal.
Reality: Quality varies greatly, and inexpensive paints often require more coats and fade faster. - Myth 2: One coat is enough.
Reality: Most surfaces need at least two coats for true coverage and longevity. - Myth 3: Color doesn’t matter once you get the right hue.
Reality: Finish and undertones significantly impact how the color looks and lasts over time.
Debunking these myths helped me avoid costly mistakes and achieve stunning, durable results with less stress. It’s worth investing in quality tools and understanding the nuances to elevate your painting projects beyond just a fresh coat of paint.
What Experts Won’t Tell You About Selecting the Perfect Painting Tools
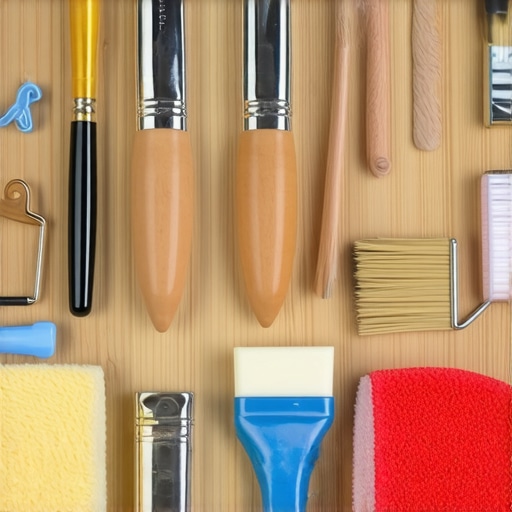
Many professional painters swear by high-quality brushes and rollers tailored to specific finishes and surfaces. For example, choosing the right nap length for rollers can make a noticeable difference in coverage and texture. Also, investing in a good extension pole allows for even paint application on ceilings and high walls, reducing fatigue and preventing uneven results. Trusting expert-recommended tools, like premium brushes and precise masking tapes, simplifies the process and ensures a neat, professional-looking finish every time. If you’re curious about enhancing your toolkit, I recommend exploring specialized cleaning techniques for tools to maintain their performance.
Your Turn to Elevate Your Painting Game
Getting into the habit of mastering these insider lessons can markedly improve your house painting results and save you both time and money. Remember, the magic lies in the details—from surface prep to tool selection and storage. Don’t be discouraged by initial setbacks; each project is a step toward becoming your own home improvement expert. Embrace these insights, and watch your spaces transform with confidence. Now, tell me: which of these lessons resonates most with your current painting challenges? Share below and let’s learn together!