I vividly remember the day I looked at my living room wall and felt a sinking feeling—again. No matter how much I scrubbed, no matter the new furniture I bought, that dull, outdated shade of beige seemed to drag the entire space down. I realized I had fallen into a trap that many homeowners do: sticking to those familiar, yet outdated, paint colors out of habit or fear of wasting money. It was a lightbulb moment that prompted me to rethink my approach to choosing paint colors.
Why Clinging to Old Paint Colors Costs You More Than Just Style
Staying behind the times with your interior paint choices can actually do more harm than good. Outdated colors can make your home look tired, decrease its apparent value, and even impact how you feel when you’re inside. When I finally decided to update my palette, I learned that many of those classic shades—like certain browns, yellows, or pastels—are no longer in vogue and can make your space feel dated in a matter of years. According to recent industry insights, homebuyers and design experts agree that certain colors age poorly and can turn off potential buyers or visitors.
Is It Worth Spending on a Color Makeover?
Many homeowners hesitate, worried about wasting money on what seems like a superficial change. I made this mistake early on—spending big on trendy new furniture but leaving my walls in their dated hues. That was a rookie error that I now know better how to avoid. If you’re wondering whether updating your colors is truly worth it, the answer is a resounding yes. It not only elevates your home’s style but also boosts your confidence and comfort every time you walk through the door.
So, what are the colors you should avoid in 2026? And how can you effortlessly update your interior for a more modern, inviting look? Stay tuned—I’ve got the insights and tips to guide you through the process, so you’re never stuck with outdated hues again. To get started, check out some of the top local painting experts who can help accelerate your transformation—more on that soon. Have you already faced this problem with your home’s colors? Share your experience in the comments; I’d love to hear how you navigated it.
Choose Your Palette Wisely
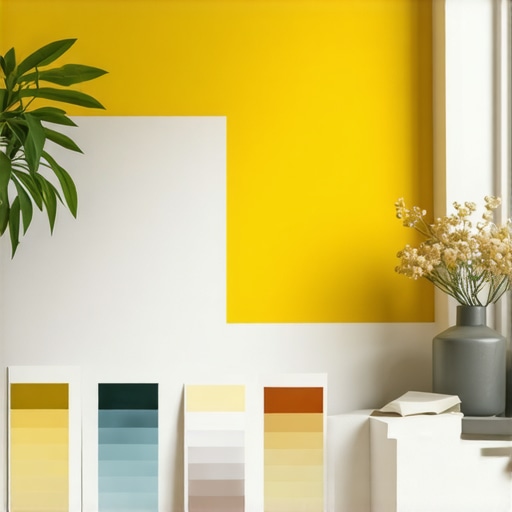
Start by selecting colors that complement your space and evoke the desired mood. Gather inspiration from magazines or online portfolios. Remember, colors are like spices in cooking; a little goes a long way. I once opted for a soft gray in my home, which made the space feel more open and modern. Use tools like color swatches and digital apps to visualize before committing.
Prep the Surface Thoroughly
Proper preparation is crucial. Remove furniture or cover it with drop cloths, sand any rough patches, and clean the walls to eliminate dust and grease. Think of your wall as a canvas—clean and smooth surfaces make for a flawless finish. I once skipped this step and ended up with uneven patches that needed re-priming, delaying my project. Invest time here to save headaches later.
Gather the Right Tools and Materials
Use high-quality brushes, rollers, and painter’s tape. The right tools influence both speed and quality. For large flat surfaces, rollers are efficient, while brushes are better for edges and corners. I tried shortcutting with cheap tools, resulting in streaks and uneven edges. Checking out recommendations from top local painting tips can help you select the best equipment for a professional look.
Apply Primer for Better Results
Priming ensures the new paint adheres well and enhances color vibrancy. For walls with stains or dark colors, primer is indispensable. Think of primer as the foundation of a house; without it, everything else crumbles. In my experience, applying a quality primer saved me from needing multiple coats of expensive paint, making the process more efficient.
Master Smaller Techniques for Edges
Use painter’s tape to mask edges, and a fine brush for corners. For precision, apply tape carefully along trim or molding, then use a brush to paint just the edges. I once attempted to freehand corners, which led to messy results. Learning this simple trick dramatically improved my finish. For expert guidance, explore local house painting tips.
Optimize Painting Strokes for Speed and Quality
Use consistent, overlapping strokes with your roller or brush. Load your tool adequately but not excessively to avoid drips. Think of painting like drawing—smooth, steady strokes produce the best results. During my first repaint, I kept stopping and starting, causing streaks. Once I adopted a continuous stroke technique, the finish became more uniform, cutting down my total work time. Check out house painting speed tips for more insights.
Layer and Finish with Confidence
Apply multiple thin coats rather than one thick coat. Wait for each layer to dry completely before applying the next. Thinner layers prevent drips and uneven textures, ensuring durability and aesthetic appeal. I learned this by experience—rushing the process resulted in peeling paint months later. Patience here pays off, and for further strategies, visit quick painting tips.
Cleanup and Maintenance
Remove painter’s tape carefully after the final coat, and clean your tools promptly. Store leftover paint properly for future touch-ups. Proper cleanup seals the project, extending the life of your fresh coat and preserving your tools. I once ignored this step and found hardened brushes later. Investing a few extra minutes here saves money and effort long-term.
Applying these concrete steps transforms your painting project from a daunting task into a manageable, even enjoyable process. Remember, each phase builds upon the last, ensuring a sleek, modern finish that will elevate your space and confidence. For more detailed advice, consult trusted sources like top painting companies.
Many homeowners assume that choosing a reputable painter or sticking to traditional methods guarantees a flawless result. However, beneath the surface, there are nuanced challenges and misconceptions that can sabotage your project. Let’s delve deeper into some of these pitfalls to ensure your next painting endeavor is truly successful.
Why the ‘One-Size-Fits-All’ Approach Fails in Painting
Contrary to popular belief, not all paints or techniques suit every surface or environment. For example, assuming that a high-gloss finish always offers better durability ignores variables like humidity, surface prep, or the type of coating used. Professional insights highlight that tailored solutions—like specific primers or specialized paints—are often necessary for optimal longevity. Overlooking this can lead to premature peeling or discoloration, costing you more in touch-ups later.
Beware the Myth of Cheap Canvases
Many think that saving money by hiring cut-rate contractors or using inexpensive paints saves time and effort. In reality, expert painters understand that quality materials and experienced professionals yield faster, more durable results, minimizing rework and dissatisfaction. Skimping here often results in uneven coats, uneven color, or peeling, which shows that you often get what you pay for.
Advanced Insights: What Do Experts Know That You Don’t?
Professional painters are acutely aware of nuances like paint absorption rates, substrate compatibility, and environmental impacts—factors that most homeowners rarely consider. For instance, subtle differences in surface texture can affect how paint adheres, which is why surface preparation and choosing the right primer are critical. According to a recent study by the Paint Quality Institute, surfaces improperly prepared can reduce paint lifespan by up to 30%, emphasizing why expertise matters.
Furthermore, specialists often employ advanced techniques such as sprayer applications, strategic layering, and climate considerations to maximize efficiency and finish quality. Relying solely on DIY methods or generic advice can undermine these benefits, leading to costly mistakes. To align with industry best practices, consider consulting trusted sources like local painting experts who utilize advanced strategies tailored for rapid, reliable results.
Have you ever fallen into this trap? Let me know in the comments. Remember, understanding these hidden nuances helps you make informed decisions and achieve outstanding results with your house painting projects.
,
Keeping It Working: Essential Tools for Quality House Painting
Investing in the right tools is pivotal for achieving professional-looking results that stand the test of time. Personally, I rely on high-grade extension poles for rollers, which allow me to reach ceilings and upper walls effortlessly, reducing strain and ensuring even application. A quality corner brush simplifies trimming and edges, preventing drips and uneven lines. My go-to is the Purdy Alpha Pile angled brush—its stiffness and fine taper give me precision in tight spots. For larger surfaces, a premium microfiber roller cover offers superior paint pickup and minimal lint, delivering a smooth, uniform finish.
Additionally, I recommend using a paint sprayer for exterior projects or intricate interior designs. I prefer the Wagner Control Pro 150 to cut painting time significantly while maintaining control and minimizing overspray. Once you understand the nuances of your specific tools—like how different roller nap lengths affect paint absorption—you can optimize your workflow for faster, cleaner results. Consulting trusted sources, such as top local painting tips, helps me ensure I select equipment that maximizes efficiency and quality.
Easy Maintenance for Long-Term Results
Proper maintenance of your tools extends their lifespan and preserves their performance. I always clean brushes and rollers immediately after use with warm, soapy water (for latex paints) or the recommended solvent (for oil-based paints). Storing brushes properly—resisting the temptation to let the bristles splay—keeps them in excellent shape for future projects. Flying under the radar but equally important is inspecting tools regularly for wear and tear; replacing worn brushes prevents streaks or uneven application down the line. Resealing paint containers tightly prevents spoilage and hardening, so leftovers remain usable. For those looking to streamline this process, investing in a tool-cleaning system like the Wagner Prospector can dramatically reduce cleanup time, making ongoing maintenance straightforward and stress-free.
Preparing for Long-Term Durability
Beyond just tools, establishing a routine maintenance schedule ensures your paintwork stays fresh and vibrant. For exterior walls, inspecting for chipping or mildew annually allows for early touch-ups that prevent costly repairs later. Interior walls benefit from regular dusting and cleaning to prevent dirt buildup that can dull the finish. I make it a habit to revisit my painted surfaces every two years, addressing minor issues before they escalate. Using paint with advanced UV blockers and mildew-resistant formulas—especially in harsh climates—can extend the aesthetic and structural integrity of your project. As the industry anticipates smarter, eco-friendly paints with self-healing properties, staying updated on innovations can future-proof your investments. For expert strategies, I suggest exploring effective exterior house painting strategies.
Scaling Up Your Painting Projects with Confidence
When your initial project proves successful, consider scaling by adopting modular tools like telescoping extension poles and portable sprayers. These enable rapid transformations across multiple rooms or large exteriors without sacrificing quality. Proper planning—such as mapping out work zones and scheduling painting during optimal weather conditions—can save you days of rework. I’ve found that establishing a checklist of maintenance steps before starting helps me keep track and avoid forgetting essential care protocols. As the trend moves toward sustainable and self-healing paints, being proactive in equipment maintenance and surface preparation will magnify your results and satisfaction.
How do I maintain my painting tools over time?
Maintaining your painting tools long-term requires consistent cleaning, proper storage, and timely upgrades. Just as a mechanic cares for their tools, a painter benefits from rinsing brushes immediately after use, using the appropriate solvents, and storing them in a dry, protected space. Regularly inspecting rollers and brushes for signs of damage ensures a smooth finish on every project. Upgrading to ergonomic tools, like lightweight brushes or extendable rollers, can reduce fatigue and increase precision. Investing in quality equipment, coupled with knowledge from trusted sources, guarantees your tools remain effective for years to come. For more detailed strategies, consider reviewing trusted local painting tips and applying these techniques proactively.
If you’re eager to elevate your craftsmanship, try implementing a dedicated cleaning regimen immediately after your next painting session. Doing so ensures your tools serve you reliably on many future projects, building trust and efficiency in your workflow. Remember, high-quality tools paired with consistent maintenance are the cornerstone of dependable, professional results lasting for years.
What the Pros Won’t Tell You About House Painting Wins
- Trusting shortcuts often backfires: I learned the hard way that rushing through surface prep or skimping on quality tools leads to disappointing finishes and costly rework. True success in house painting demands patience and attention to detail, which professional painters understand intuitively.
- You can’t DIY your way out of surface inconsistencies: Sometimes, a wall’s imperfection isn’t just surface-level—it’s the key to a flawless coat. Investing in proper drywall repair and sanding techniques dramatically elevates your results, a secret many overlook until it’s too late.
- Understanding environmental impacts saves paint life: Humidity, sunlight, and temperature can sabotage even the best paint jobs. I found that timing my painting projects and choosing climate-appropriate paints made all the difference in longevity and appearance.
- Color choices influence mood and perception more than you imagine: Picking the right hues can transform not just the look, but also the feel of your home. I once went with calming neutrals in my living room, and it created an inviting space that friends still comment on.
- Sample testing is the small investment that pays huge dividends: Trying out swatches on your walls helps avoid costly mistakes, ensuring color harmony and satisfaction with the final look. The extra step is always worth the peace of mind.
Tools and Resources That Elevated My Painting Game
- High-quality brushes and rollers: I rely on trusted brands like Purdy and Wooster because their durability and finish quality outlast cheaper alternatives, saving me time and frustration. Investing in good tools is a game-changer.
- Digital color visualization apps: These tools help me experiment with palettes before committing, avoiding regrets and helping clients envision their space more accurately. I recommend exploring color matching apps that sync with my favorite paint brands.
- Professional surface preparation guides: From tips on sanding techniques to patch repair, resources like top local painting tips provided invaluable insights that elevated my craftsmanship.
- Weather forecasting tools: Planning around weather conditions minimizes issues like paint blistering or uneven drying. I always check forecasts before beginning exterior projects, ensuring perfect results.
Your Next Great Painting Journey Starts Now
Embarking on a house painting project is more than just applying color—it’s about infusing your space with personality, freshness, and confidence. Remember, the real transformation happens when you leverage the lessons learned, trust the right tools, and approach each step with patience and purpose. Whether you’re tackling a single wall or a whole house, these insights empower you to achieve professional results and enjoy the process along the way.
So, what’s stopping you from starting your next paint job? Share your plans or past experiences below—I’d love to hear how you’re turning your home into a masterpiece.
,
Reading this post really resonated with me, especially the part about choosing outdated colors that can make your home seem dull and less inviting over time. I remember when I first painted my living room in a bright yellow that was super trendy back then, but after a few years, it just felt outdated and didn’t match my growing style. Updating my palette was such a game-changer, not only for how my home looks but also for how I feel walking through the space. I’ve found that sticking to neutral tones with subtle accents gives a fresh look without making the room feel cold or impersonal.
I’m curious, has anyone else had success with using color accents to modernize a space without repainting the entire room? Also, I’d love to hear your tips on what new trending colors are working well in different rooms, especially in small spaces or bedrooms. It seems like a lot of the current trends favor soft, earthy tones—do you think those are good long-term choices or maybe just a passing craze? Looking forward to hearing more ideas from this community!