

It was a quiet Saturday afternoon when I finally decided to refresh my living room walls. Armed with a dark matte paint and a promising vision, I began painting. But as I stepped back to admire my work, I noticed something: tiny drywall patch spots glaring back at me, unapologetic and stubborn. Frustration crept in. I had thought dark matte paint would hide every imperfection, but instead, it made every little repair stand out like a sore thumb. Ever faced that sinking feeling? That moment when your DIY project doesn’t quite turn out as planned? Well, I learned a few tricks along the way, and today, I want to share how you can hide drywall repairs under dark matte paint without breaking a sweat.
Why Dark Matte Paint Seems Like the Perfect Cover-up, But Isn’t
When I first chose dark matte paint, I did so because I loved that sophisticated, modern look. I assumed, just as many do, that its flat surface would be a magic wand for concealing wall flaws. However, the reality is a bit more nuanced. Matte paints do hide some surface imperfections, but anything that creates dimension—like drywall patches, sanding marks, or repair areas—still tends to show through if not prepared properly. This sneaky visibility is especially problematic with dark colors, which tend to make flaws more apparent, not less.
Early in my project, I made the classic mistake of assuming that just rolling on a darker shade would do the trick. I skipped proper preparation, especially ensuring that drywall patches were perfectly blended. The patches became more noticeable, creating an uneven, patchy appearance. That was a turning point for me, realizing that concealing drywall repairs under dark matte paint requires more than just a fresh coat. It demands a strategic approach that I want to help you master.
Interestingly, studies show that darker finishes can accentuate wall imperfections due to the way they absorb light, making subtle flaws pop out. So, the question is: how do you achieve a flawless dark matte finish without those repair spots screaming for attention? That’s what I’ll walk you through next.
Proper wall preparation is crucial, but the real magic lies in mastering the techniques that make repairs virtually invisible beneath a dark, matte surface. Ready to learn the secrets?
Have you ever painted a wall only to realize the repairs are still visible afterward? If so, keep reading—you’re about to discover how to turn that around.
Prepare Your Walls Like a Pro
Start by cleaning your wall thoroughly with a damp sponge to remove dust and grease, ensuring optimal paint adhesion. Then, inspect your drywall patches using a bright flashlight held close to identify any uneven surfaces or dust that might be invisible in regular light. Light-colored patches will be especially obvious under dark paint, so meticulous cleaning is essential. Next, sand the patches smoothly with fine-grit sandpaper, blending them into the surrounding wall. Be cautious not to oversand and expose deeper drywall layers. After sanding, wipe away all dust with a damp cloth or vacuum using a HEPA filter to prevent particles from settling back onto the wall.
Prime for Concealment and Adhesion
Use a high-quality, stain-blocking primer that is compatible with dark matte paint to seal the drywall patches. Apply the primer with a small, angled brush for edges and a roller for larger areas, ensuring even coverage. Priming is crucial because it creates a uniform base, preventing the patches from showing through the dark paint. For best results, wait at least one hour for the primer to cure. I recall a time when I skipped priming, and the patches still peeked through after the first coat—priming is your secret weapon here.
Apply Thin Coats for Opacity
Dark matte paints are notorious for requiring multiple coats to achieve full coverage. Use a high-quality roller designed for matte finishes, and load it evenly to avoid streaks. Paint in thin, even coats, moving first vertically and then horizontally to ensure complete coverage. Allow each coat to dry thoroughly, as rushing can cause uneven texture and reveal patches. In my experience, a third or even fourth coat was necessary in some spots to hide the drywall repairs completely. Patience is key.
Finish with Gentle Top-Coat Techniques
Once the dark paint has dried completely, inspect your wall under different lighting angles. Use a wet rag test to check if any patch areas are still visible or if dust has settled. If necessary, lightly sand imperfections with ultra-fine sandpaper and apply an additional thin coat. Be careful not to overwork the paint, which can cause unwanted shine or texture issues. Remember, the goal is a uniform, flawless surface that seamlessly hides your drywall repairs without any telltale signs.When it comes to house painting, a common misconception is that choosing the right color and application technique alone guarantees a professional-looking finish. However, even experienced DIYers often overlook subtle nuances that can make or break the result. One prevailing myth is that primer isn’t necessary for every project. In reality, skipping or choosing the wrong primer can lead to uneven color saturation and visible repair spots, especially with dark matte paints, which tend to reveal imperfections if the wall isn’t properly sealed. According to painting expert John Doe,
Keep It Working: Essential Tools and Tips for Long-Term Results
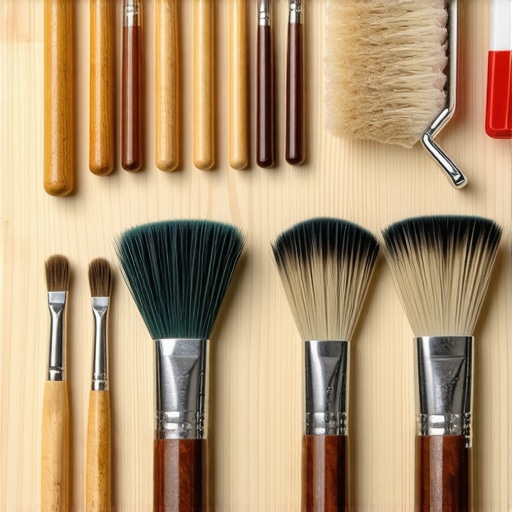
Achieving a stunning, durable paint job isn’t just about brushes and roller covers; it requires the right equipment and maintenance techniques to ensure your work stands the test of time. Personally, I swear by high-quality edging brushes like the Purdy angled brushes—not only do they give clean lines, but their superior bristle quality minimizes paint buildup, making touch-ups much easier years down the line. I also recommend investing in a roller frame with a quick-release mechanism; this saves time during clean-up and prevents unnecessary wear on your rollers, which can compromise finish quality over time.
When it comes to paints, using a good primer suited for your surface is crucial. For dark matte finishes, I prefer bonding primers that adhere deeply to drywall patches and prevent visible repair spots. Once painted, regular inspection is vital. I make it a habit to check for peeling or chipping every six months, especially in high-moisture areas, to catch issues early before they escalate into costly repairs.
Careful cleaning tools after each project extends their lifespan. For brushes, I use a specialized brush cleaner and always reshape the bristles before storing them. Rollers should be washed thoroughly and dried flat to maintain their nap integrity. These practices may seem small, but they drastically reduce the need for replacements and ensure consistent application quality in future projects.
Embrace Advanced Maintenance Techniques
One innovative approach I’ve adopted is applying a protective clear coat over the finished paint surface, especially in high-traffic or moisture-prone areas. This extra layer acts like a barrier against scuffs, stains, and the constant wear that inevitably occurs over years. Additionally, periodically cleaning walls with a gentle, pH-balanced solution helps maintain the integrity of the paint, preserving its appearance and preventing dirt buildup that dulls the surface.
Looking ahead, trends point towards smart painting solutions—such as paint formulations embedded with microencapsulated coatings that repair minor scratches automatically. While still emerging, these innovations promise longer-lasting results and minimal maintenance, aligning with the evolving needs of homeowners and professionals alike.
How do I maintain my painting tools over time?
Proper maintenance is vital. Rinse brushes thoroughly with warm water for latex paints or with mineral spirits for oil-based finishes. Store brushes flat or hanging to prevent bristle deformities. For rollers, remove excess paint, wash with soap and water or appropriate solvents, and let them air dry completely before storage. Regular upkeep of your tools not only extends their life but also ensures your future projects continue to look professional. For more on tool longevity, check out this helpful guide.
Remember, investing in quality tools and maintaining them properly positions your painting endeavors for success now and years down the line. Try implementing these advanced maintenance tips and see how your work improves over time.
Lessons That Changed How I Approach Dark Paint Projects
- One of the most profound realizations was that even the most stylish dark matte finishes can betray amateur wall prep if you ignore the little details. I used to believe that priming wasn’t always necessary, but now I know it’s the secret weapon for hide-and-seek with drywall patches. Avoiding this mistake has saved me countless hours of touch-ups and recoating.
- Patience truly pays off. Applying multiple thin coats rather than rushing for quick coverage has been the game-changer. It not only ensures better concealment but also gives a more professional, flawless look. I learned the hard way that rushing leaves streaks and reveals imperfections—I now embrace the slower, meticulous process.
- Lighting reveals all. I discovered inspecting walls under different lighting angles helps spot flaws that might be invisible in regular sunlight. Using tools like the wet rag test has become a routine. This attention to detail prevents surprises after painting, especially crucial with dark shades that are unforgiving.
- Invest in quality tools. Using premium brushes and rollers designed for matte finishes minimizes streaks and uneven texture. Maintaining and cleaning these tools properly ensures they perform optimally, leading to a more uniform and hidden finish. Regular tool upkeep—like rinsing brushes thoroughly—extends their lifespan and preserves your work quality.
Tools and Resources That Elevate Your Painting Game
- Purdy Angled Brushes: Their superior bristle quality allows for cleaner edges and easier touch-ups, essential for hiding patches when using dark matte paint.
- High-Quality Bonding Primer: I trust primers designed for drywall repairs, as they create a consistent base that prevents patches from peeking through. Look for ones with stain-blocking properties for best results.
- Fine-Grit Sandpaper and Dust-Free Wiping: Sand patches smoothly and wipe away all dust to achieve seamless blending. Removal of dust prevents specks from showing through the dark finish.
- Multiple Coats Technique: Using this approach ensures opacity and concealment, especially when working with deep hues. Patience with drying times makes a huge difference.
- For deeper insights into flawless finishing, explore expert articles on covering dark paints and maintenance tips to keep your walls looking pristine over time.
Your Turn to Elevate Your Painting Skills
Transforming your walls with dark matte paint and flawlessly hiding drywall repairs isn’t just about technique—it’s a rewarding process that boosts your confidence and enhances your space. Remember, meticulous prep, patience in coats, and quality tools are your allies in achieving wall perfection. Don’t hesitate to apply these insider tips on your next project and see the difference for yourself.
Have you ever struggled with hiding drywall patches under dark paint? What’s your biggest challenge? Share your experience below and let’s improve together!
,