I remember the day I finally understood the power of color in home painting. It was a hot summer afternoon, and I was staring at a half-painted living room that just didn’t feel right. Every brushstroke felt like a wasted effort because no matter how much I tried, the space still looked dull and uninspired. Then, I stumbled upon a realization—**the right palette can make or break your home’s aesthetic**. That lightbulb moment led me to dive deep into upcoming trends, especially the rising dominance of *7 Earth-Tone Palettes* for 2026. Now, I want to share this insight with you, so your next painting project isn’t just a chance to freshen up walls but a real transformation of your living space.
Why Earth Tones Are Taking Over in 2026
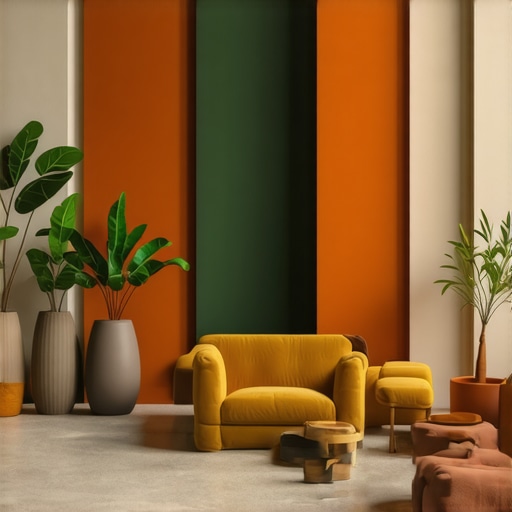
In recent years, homeowners and designers have shifted away from flashy colors towards more natural, calming shades. Earth tones—think warm beiges, soft browns, muted greens, and gentle terracottas—are proving to be more than just a trend; they’re becoming a staple. According to a recent report by Elite Painter Pro, these palettes offer a unique combination of versatility and emotional comfort, aligning perfectly with the modern need for cozy, inviting homes amidst a chaotic world. The reason behind this surge? It’s simple: earth tones seamlessly meld into current lifestyle priorities, making spaces feel grounded and peaceful.
But let me be honest—the journey to adopting this trend didn’t go smoothly for me. Early on, I made a critical mistake: I chose colors based on what looked good online without considering my home’s unique lighting and furnishings. That led to a space that looked lifeless, wasting money and time. This taught me a vital lesson: understanding how light and material interact with earth tones is crucial. If you’re feeling overwhelmed or skeptical about this trend, you’re not alone. Many people hesitate, fearing their home will look dull or outdated—especially if past projects were anything to go by.
Is Earth Tones Actually Worth the Hype?
It’s fair to wonder if these colors are just a passing fad or truly worth the effort and investment. From my experience, the answer is a confident yes, but only if you approach it with the right knowledge. For instance, using the wrong finishes or ignoring the importance of accents can turn what should be a calming palette into a heavy, oppressive atmosphere. In fact, one of my early mistakes was ignoring the significance of textures and finishes, which are critical when working with earthy colors. Want to avoid my pitfalls? You might find it helpful to learn about the common risks and how to avoid them. A good starting point is exploring pro tips for avoiding costly mistakes.
Now that I’ve shared my story, I’ll walk you through the practical steps to incorporate these earth tones into your home confidently. Trust me, the right palette can refresh your space and even boost your home’s value—so let’s dive into how to do it right.
Start with Precise Color Selection
Choosing the right earthy shades is like selecting ingredients for a recipe; each hue impacts the overall flavor. I once spent an entire weekend testing paint swatches on my wall, applying small patches and observing them at different times of the day. This micro-story taught me the importance of testing colors in your home’s unique lighting conditions. Use sample pots of beige, muted green, or terracotta, and observe how they look under sunlight, artificial light, and at dusk before committing to a full gallon. Remember, even the most beautiful online color might look dull or overly warm in your space—so prioritize in-home testing.
Prepare Your Surface for the Perfect Finish
Think of painting as laying a foundation for a house; if the base isn’t solid, the whole project falters. Clean your walls thoroughly to remove dust, dirt, or grease. For textured or uneven surfaces, use a primer or a bonding sealant; this enhances adhesion and smooths out imperfections. I learned this the hard way when I skipped primer on my living room accent wall—my topcoat peeled after just a month. Investing in proper surface prep not only ensures longevity but also makes your earthy tones look richer and more uniform.
Select Appropriate Tools and Finishes
Choosing the right brushes, rollers, and finishes is crucial. For large, flat walls, use a high-quality roller with a medium nap to achieve even coverage. For corners and edges, switch to a angled brush for precision. When working with earthy tones, matte or eggshell finishes tend to amplify the natural, calming effect but can highlight wall imperfections. Therefore, if your walls have minor flaws, consider satin or semi-gloss finishes to balance aesthetic appeal and durability. I once used a matte finish on my walls, and the slightest smudge became permanent—proof that selecting the correct finish impacts both look and maintenance.
Use Techniques to Enhance Depth and Texture
Incorporate techniques such as glazing or dry brushing to add subtle depth. For my guest bedroom, I applied a light glaze over a beige base, creating a warm, inviting atmosphere that felt textured and luxe. To do this, dilute a darker earthy hue with water or glaze medium, then gently sponge or wipe it onto the wall. Practice on a scrap piece first to control the effect. Additionally, employing different brush strokes or sponging can create visual interest—breaking the monotony of monochrome earth tones and adding sophistication.
Implement Accents and Complementary Colors
Earth tones work best when paired with accent colors like deep greens, terracotta, or soft whites. In my living room, I painted one wall in a muted sage to serve as a focal point and added metallic accents to throw light and texture. Strategically placed accessories—such as cushions, vases, or picture frames—can elevate the earthy palette without overwhelming the space. Remember, balance is key; too much of one tone can make the room feel heavy or dull. Use complementary hues in small doses to keep the atmosphere fresh and harmonious.
Pay Attention to Lighting and Finishes
Natural light can dramatically alter how earth tones appear. I learned this the hard way when my living room’s walls looked perfect during the day but lost their charm under evening lighting. Install adjustable lighting fixtures and test your paint at different times to ensure the colors stay appealing. Also, opt for high-quality finishes that resist fading and stains, especially in rooms with sunlight exposure. This investment safeguards your work and keeps your earth tones vibrant for years.
Maintain Consistency and Quality
Consistency in application ensures a seamless look. Use the same batch of paint for the entire project. I recommend keeping a sample jar of your chosen color for touch-ups in the future. Applying multiple thin coats rather than a single thick one produces a smoother, more even appearance. And don’t rush—allow adequate drying time between coats. These steps pay off by creating a professional finish that enhances the warm, natural vibe of your earth tones.
Myth Busting: The Oversimplification of Choosing Paint
One of the most pervasive misconceptions in house painting is believing that selecting the right color is enough to guarantee a successful outcome. Many homeowners assume that if they pick a popular shade, their project will turn out perfect. However, in my experience, the nuance lies in understanding the interaction between paint formulation, surface prep, and environmental factors. For example, the type of finish—matte, eggshell, semi-gloss—can dramatically influence durability and appearance, especially in high-traffic areas or moisture-prone zones. Skipping critical steps like surface cleaning or priming often leads to peeling, uneven sheen, or wall stains that are hard to fix later. Recognizing these subtleties can make the difference between a vibrant, lasting wall and a costly redo.
Why Certain Techniques Lead to Uneven Results
Contrary to popular belief, applying multiple thick coats of paint isn’t the best way to achieve a uniform finish. Instead, most professionals advocate for thin, even coats with proper drying time in between. Thick layers tend to drip, sag, or trap air bubbles, which can cause visible streaks or uneven texture. Additionally, the skillful use of tools—like high-quality brushes and rollers—is often overlooked. For example, using a roller with the right nap length tailored to your wall’s texture helps in avoiding lap marks and streaks. Incorporating advanced techniques such as cross-hatching can further improve coverage, but only if executed with patience and precision. These intricacies often trip up even experienced DIYers, leading to disappointment and additional costs.
If You’re Considering Local Painting, What’s the Hidden Nuance?
Many people think that hiring local painters is a straightforward choice, but the real challenge is in vetting the quality and transparency of their quotes. It’s common to see drastically different bids for seemingly similar jobs, which can be confusing and frustrating. The hidden nuance is that lower quotes might omit essential services or include hidden surcharges, while higher bids might reflect better quality or added value. I’ve frequently encountered situations where homeowners focus solely on price, only to realize later that corners were cut—resulting in poor adhesion, mismatched colors, or surface imperfections. To avoid this, thoroughly review detailed estimates and ask about materials, surface prep, and warranty coverage. For more insights, check out this article on [red flags in local painting quotes](https://elitepainterpro.com/3-red-flags-in-local-painting-quotes-you-cant-ignore-in-2026). Have you ever fallen into this trap? Let me know in the comments.
Achieving a beautiful, durable paint job isn’t just about choosing the right colors or applying the perfect technique—it’s equally about the tools you use and how you maintain them over time. As a seasoned homeowner or local painter aiming for long-term results, investing in high-quality equipment and adopting effective maintenance routines can significantly extend the life of your paintwork. Today, I’ll share my expert recommendations on tools that deliver professional results and tips on maintaining them for longevity.
Why a Good Quality Airless Sprayer Matters
In my experience, a reliable airless sprayer is a game-changer, especially for exterior painting projects. I personally use the Graco Magnum X7; it offers adjustable pressure control, which ensures even coverage and reduces overspray. Unlike conventional brushes or rollers, an airless sprayer can handle large surfaces efficiently, saving you time while providing a smooth, professional finish. Regular cleaning after each use is vital—residual paint can clog nozzles, impairing performance over time. To keep your sprayer in top shape, I recommend a thorough flush with water or solvent based on your paint type, and storing it in a dry, dust-free environment.
Smart Brush and Roller Choices
While sprayers are excellent for big jobs, brushes and rollers are indispensable for detail work or touch-ups. I prefer synthetic brushes for latex paints due to their durability and smooth application. For rollers, a high-quality microfiber with a medium nap ensures even paint distribution and minimizes streaks. Remember, applying paint with tools that are worn out or poorly maintained can lead to uneven coverage and more frequent replacements. My best tip? Clean brushes and rollers immediately after use with warm, soapy water if you used water-based paints, extending their usability for future projects.
Maintenance Isn’t Just About Cleaning
Beyond cleaning, routine inspection of your tools prevents small issues from escalating. Check spray nozzles for wear or clogging, tighten loose fittings, and replace worn-out brushes or roller covers promptly. Keeping a dedicated toolbox with spare parts and cleaning supplies streamlines this process. Over time, skipping maintenance can lead to inconsistent spray patterns or color bleeding—faults that compromise your investment. For a comprehensive guide on maintaining your equipment, consulting industry-specific resources can be helpful—like the detailed tips on eco-friendly paints and equipment.
Tools I Trust for Long-Term Results
In my arsenal, I always include a high-quality 3/4 inch angled brush for precision cuts, a microfiber roller for smooth coverage, and a heavy-duty paint sprayer like the Graco X7. Additionally, I recommend investing in extending ladders, drop cloths, and masking tape to protect surfaces and ensure clean lines. Consistent upkeep of these tools, such as replacing worn parts and thorough cleaning, ensures optimal performance over multiple projects, ultimately saving you money and time.
Predicting Future Trends in Painting Tools
Looking ahead, I believe automation and smart technology will play a significant role in local painting. Tools equipped with IoT sensors could monitor wear and performance, prompting timely maintenance alerts. For instance, variance in spray pattern or pressure could be detected remotely, allowing for preventative care rather than reactive fixes. This proactive approach not only improves results but also reduces costs associated with tool failure.
How do I keep my tools performing over years?
Developing a routine for cleaning immediately after each use, regularly inspecting for wear and tear, and storing equipment in climate-controlled environments are key. Additionally, scheduling periodic upgrades or replacements of parts based on manufacturer recommendations ensures your tools stay at peak performance. To further extend the lifespan, consider using protective covers and avoiding harsh chemical solvents unless specified—these can degrade tool components prematurely.
Start implementing these maintenance tips today—especially the habit of thorough cleaning and inspection—to safeguard your investment. If you want to learn more about choosing the right equipment, check out the expert insights at this resource. By maintaining your tools diligently, you’ll enjoy consistent, high-quality results on every project, long into the future.
Over the years, I’ve realized that true mastery in house painting isn’t just about choosing beautiful colors or using the latest tools—it’s about understanding the subtle nuances that turn a good job into an exceptional one. The insights I’ve gained from my experiences have taught me that a willingness to learn, adapt, and pay attention to the smallest details can dramatically transform your results. Embracing these lessons isn’t just about avoiding mistakes—it’s about unlocking the full potential of every project, creating spaces that resonate with comfort, style, and longevity.
What They Don’t Tell You About Painting Success
- One of the biggest lightbulb moments was realizing that surface preparation is the secret backbone of a flawless finish. Skipping or rushing this step can undo hours of work, no matter how perfect your color choice is. For example, I once neglected to prime an accent wall, and the paint started peeling within months—an expensive mistake that taught me the importance of meticulous prep. Deep down, the lesson is clear: dedicating time to perfecting your surface paves the way for lasting beauty and vibrant colors.
- I also learned that choosing the right finish is more critical than many realize. A matte finish might look stunning in a cozy living room, but in high-traffic areas, it can be a nightmare to maintain. Personally, I trust eggshell or satin for durability, but always test these in your home’s unique lighting to see how they truly behave. This insight saves you from regret and ensures your work remains beautiful for years.
- Another revelation was how lighting profoundly influences color perception. A shade that looks perfect during the day can turn dull or off in artificial light. I now always test paint samples at different times and light conditions before making a final decision. This approach guarantees the palette you select will truly shine in your space, creating the warm, inviting atmosphere you envision.
My Top Picks for House Painting Confidence
- Elite Painter Pro offers invaluable resources on avoiding costly mistakes and choosing the right materials. Their guides, such as the checklist for mistakes to avoid, have become my go-to references for staying on track. Trusting industry experts who know the ins and outs has made my projects smoother and more successful.
- Professional-grade tools like Graco’s Magnum X7 sprayer have revolutionized my exterior painting speed without sacrificing quality. Investing in reliable equipment, coupled with proper maintenance, means my tools deliver consistent results and last longer. They’re my secret weapon for efficient, high-quality finishes that stand the test of time.
- Craftsmanship-focused literature such as specialty books on texture techniques or eco-friendly paints have broadened my perspective. These resources challenge me to innovate beyond traditional methods, offering new ways to add depth and character—like dry brushing or glazing—that elevate the look and feel of my walls.
Take Action and Make Your Space Shine
If you’re serious about mastering house painting in 2026, remember that every detail, from surface prep to tool maintenance, plays a vital role. Each project is an opportunity to improve, learn, and craft a home that truly reflects your style and care. The journey might have its hurdles, but with dedication and the right knowledge, you’ll find joy in transforming your space into something extraordinary. So gear up—your next masterpiece awaits, and it all starts with you taking that first confident stroke.
Reading this post really resonated with my own journey into embracing earth-tone palettes. I especially appreciated the detailed advice on testing colors in different lighting conditions—it’s such a critical step that many overlook, leading to surprises after painting. My recent project involved repainting a sunroom, and I found that warm beige with a touch of muted green made the space feel both lively and calming, exactly as suggested here. One thing I’ve noticed is that layering textures—like adding textured wall panels or varied finishes—can really enhance the natural vibe of earth tones. Have others experimented with mixing textures to add depth? I’m curious about creative ideas for elevating these palettes beyond just paint on walls. Overall, great insights that I’ll definitely keep in mind for my future projects. Thanks for sharing such practical tips!