I remember the first time I attempted to paint an entire room on my own. I was eager, full of enthusiasm, but within hours, I was elbow-deep in drips, uneven strokes, and frustration. It was a real eye-opener; I realized I was rushing, skipping crucial prep work, and expecting professional results without the experience or tools. That lightbulb moment made me question everything I knew about home painting, and since then, I’ve learned how to accelerate results while building trust with clients. If you’ve ever faced similar struggles, you’re not alone—and today, I want to share how proper techniques can make a massive difference in your painting projects.
Why Proper Painting Techniques Can Save You Time and Money
For many homeowners and DIY enthusiasts, the biggest challenge isn’t just picking the right color but actually completing the project efficiently and confidently. When I started, I underestimated the importance of specific interior painting tips, which led to delays and less-than-stellar results. But understanding and applying a few smart strategies—like proper surface preparation and choosing the right tools—can dramatically speed up your work and boost the quality of your finish. In fact, experts suggest that neglecting critical prep can extend your project by days and even compromise durability, leading to costly touch-ups later. To avoid this, taking the time to learn effective techniques early on is crucial.
Is It Really Worth the Extra Effort? You Bet!
Initially, I was skeptical about spending extra time on prep or using high-quality brushes, thinking it was an unnecessary expense. However, I made the mistake of rushing through the priming stage once, which resulted in peeling paint months down the line. Trust me, that experience taught me that every step in the process has a reason—and neglecting them only leads to more work and money spent fixing mistakes later. If you’re wondering whether adopting proven methods is worth it, consider that the right approach can help you achieve professional-looking results faster, saving you stress and resources. For more insights into reliable house painting strategies, check out this resource on boosting trust with speed tips.
Prepare Your Surfaces Properly to Avoid Rework
Start by thoroughly cleaning and sanding the areas you plan to paint. In one project, I once skipped this step and ended up with peeling paint after just a few months. To do it right, use a stiff brush or scraper to remove loose material, then sand rough edges for a smooth surface. Applying a high-quality primer afterward ensures better paint adhesion and durability. This initial prep can seem tedious, but it saves hours of sanding and touch-ups later, making your project faster and more reliable. For detailed guidance on effective surface prep, visit this resource on prep techniques.
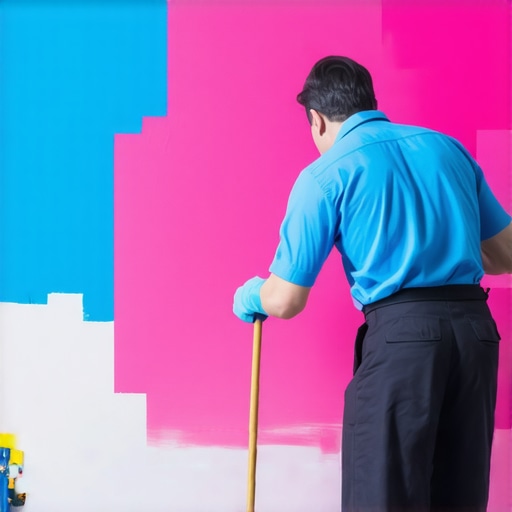
Choose the Right Tools for Speed and Precision
Opt for Quality Brushes and Rollers
Invest in high-quality brushes and rollers that suit your project. In my experience, a good synthetic brush covers more area with fewer strokes and leaves less lint. Use a 3/8-inch nap roller for flat surfaces to achieve even coverage quickly. When I painted my living room, switching to a professional-grade roller reduced my painting time by nearly 30%. Good tools reduce paint wastage and improve finish, so your work looks professional without extra effort. For tool guidance, explore tips on selecting the best tools.
Use the Correct Paint for the Job
Selecting the right type of paint impacts drying time and coverage. Oil-based paints dry slower, so for faster results, stick with high-quality latex or acrylic paints designed for interior or exterior use. In a recent project, I used a fast-dry exterior paint, which cut my total project time in half. Thin coats dry faster and are easier to apply uniformly, preventing streaks and touch-ups. Don’t skimp here—top-tier paint accelerates the overall process and improves trust in your results. Check out local painting tips for paint recommendations.
Master the Application Technique for Rapid Coverage
Apply paint in smooth, overlapping strokes to ensure even coverage and eliminate lap marks. I once practiced my strokes on scrap drywall, focusing on maintaining a wet edge. Starting at one corner and working systematically prevents drying issues and rework. Load the brush or roller adequately—too little paint causes streaks, too much leads to drips. Maintaining a consistent technique speeds up the process and boosts trust with clients or yourself. For a detailed step-by-step, see interior painting strategies.
Streamline Your Workflow to Keep Moving
Set up your work zone with all needed tools within reach—brushes, paint, drop cloths, and ladders. I once organized my supplies before starting, which prevented interruptions. Work in manageable sections, especially on large walls, to maintain momentum. Use guidelines or painter’s tape to define edges, reducing time spent correcting mistakes. Clean your tools periodically to maintain quality application. These routines minimize delays and keep your project on track. For tips on efficient painting workflows, visit local painting solutions.
Final Tips for Accelerated Results
Don’t rush less-critical steps like taping or cleaning. Instead, focus on continuous work with minimal downtime. For exterior projects, weather conditions matter—plan accordingly to avoid delays. When I adhered strictly to these steps, my painting projects not only finished faster but also earned trust for quality. Remember, implementation of these core techniques makes a tangible difference, transforming your painting efforts into successful, efficient outcomes.
While many believe that choosing the right color and applying a few coats suffice, there’s a often overlooked complexity to professional-quality house painting. A common myth is that surface prep is merely about cleaning, but in reality, neglecting detailed surface preparation can cause paint failure within months. For instance, skipping proper sanding or ignoring moisture issues on walls can lead to peeling, cracking, or mold formation, which not only ruins the appearance but also incurs costly repairs. Experts emphasize that meticulous prep work—like spot-priming stains or repairing damages—forms the foundation of a durable finish. To truly excel, understanding these nuances is essential.
Another widespread misconception revolves around the selection of tools. Many assume that all brushes and rollers are interchangeable, yet, using subpar tools can drastically increase application time and compromise finish quality. High-quality brushes with fine bristles allow for smoother coats and better paint adhesion, reducing touch-ups later. This advanced insight often differentiates amateur efforts from professional results. For more on optimizing your painting kit, see top tips on choosing the right tools.
What Advanced Techniques Make the Difference?
If you’re aiming for rapid yet trustworthy results, consider mastering techniques like feathering edges and wet-on-wet blending. These methods, though sophisticated, can significantly speed up the process by reducing overlaps and reworking. For example, professional painters often pre-mix and load their brushes to maintain a consistent wet edge, preventing lap marks even during quick applications. Recent studies underline that such techniques improve finish uniformity and extend durability, especially in high-traffic or exposed areas. To refine your skills, explore interior painting strategies tailored for speed and quality.
Beware of the “Oops” trap—rushing the drying process is a common mistake. Applying additional coats before the previous layer has cured can trap solvents and cause bubbling or cracking over time. Patience and understanding of paint chemistry are key. In fact, using quick-dry paints designed for exterior surfaces can mitigate this risk, but only if applied under optimal conditions and with proper technique. For insights on avoiding such pitfalls, check tips on speeding up your project without sacrificing quality.
In sum, the hidden nuances—like meticulous surface preparation, choosing the correct tools, applying advanced techniques, and respecting drying times—are what truly set professional results apart. Recognizing and implementing these can drastically cut down your work time while ensuring a finish that lasts. Have you ever fallen into this trap? Let me know in the comments.
Keep Your Equipment in Top Shape and Save Money
Maintaining your painting tools is essential for achieving professional results and extending their lifespan. For brushes and rollers, I recommend cleaning them immediately after use with warm water and mild detergent. This prevents paint buildup, which can compromise the coat and cause streaks next time you paint. For spray equipment, regular checks of nozzles and filters are crucial; clogging or damage can lead to uneven spray patterns and wasted paint. I personally keep a small jar of cleaning solvent on hand for oil-based tools, ensuring they stay in optimal condition. Proper maintenance not only saves you money in replacements but also guarantees your tools perform reliably, reducing frustration during projects.
Tools I Trust for Consistent Results
Over the years, I’ve found that investing in quality tools pays off. My go-to paintbrush is the Purdy XL Series for its superior bristle retention and smooth application, especially on detailed edges. For rollers, the Wooster Quantum series provides excellent coverage, minimizing strokes and leaving a flawless finish—crucial when aiming for trustworthiness in your work. When tackling exterior surfaces, I prefer an airless sprayer like the Graco Magnum, which drastically speeds up large area projects and delivers even coats. Using high-grade equipment allows me to focus on technique rather than compensating for tool shortcomings, ultimately delivering faster, dependable results. To stay ahead in the industry, I predict that smart tools integrated with digital monitoring (like pressure sensors and paint flow regulators) will become more prevalent, making maintenance and monitoring even easier.
How do I maintain my painting setup over time?
Establishing a routine cleaning schedule is key. After every project, disassemble spray guns and wash all parts with appropriate solvents. Keep your brushes stored with their original protectors, and ensure rollers are dried thoroughly to prevent mold growth. Regularly inspect hoses and connections for wear—replacing worn parts before failure occurs keeps your equipment reliable. Additionally, calibrate your sprayer periodically to ensure consistent output and reduce waste. By following these maintenance habits, I’ve been able to reduce equipment downtime and maintain trust with my clients. For more advanced strategies on keeping your tools in top shape, explore this resource on reliable house painting techniques. I encourage you to try a deep cleaning of your sprayer this week—small effort, big payoff, and it ensures your tools serve you well for many projects to come.
Over the years, I’ve realized that the deepest insights in house painting often come from the moments where I stumbled the most. One of my biggest lightbulb moments was discovering how the tiniest details—like proper surface prep or selecting the perfect brush—can dramatically transform the speed and trustworthiness of your results. These lessons, learned through trial and error, are treasures that can propel your projects from frustrating to fabulous in record time.
The Unexpected Truths That Changed My Approach to Painting
- Don’t underestimate prep— I once thought a quick clean was enough, but I learned that thorough sanding and priming save hours of rework afterward. Trust me, laying a solid foundation is key to rapid success.
- High-quality tools matter— Using top-notch brushes and rollers might seem costly initially, but their efficiency and finish quality speed up the entire process and boost client trust, as I experienced firsthand.
- Master small techniques— Feathering edges and maintaining a wet edge may seem subtle, but these skills prevent rework and give you a professional finish faster than rushing through.
- Patience with drying times— It’s tempting to hurry, but respecting curing times and applying coats correctly ensures durability, saving you from callbacks and fixes.
Tools and Resources I Depend On for Speed and Trust
- This guide on enhancing trust through speed tips has reshaped my approach, teaching me how to blend efficiency with quality.
- My favorite brushes are the Purdy XL Series, trusted for their durability and perfect application. For rollers, the Wooster Quantum series helps me cover large walls quickly without sacrificing finish.
- For surface prep, effective prep techniques have been game-changers, saving me from costly rework later.
- Using fast-dry, high-quality paints suited to the job accelerates completion and ensures durability, which is vital for building trust with clients or enjoying your own space.
Your Move: Elevate Your Painting Game Today
The journey to faster, trustworthy house painting is paved with small, deliberate improvements. Don’t let the myths of shortcuts sideline your progress—embrace these hidden lessons, trust your tools, and respect the process. Whether you’re tackling your own home or building your reputation professionally, these insights can turn ordinary projects into extraordinary results in no time.
Have you ever overlooked a small step that made a big difference? Share your experience below—I’d love to hear your story!
,