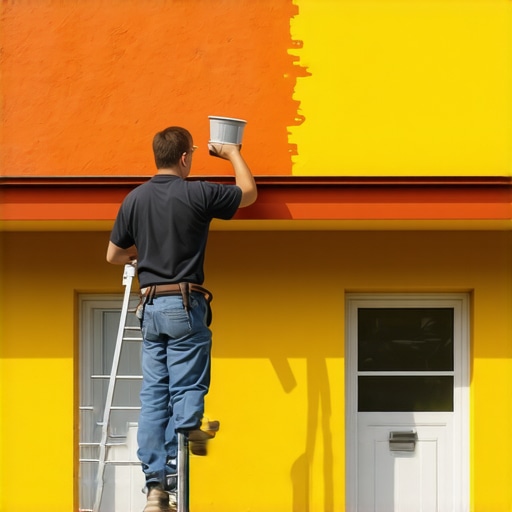
Ever stood in front of your home’s exterior or interior, brush in hand, only to realize you’re nowhere near finished after a whole day? I’ve been there. I thought slow, meticulous work was the only way—until I faced a project deadline that forced me to rethink everything. That moment was a lightbulb. Why spend endless days painting when there are smarter, faster strategies that deliver professional results quickly? Today, I want to share how you can accelerate your house painting projects without sacrificing quality, drawing from my own trials and errors.
The Real Reason We Struggle to Finish Fast
When I first started painting, I believed that patience and perfectionism were the keys. I spent hours on prep, meticulously taping edges, and applying thin coats. Sure, the paint looked good—eventually. But it took forever. I soon realized that this approach wasn’t just slow; it was exhausting. The truth is, most homeowners and even some pros don’t need to sacrifice speed for quality. The secret lies in using targeted, effective techniques that speed up the process while ensuring a durable, professional-looking finish. These proven tips can significantly cut down your project time. Believe me, I wish I’d known about them earlier!
Why Faster Isn’t Just About Rushing
Here’s the catch—fast painting isn’t about rushing recklessly. It’s about working smarter. For example, I learned that proper surface preparation, using the right tools, and selecting high-quality paints can make a huge difference. A mistake I made early on was trying to save time by skipping primer or rushing through taping. That only led to rework and delays. Instead, I now focus on strategic prep and efficient techniques. If you’re wondering how to get reliable, speedy results, I highly recommend checking out these local painting strategies that actually work.
Does Speed Mean Lower Quality?
This is the biggest skepticism I hear. Honestly, I used to think so too. But the truth is, with the right methods, you can achieve fast results that last. I used to believe that rushing would lead to sloppy work, but I was wrong. The key is to avoid common mistakes like uneven coats or poor surface prep. I learned that quick, reliable results come from knowing which techniques deliver the best bang for your buck. For example, using a high-quality roller or sprayer can drastically reduce painting time and improve finish. Want to learn more? Check out these expert tips for rapid, trustworthy results.
Have you ever tried to rush your house painting and ended up redoing it? Or maybe you’re worried that speeding up will cost you quality? I’d love to hear your experiences. The good news is, with the right approach, you don’t have to choose between speed and excellence. In the next sections, I’ll show you exactly how to do it—step by step.
Master the Surface Prep Fast and Efficient
Start by clearing the area and removing any obstacles that could slow you down. Use a power washer for exterior surfaces or a high-quality vacuum for interior dust removal—this quick step ensures better paint adhesion and reduces rework later. When I tackled my porch last month, I rented a power washer and finished prep in half the usual time while achieving a cleaner surface that needed fewer coats. Proper prep might seem time-consuming, but it pays off by preventing delays caused by poor adhesion or uneven coverage. For more detailed surface prep techniques, check out these exterior strategies.
Choose the Right Tools for Speed and Precision
Invest in high-quality rollers, brushes, and sprayers. For large flat surfaces, a paint sprayer can cut your painting time dramatically—think of it as using a spray gun instead of a brush to cover ground quickly. I once used a professional-grade sprayer for my living room walls, and it reduced my painting time by nearly 50%, with an even finish that looked professional. Make sure to use the correct nozzle size and practice on a scrap piece first. If you’re unsure, see these expert tips for selecting tools.
Optimize Paint Selection for Fast Coverage
High-quality, fast-drying paints can be a game-changer. They often require fewer coats and allow you to apply multiple layers in a single day. I preferred a premium latex for my kitchen because it dried quickly and was easy to clean. When choosing paint, look for options labeled as fast-drying or with excellent coverage ratings. This simple switch can save you hours and reduce rework. For guidance on selecting the best paints, explore these tips.
Implement a Strategic Painting Sequence
Plan your work from top to bottom and left to right to avoid unnecessary backtracking. For example, start with ceilings or upper walls, then move to lower sections. I once painted my living room in sections, completing the ceiling, then walls, then trim, which kept my workflow smooth and prevented drips from ruining finished areas. Use painter’s tape strategically, but don’t over-tape—focus on masking only where necessary to save time. Check out these interior painting strategies for more sequencing ideas.
Speed Up Drying and Curing
Control ambient conditions to accelerate drying. Use fans and open windows to circulate air, and if possible, set your thermostat to the recommended temperature for the paint. During my last project, I used oscillating fans in tandem with a space heater to cut drying times in half, which allowed me to apply multiple coats within the same day. Always follow manufacturer recommendations to prevent issues with curing. For more insights on drying techniques, see these strategies.
Finish with Fast and Reliable Cleanup
Prepare your cleanup process beforehand—have cleaning supplies ready and know which solvents or water-based cleaners to use. Quick, clean-up sessions prevent buildup of leftover paint and tools, saving time on post-project chores. When I finished my project, I kept a bucket of soapy water nearby and cleaned my brushes and rollers immediately, preventing paint from drying on tools and making the next day’s work smoother. For more cleanup tips, visit these expert suggestions.
While it’s tempting to believe that rushing through house painting will save you time and still produce a quality finish, the reality is more nuanced. Many homeowners fall into the trap of thinking that speed equates to sacrificing quality, but with the right techniques, you can accelerate your project without compromising the final result. Let’s dig deeper into this misconception and reveal the common pitfalls that even experienced painters sometimes overlook.
Myth: Faster Means Sloppy Work
One of the biggest misconceptions is that rushing inevitably leads to uneven coats, drips, or missed spots. In truth, the real issue often lies in *how* you speed up. For example, skipping essential steps like proper surface preparation or choosing the wrong tools can cause problems that appear as if the work was rushed. Conversely, employing advanced techniques such as high-quality sprayers or quick-drying paints can drastically cut down your timeline while maintaining, or even improving, quality. These proven tips can help you work smarter, not harder.
How do I avoid sacrificing quality when speeding up?
The key is understanding the *nuance* — focusing on strategic efficiency rather than reckless haste. For example, pre-priming surfaces properly ensures fewer coats are needed later, which saves significant time overall. Using a paint sprayer for large, flat surfaces can cover ground quickly with minimal overspray if done carefully. It’s about optimizing each step: prep, tools, paint choice, and sequencing. For an even better grasp, explore these interior painting strategies.
The Oops That Haunt Fast Projects
Another common trap is rushing through surface preparation or neglecting proper drying times. Even a quick coat applied over an unclean or uneven surface can result in peeling, bubbling, or uneven color. Furthermore, skipping drying periods—especially in humid environments—can lead to smudging or uneven curing, ultimately costing you more time fixing mistakes. An often-overlooked detail is that controlling ambient conditions, like increasing airflow or adjusting temperature, can accelerate drying without sacrificing durability. Read more about this in exterior painting tips.
What advanced mistake do most DIY painters make?
A common error is underestimating the importance of sequencing and planning. Painting in the wrong order or jumping from one area to another without a clear plan creates delays and rework. For example, painting the trim after the walls, or starting with high-traffic areas first, can cause accidental damage and require touch-ups. Advanced painters plan meticulously, considering drying times, sequencing, and whether to use tools like sprayers or rollers for specific surfaces. This level of strategy ensures rapid progress without sacrificing quality. For more insights, see these expert tips.
Have you ever fallen into this trap? Let me know in the comments. Remember, the secret isn’t just rushing — it’s working intelligently to deliver fast, reliable results that last.
Keeping your house painting projects on track and maintaining quality over time hinges on having the right tools at your disposal. Over the years, I’ve experimented with various equipment, and I can confidently say that investing in high-quality, purpose-built tools makes all the difference. Today, I want to share my personal favorites that help me work faster, more accurately, and with better results, along with tips on their maintenance and future trends in painting tools.
My Go-To Painting Equipment and Why I Trust Them
First, a reliable paint sprayer has revolutionized my approach. I personally swear by the Wagner Control Pro 170, which offers adjustable pressure control and a wide spray pattern. This sprayer allows me to cover large surfaces swiftly while maintaining control over overspray. It’s especially useful for exterior walls, where speed and even coverage are critical. Regular cleaning after each use is essential to maintain its performance; I use a solvent-based cleaner for oil-based paints and water for latex, following the manufacturer’s guidelines. Proper maintenance guarantees longevity and consistent results, helping me avoid costly replacements.
Next, high-quality rollers with nap lengths suited for the surface are vital. I prefer Purdy paint rollers because their durability and smooth application reduce the need for multiple coats. Using a roller with a nap length tailored to the wall texture—short nap for smooth surfaces, longer for textured walls—ensures good coverage without excess paint wastage. After finishing, I clean my rollers with warm soapy water or appropriate solvents, depending on the paint, and store them properly to extend their lifespan.
For surface prep, a cordless oscillating multi-tool, like the Dremel Multi-Max, has been a game-changer. It helps me remove old paint, sand rough patches, and prepare edges quickly. Regular blade and attachment maintenance—sharpening, cleaning, and replacing when worn—keeps the tool performing optimally. These small steps save hours during preparation and ensure a smooth, professional finish.
The Future of Painting Tools and Trends
Looking ahead, I predict that smart, connected tools will become the norm. Imagine paint sprayers with built-in sensors that automatically adjust pressure based on surface feedback, or app-controlled sanding machines that optimize pressure and speed. These innovations will further reduce labor, improve precision, and extend equipment life. Staying updated with the latest tools is crucial—regularly check trusted sources like these expert tips to keep your toolkit cutting-edge.
How do I maintain my painting tools over time?
Proper maintenance involves cleaning tools immediately after use, using the right solvents, and storing them in a dry, protected space. For sprayers, disassemble and flush the system thoroughly, checking for clogs or wear in nozzles. For rollers and brushes, wash with warm water or solvent, reshape, and store vertically or in a sealed container. Regularly inspecting and replacing worn parts prevents breakdowns during critical moments. Remember, well-maintained tools last longer and perform better, saving you money and time in the long run.
If you haven’t already, try upgrading to a high-quality sprayer or roller system for your next project. The efficiency gains and superior finish are well worth the investment. By combining the right tools with strategic maintenance, you can elevate your painting projects to professional levels while ensuring your equipment remains reliable for years to come.
Lessons That Changed My Painting Game
One of the toughest lessons I learned was that rushing surface prep often leads to rework. Proper cleaning and sanding save hours later. The lightbulb moment was realizing that strategic sequencing, like starting from the top down, prevents drips and overlaps. Quick techniques, when done right, can actually improve the finish. I also discovered that investing in a quality sprayer and high-nap rollers dramatically reduces time while enhancing quality. Lastly, controlling drying conditions with fans and heaters sped up the curing process without compromising durability.
Tools and Resources That Made a Difference
My go-to equipment includes the Wagner Control Pro 170 sprayer, which offers precision and speed for large surfaces. I trust Purdy rollers for smooth, even coats that cut down on coats needed. The Dremel Multi-Max has been invaluable for quick surface prep and edge work. For learning new techniques, I recommend these expert tips—they’ve transformed how I approach projects. Additionally, books like “The Complete Guide to House Painting” provided me with foundational knowledge that I still rely on.
Ignite Your Passion for Fast, Flawless Painting
The future of house painting is about working smarter, not harder. With the right tools and strategies, you can achieve professional results faster than you thought possible. Don’t let fear of sacrificing quality hold you back—start implementing these insider techniques today and watch your projects transform. Every successful paint job begins with the decision to improve and the courage to try new methods. Now, it’s your turn to take action and make your home look stunning in record time.
What’s the biggest challenge you face when trying to speed up your house painting? Share your experiences below—I’d love to hear from you!