I’ll never forget the moment I painted my living room a trendy shade, only to realize months later that the color didn’t quite resonate with potential buyers. The regret hit hard; I had overlooked one crucial detail—how the right paint color could significantly boost my home’s value. It was a lightbulb moment that changed everything.
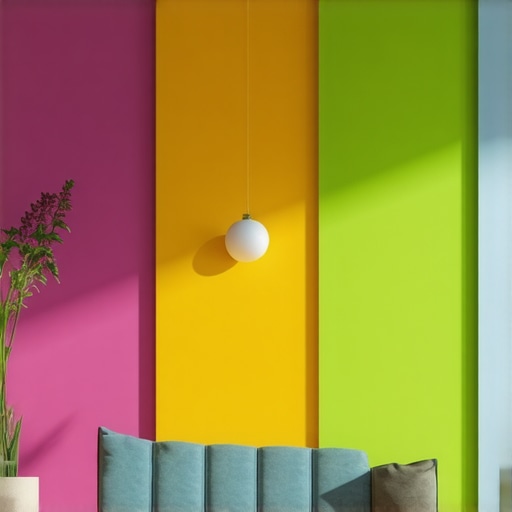
The Power of Paint: Why Color Choices Matter in 2026
Thinking about sprucing up your home? You’re not alone. The way we choose colors can make or break your house’s appeal, especially now when buyers are more discerning than ever. Recent studies suggest that certain hues can increase perceived value and even expedite the sale process. But with all the options out there, how do you pick the perfect shades?
Is the Hype About Color Trends Truly Worth It?
Early in my journey, I made the mistake of following fleeting color trends without considering long-term appeal. That mistake cost me more than I expected. The key is balancing trendy shades with timeless hues that resonate with most buyers. Looking for expert advice? Check out top local painting tips that help you accelerate results confidently.
So, if you’re wondering whether investing in specific paint colors now is worth the effort—spoiler: it is! Properly chosen colors can enhance your home’s attractiveness and boost its value, making your renovation investments count.
Stay tuned because next, we’ll dive into the top six colors that are poised to give your home a competitive edge in 2026.
,
Prepare Your Surface for a Perfect Finish
Start by inspecting your walls for cracks, peeling paint, or dirt. Use a scraper or putty knife to remove loose paint and fill holes with spackle. Once dry, sand the surface smoothly to create an even base. For larger projects, I once skipped thorough prep and ended up with paint bubbling—a costly mistake that set me back days. Proper preparation is like laying a solid foundation for a house; it ensures durability and a seamless finish.
Choose the Right Tools and Materials
Select quality brushes, rollers, and painter’s tape suited for your surface. For walls, a 9-inch roller with a medium nap works well; for edges, a angled brush provides precision. Invest in high-quality paint; cheap paint may save money upfront but often leads to uneven coverage and peeling. Remember, the right tools make the job easier and the results more professional, much like a chef needs sharp knives to cut consistently.
Use Techniques That Save Time and Improve Results
Apply paint in two Thin coats rather than one thick layer, allowing ample drying time between coats. Use a ‘W’ shape rolling pattern to ensure even coverage and avoid streaks. When cutting in around edges, steady your hand and use painter’s tape for sharp lines. I recall rushing through a cut-in one day and ending up with uneven edges that I had to touch up later, costing me extra hours. Mastering these techniques guarantees a cleaner, faster job and minimizes rework.
Work Methodically for Efficiency
Break the project into manageable sections and follow a logical sequence: prep, cut-in, roll, and touch up. Keep your tools organized—use paint trays and buckets with lids to prevent spills and keep everything within reach. Once, I tried to coat an entire room without planning, leading to overlapping and uneven paint jobs. Systematic work not only speeds up the process but also reduces mistakes, especially when working with local experts who follow proven methods for rapid results (see tips here).
Clean Up and Final Checks
After painting, clean your brushes and rollers promptly for reuse. Remove painter’s tape carefully to avoid peeling paint. Step back and assess your work—I once missed a patch that became visible only in the sunlight, prompting last-minute touch-ups. Proper cleanup preserves your tools and ensures a pristine look, while thorough inspection guarantees satisfaction and reduces callbacks.
Leverage Local Expertise for Swift Results
If you’re aiming for fast, professional results, consider hiring trusted local contractors. They follow effective strategies that combine preparation, quality materials, and efficient techniques. For reference, top local house-painting tips suggest focusing on prep and using the right tools to expedite the process (more info here). Collaborating with experts can dramatically cut down project time and boost your home’s aesthetic appeal in 2026.
While many believe that basic painting techniques suffice, there’s a deeper layer of nuance that often goes unnoticed—one that can make or break your project. A common myth is that preparation is merely about applying primer; experts know it’s about understanding the specific substrate and how its properties will influence adhesion and finish. Skipping detailed prep, such as proper sanding or cleaning, can lead to issues like peeling or uneven texture, which are costly mistakes that even seasoned DIYers have made. In fact, detailed surface analysis and targeted treatment are critical for achieving a professional look and longevity. For an in-depth look at common pitfalls, you might check out this comprehensive checklist.
What advanced mistakes do experienced painters avoid that amateurs often overlook?
One advanced nuance involves understanding environmental conditions—temperature, humidity, and airflow—that subtly impact paint curing and adhesion. For instance, applying paint in high humidity can cause blushing — a phenomenon where a cloudy, semi-transparent layer appears, undermining color vibrancy and durability. Professional painters monitor weather patterns meticulously and often delay projects or adjust their techniques accordingly. Studies confirm that environmental control is a key player in top-tier finishes, a fact that beginners may neglect, leading to disappointing results (see this expert guide).
Furthermore, selecting the correct paint type for specific surfaces and conditions is more nuanced than simply choosing a color. For example, high-performance finishes like elastomeric coatings for exterior masonry require different application techniques and considerations than standard latex paints for interior walls. Failure to adapt your approach based on these factors often results in peeling, cracking, or insufficient coverage. This is why collaborating with local experts, who understand these subtleties, can greatly improve your project results. To accelerate your success, explore these speed-boosting tips.
Tools I Recommend for Durability and Precision
To ensure your paint job stands the test of time, investing in the right equipment is crucial. I personally swear by a high-grade Wagner Flexio 590 spray system; its adjustable settings allow me to achieve both even coverage and efficient application, especially on textured surfaces. For brushes, I prefer Purdy angled brushes, specifically the Purdy Clearcut Series, because they deliver cleaner lines and are easier to clean after use, saving time on cleanup and preserving their effectiveness for future projects. And don’t underestimate the importance of quality painter’s tape—3M ScotchBlue Painter’s Tape creates crisp lines and stays put without peeling paint, which is essential for professional results.
Beyond basic tools, I recommend utilizing a wet-edge roller tray with a grid for quick, smooth loading of paint, reducing roller sputter and uneven coats. For prepping and cleaning, a High-Pressure Power Washer like the Simpson Cleaning MS60763 MegaShot allows for rapid removal of dirt and loose paint, prepping surfaces for long-term adhesion. A professional-grade cordless sander, such as the Makita XOB01Z, streamlines repair work on walls, ensuring surfaces are perfectly smooth and ready for paint, which directly impacts the durability and appearance of your finish.
Embracing Technology to Enhance Results
In recent years, digital color matching tools, like the Pantone ColorMatch system, help homeowners and painters select precise shades that won’t fade or shift over time. Using a colorimeter ensures your color stays consistent across different batches, especially on large projects or when touching up later. Moreover, project management apps such as Jobber or Houzz streamline scheduling, material ordering, and team communications, minimizing delays that can compromise the finish’s long-term quality. I’ve found that integrating these tech tools reduces errors and keeps projects on track, ultimately extending the lifespan of your paintwork.
How do I maintain my paint jobs over time?
Maintenance is the secret to keeping your walls looking fresh. Regular cleaning—using gentle soap and water or a mild degreaser on kitchen walls—prevents buildup of grime that can degrade paint over years. For touch-ups, always carry a small amount of matching paint in an airtight container to address nicks or scuffs promptly, preventing minor issues from escalating. Additionally, inspecting the exterior every couple of years allows you to spot and repair peeling or cracking early. Applying a high-quality clear topcoat, like a UV-resistant acrylic sealer, during the initial painting phase can delay aging and protect surfaces from weathering. Adopting a routine maintenance schedule, combined with the right tools and tech, will keep your paint looking professional for years.
Looking ahead, advancements in paint formulations—such as self-cleaning coatings with photocatalytic properties—are poised to revolutionize long-term maintenance. These innovative finishes actively break down dirt and pollutants, reducing the need for frequent cleaning and preserving color vibrancy longer. To stay ahead, I recommend trying out one of these cutting-edge paints on a small area to gauge how it suits your environment. See how top local painters recommend accelerating results by integrating maintenance with efficient tools for lasting beauty. Start incorporating these practices today, and watch your investment pay off over decades, not just years.
Lessons from the Trenches That Changed My Painting Game
- Never underestimate prep—skipping surface analysis led me to costly mistakes that could have been avoided with a simple thorough inspection.
- Environmental awareness transforms results—monitoring humidity and temperature is often overlooked but crucial for that flawless finish.
- Trusting quality tools and materials isn’t just about appearance; it’s about longevity and resistance against the elements, especially important for exterior projects.
- Timing and technique matter—applying multiple thin coats and mastering the right techniques speed up work and improve durability.
- Collaboration with local experts accelerates success—leaning on trusted contractors can make your project smoother and faster than DIY efforts alone.
Tools and Resources I Turn To for Peak Performance
- My Wagner Flexio 590 spray system helps me deliver even coats quickly, especially on textured surfaces—it’s a game-changer for efficiency.
- Purdy Clean-Cut brushes provide precision and ease of cleaning, ensuring consistent results across projects.
- 3M ScotchBlue Painter’s Tape guarantees sharp edges without peeling, saving time on touch-ups.
- The Pantone ColorMatch system and colorimeter keep my shades consistent, vital for large or retouching projects.
- Project management apps like Jobber streamline scheduling and coordination, minimizing delays that can compromise quality.
Embrace the Future: Start Your Painting Journey Today
Now is the perfect moment to elevate your painting projects by applying these insights. With the right mindset, tools, and expert guidance, you can achieve stunning, long-lasting results that boost your home’s value in 2026 and beyond. Don’t wait for the perfect timing—start transforming your space today and enjoy the satisfaction of a job well done! Have you encountered unexpected challenges in your painting efforts? Share your experiences below—I’d love to hear how you overcame them.
Reading this post really made me reflect on the importance of proper surface prep before painting. I once rushed just to get the project done, and as a result, I had peeling and uneven textures within a few months. I’ve since learned that taking the extra time to inspect and prep surfaces thoroughly makes a huge difference in longevity and appearance. The tips about using quality tools and the right techniques resonate a lot—skimping on those steps definitely costs more in the long run. I’m curious, when working on exterior walls, how do you best deal with environmental factors like humidity or temperature fluctuations? Do you have recommendations for scheduling or specific products that help manage these conditions effectively? Overall, I agree that collaborating with professionals often yields the best results, especially for large projects. Has anyone experienced a significant ROI by using advanced paint technologies, such as self-cleaning or UV-protective coatings? Would love to hear more about real-world results or suggestions for starting with these innovative options.
This post really resonated with me, especially the part about choosing colors that appeal long-term rather than following fleeting trends. When I renovated my kitchen last year, I went with a classic greige because I wanted something timeless that would appeal to future buyers. It’s interesting how subtle color choices can influence perceived value. I’ve also learned that the lighting in a space can dramatically alter how a color looks, so testing swatches in different conditions is crucial. Regarding surface prep, I used a high-quality primer and spent extra time sanding and cleaning, which made a noticeable difference in the last coat’s finish and durability. For outdoor projects, I always check the weather forecast carefully and avoid painting on humid or windy days to prevent issues like blushing or uneven curing. Has anyone experimented with new eco-friendly or self-cleaning paints? I’d love to hear about how they perform in real-world scenarios, especially in high-traffic or outdoor environments.