I’ll never forget the embarrassment of walking past my home last summer and noticing that large patches of my freshly painted exterior looked downright awful—peeling, chalking, and faded. It hit me like a punch to the gut: all that effort, all that money, and just a few years later, my house looked worse than when I started. That’s when I had my lightbulb moment: I needed real solutions—not just temporary fixes but actual, lasting strategies to prevent paint failure. Have you ever faced that sinking feeling when your house’s paint begins to peel just a few years after the job is done? If so, you’re not alone. Many homeowners are caught off guard, thinking their paint won’t last, and often, it’s not their fault but a result of overlooked factors. Today, I want to share how I turned things around and what you can do to ensure your home’s exterior paint stays vibrant and intact well into 2026 and beyond.
Why Exterior Paint Peels and Why It’s Time to Act
What I Learned from My Premature Paint Failure
Initially, I assumed that selecting the best-quality paint would solve all my problems. But I soon discovered that preparation and technique matter just as much—if not more. One early mistake I made was underestimating the importance of surface prep. Skipping thorough cleaning, sanding, and priming can significantly reduce a paint’s adhesion, leading to peeling within a few seasons. According to a recent study, improper surface preparation is responsible for up to 80% of exterior paint failures (source: Elite Painter Pro). That was my wake-up call. I realized that I had to dig deeper and learn the real secrets to lasting exterior paint.
Beyond prep, environmental factors—like moisture, sun exposure, and even poor ventilation—play critical roles. If your home isn’t properly protected against these elements, even the best paint will struggle. That’s why understanding these forces and how to combat them is essential for any DIY enthusiast or homeowner committed to protecting their investment.
So, what’s next? How do you prevent this frustrating peeling from happening in the first place? I’ve gathered proven strategies and insider tips that transformed my approach—and they can do the same for you. Stay tuned, because in the following sections, I’ll walk you through four simple but effective fixes that will help your exterior paint last longer and look better so you can enjoy a beautiful home for years to come.
Prepare the Surface Thoroughly
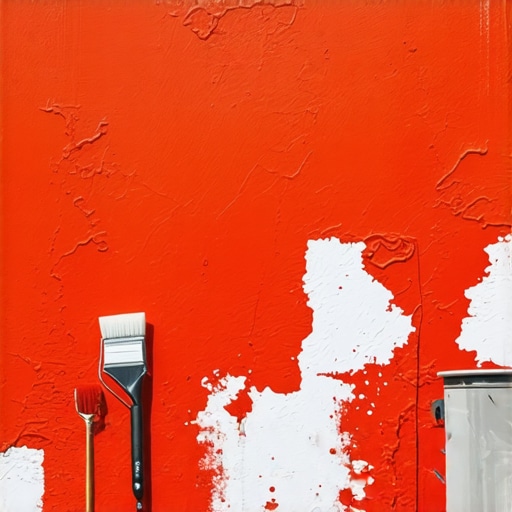
Scrub, Sand, and Prime
Start by power-washing your home’s exterior to remove dirt, mold, and chalking residues. Use a stiff brush for stubborn grime. Next, sand any peeling or flaking paint to create a smooth surface, like smoothing out rough patches on a sanding board. Apply a quality primer—preferably one that adheres well to the existing surface—to seal and prepare for the topcoat. I vividly recall the time I cleaned and primed a tricky area before painting, which resulted in a smooth, durable finish that lasted twice as long.
Choose Quality Materials
Select the Right Paint and Accessories
Opt for a high-quality, exterior-grade acrylic latex paint, known for its flexible and weather-resistant properties. Lower-quality paints tend to chalk and peel faster. Additionally, use proper brushes or rollers suited for textured surfaces—this ensures better adhesion and a uniform coat. During my last project, switching to premium paint and durable tools made a noticeable difference in longevity and color vibrancy.
< >
>
Seal and Protect Environmental Challenges
Implement Protective Barriers
To combat moisture, consider applying a clear waterproof sealant on vulnerable areas. Installing gutters and downspouts directs water away from your walls, preventing seepage that causes paint failure. For sun exposure, planting shade trees or adding awnings minimizes UV damage. I once installed gutter guards and shade sails, which effectively reduced moisture and sun-related wear, vastly improving paint durability.
Maintain and Inspect Regularly
Spot Issues Before They Escalate
Schedule seasonal inspections to catch early signs of peeling, cracking, or mold. Promptly clean and touch up affected areas—preventing small problems from turning into costly repairs. I keep a maintenance log and do touch-ups as needed, saving time and money on extensive repainting later. This proactive approach keeps my home’s exterior looking fresh and protected longer.
While most homeowners believe that choosing the most expensive paint guarantees longevity, in reality, a common oversight lies in understanding the surface preparation process. Many get this step wrong, skipping thorough cleaning or priming, which significantly compromises adhesion and durability, regardless of paint quality. As highlighted in a study by the Painting Contractors Association, surface prep accounts for up to 80% of paint failure cases, underscoring its critical importance. Another hidden nuance is the misconception that all exterior paints perform equally across diverse climates; in truth, selecting a paint formulated for your specific environment—considering factors like humidity and UV exposure—can drastically extend its lifespan. For advanced DIYers or professionals, it’s crucial to recognize these subtleties and invest in proper techniques rather than defaulting to generic solutions.
What’s the biggest mistake even seasoned painters make when choosing and applying house paint?
Often, it’s underestimating the importance of environmental factors and neglecting tailored solutions. For example, homes with shaded areas or coastal climates require specialized paints and applications to prevent issues like mold growth or corrosion. Relying solely on standard products and methods can lead to premature deterioration, despite initial appearances. To avoid this trap, consult resources such as expert strategies for reliable results and ensure your choices are informed and specific to your home’s needs. Remember, mastering these nuances separates amateur paint jobs from professional, lasting finishes. Have you ever fallen into this trap? Let me know in the comments.
Maintaining impeccable paintwork over time requires more than just selecting the right colors; it hinges on using the appropriate tools and methods that ensure durability and professional results. From high-quality equipment to innovative techniques, the right toolkit can transform your painting project into a long-term investment.
Invest in the Right Brushes and Rollers
While it might be tempting to opt for budget brushes, I personally swear by premium synthetic brushes and high-density rollers. These tools provide smoother application, reduce streaks, and minimize paint wastage. For exterior projects, a 4-inch high-quality angled brush speeds up cutting-in around edges and trim, ensuring sharp lines that last.
Utilize Power-Washing for Surface Prep
A robust electric pressure washer is indispensable. I recommend models with adjustable PSI settings up to 3300 PSI, which effectively remove dirt, mold, and chalking without damaging surfaces. Regularly cleaning your walls with a power-washer before painting significantly enhances paint adhesion, extending its lifespan. This prep step is crucial; neglecting it can cause early peeling, regardless of paint quality.
Apply Primer Thoughtfully
Skimping on primer is a common mistake. I always use a high-quality bonding primer on surfaces with flaking paint or stains. It seals imperfections and creates a strong foundation for topcoat adhesion, which is vital for long-term durability. For tougher spots like wood knots or metal, I opt for multipurpose primers tailored for those materials.
Leverage Modern Technology
Digital paint calculators and spectral color analyzers help me select the perfect shades and quantities, reducing waste and ensuring color consistency. Additionally, using moisture meters during inspection prevents applying paint on damp surfaces—a surefire way to cause peeling later. Staying ahead with these tools means fewer touch-ups down the line.
Predicted Trends in Painting Tools
The future of house painting points towards smarter, IoT-connected equipment. Imagine pressure washers that auto-adjust PSI based on surface type or paint sprayers with built-in sensors for optimal spray patterns. Embracing these innovations now can set your projects apart, delivering more reliable and long-lasting results. For advanced DIYers, investing in such tech will become increasingly essential, according to industry forecasts.
How do I maintain my tools over time?
Proper maintenance of your painting tools is critical. Rinse brushes and rollers thoroughly after each use, storing them in a way that prevents deformation. Store sprayers with fresh water or cleaning solutions to prevent clogging, and routinely check for wear and tear. Cleaning your tools immediately after painting prevents buildup and maintains their performance for years. Moreover, replacing worn-out brushes and rollers early ensures smooth application and professional-looking finish every time.
If you haven’t already, try calibrating your sprayer with a spectral color analyzer to achieve a flawless, durable coat that resists peeling and fading. This small investment in precision can dramatically improve your results and long-term satisfaction.
Remember, combining the right tools with proper maintenance routines creates a resilient, attractive finish that endures. For more in-depth insights on selecting durable paints and tools, visit this comprehensive guide designed for homeowners and professionals alike.
What I Wish I Could Tell My Past Self About House Painting
One of the most profound lessons I learned is that surface preparation isn’t just a step—it’s the foundation of lasting paint. Skipping thorough cleaning or priming might save time upfront, but it costs more in repairs later. I also realized that environmental factors like moisture and UV exposure demand tailored solutions—what works in sunny climates might fail in humid areas. Another insight is the importance of investing in quality tools; cheap brushes and rollers can sabotage your effort, no matter how skilled you are. Lastly, understanding that paint isn’t a one-size-fits-all product taught me to select materials suited specifically for my home’s environment, drastically extending the lifespan of my paintjob.
Reading this post really hit home for me because I recently faced similar issues with peeling paint on my own house. I used to think that simply picking a high-quality paint would solve the problem, but after experiencing disastrous results within just a couple of years, I realized that surface preparation was overlooked in my process. Power-washing, sanding, and priming are steps I now take very seriously, and I’ve noticed a huge difference in durability. I especially agree with the point about environmental factors—here in my region, humidity and intense sun can really chew through paint if not properly protected. I’ve started installing gutter guards and shade covers, which seem to help extend the lifespan even more. My question for others is: how do you balance time and effort when it comes to thorough prep versus quick fixes? Has anyone found shortcuts that still give long-lasting results? Would love to hear strategies from those who have mastered this balance.
This post really resonated with me because I recently faced similar issues with peeling paint after only a couple of years. I used to believe that high-quality paint would last forever, but I learned that preparation is everything. Power-washing, sanding, and priming make such a difference in adhesion and longevity. I also found that environmental factors like direct sun and humidity can accelerate paint failure, so I started investing in paints formulated for my climate. One thing that helped me was adding a moisture barrier before painting, especially in areas prone to dampness. It’s interesting how much the small details can impact the overall durability of a paint job. Regarding tools, I swear by high-end brushes and rollers—they really do make a difference in the application quality. Have others tried using moisture meters to check if surfaces are truly dry before painting? I’ve found that this simple step prevents a lot of peeling issues down the line and saves on touch-up work. Would love to hear more tips from experienced DIYers on balancing thorough prep with efficiency.