Have you ever started painting your living room, only to realize halfway through that the walls look uneven, streaky, or just plain disappointing? I remember my first attempt — thinking I could wing it with a roller and a brush, only to end up with more patches and drips than a toddler’s finger painting. That moment of frustration was a real eye-opener. It made me realize that interior painting isn’t just about slapping on some paint; it’s about strategy, technique, and knowing the right tips to boost results fast.
Why Getting Painting Results Right Matters Now More Than Ever
In today’s fast-paced world, who has the time for endless repainting or redoing poorly executed paint jobs? Not me. And I bet not you either. Whether you’re sprucing up your home for a quick sale, freshening up a space to enjoy it more, or just trying to avoid the headache of a botched job, effective painting is crucial. Better results in less time mean you can trust the process and enjoy your refreshed space sooner. Plus, when you know what works, you’re less likely to fall for costly mistakes or shady contractors. According to a study by the Paint Quality Institute, proper prep work and technique can improve the longevity and appearance of your paint job significantly — sometimes doubling its lifespan. That’s why mastering these tips isn’t just about aesthetics; it’s about smart, efficient home improvement.
Have You Faced the Fear of Wasting Time and Money?
If you’re like I was, you probably worry about wasting both. I’ve made my share of early mistakes, like skipping primer or rushing through cutting in. These slip-ups cost me extra time and money because I had to redo sections or patch mistakes. But I’ve learned that with simple, effective strategies—like using high-quality brushes, proper surface preparation, and the right paint types—you can accelerate the process and build trust in your results. Want to know the secrets I’ve uncovered? Keep reading, because I’m going to share some proven interior painting tips that will help you achieve professional results without the headache of trial and error.
Prep Your Surface Like a Pro
Start by inspecting your walls and fixing any imperfections. Use a putty knife to fill in holes and sand rough spots to create a smooth canvas. Think of this step as laying a strong foundation for a house—without it, everything else suffers. I once skipped this step and ended up with paint peeling after a few months, which cost me more time and money. Proper surface prep ensures your paint adheres well and lasts longer. Don’t rush this; it’s the secret to fast, trustworthy results. For a comprehensive approach, check out this guide.

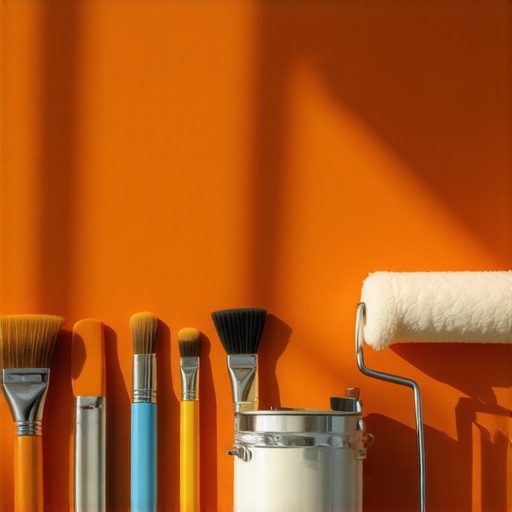
Choose the Right Tools and Materials
Invest in high-quality brushes, rollers, and painter’s tape. Think of tools as your paint’s best friends—poor tools are like trying to run a marathon in flip-flops. I once used a cheap brush for cutting in, which left streaks and made me redo that section. High-quality brushes hold more paint, give cleaner lines, and reduce the time spent fixing mistakes. For walls, a roller with a medium nap works best, but for tricky corners or edges, a good angled brush is essential. Use painter’s tape to mask off areas—this prevents bleeding and saves time on touch-ups. For more insights, review best painting tools.
Master the Painting Technique
Apply paint in W-shaped strokes with a roller to avoid streaks and ensure even coverage. When I painted my living room, I started with a wet edge technique, overlapping each stroke slightly to blend seamlessly. For ceilings and edges, use an angled brush to cut in before rolling. Don’t press too hard; let the brush or roller do the work. This method is like coloring within the lines—precision speeds up the process and results in a professional finish. Practice makes perfect, but following this technique will dramatically boost your confidence and trust in your work. For detailed steps, explore interior painting techniques.
Use the Right Paint and Finish
Select a high-quality paint suited for your space—eggshell or satin finishes are great for living rooms, while semi-gloss works well for kitchens and bathrooms. I once chose a cheap matte paint for my bathroom, and it started peeling in months. Quality paint offers better coverage, fewer coats, and faster results. Always stir thoroughly before use and consider using a paint additive for smoother application. Remember, a good paint job is an investment—trustworthy brands and finishes make all the difference. For expert recommendations, see top paint brands.
Work Smart, Not Hard
Plan your painting route to minimize overlaps and backtracking. For example, start from the farthest corner and work your way out. Use a ladder for high spots and avoid overloading your brush or roller—this prevents drips and uneven coats. Keep a wet edge and work in small sections to maintain consistency. When I painted my hallway, I divided the wall into manageable sections, which made the job feel less overwhelming and sped up the process. Combining these strategies with proper technique ensures faster, more reliable results. For additional tips, visit interior painting tips.
Many DIY enthusiasts and even seasoned painters fall prey to misconceptions that can sabotage their projects. One of the most pervasive myths is that surface preparation is optional or can be rushed. In reality, skipping proper prep work is a quick route to peeling, uneven coverage, and a finish that looks amateurish. For instance, not filling holes or sanding rough patches can cause the paint to crack or peel prematurely, which ultimately costs more time and money. To avoid this, spend ample time inspecting your surfaces and applying the right prep techniques. This simple step is often overlooked but is crucial for a professional-looking result. For more detailed guidance, check out this comprehensive prep guide.
Why Overlooking Surface Quality Can Ruin Your Paint Job
Many people believe that using cheap paint can save money, but the truth is, inferior paints require more coats and tend to fade or peel faster. High-quality paints, on the other hand, offer better pigmentation, adhesion, and durability—saving you time and expense in the long run. A common mistake is not stirring the paint thoroughly before application, which can lead to uneven color and texture. Studies from the Paint Quality Institute show that investing in premium paints and proper mixing significantly extends the lifespan of your finish, providing a smarter, more efficient approach. Don’t let misconceptions about cost fool you; quality really does matter. Want to learn more? Visit this resource on top paint brands.
Another advanced mistake is overloading brushes and rollers. Applying too much paint causes drips, uneven coats, and longer dry times. Instead, use a light, even coat and build up gradually. Mastering this technique can dramatically cut your painting time and improve the finish. Remember, patience and precision often outperform rushing through the job. If you’re eager for expert strategies, explore these expert house painting tips.
How Can Advanced Techniques Speed Up Your Painting Results?
One often overlooked nuance is the use of the right tools. For example, using a high-quality, angled brush for cutting in can make a huge difference in speed and accuracy, especially in tight corners or near trim. Additionally, working with a wet edge—repainting just before the previous section dries—ensures seamless coverage, reducing the need for touch-ups. Professionals also suggest working in consistent lighting conditions to spot imperfections early. These advanced techniques, when combined, can accelerate your project without sacrificing quality. Want to see how experts do it? Check out this guide on expert painting strategies.
Remember, the key to avoiding common pitfalls is understanding the nuances that separate an average job from a professional finish. Have you ever fallen into this trap? Let me know in the comments!
Keep Your Tools in Top Shape for Consistent Results
Investing in high-quality tools is just the first step; maintaining them properly ensures they perform at their best over time. I personally prefer using Purdy brushes because they hold shape and paint evenly, but I make sure to clean them thoroughly after each project. Rinse brushes immediately with warm water for latex paints or use mineral spirits for oil-based paints, then reshape the bristles and store them flat or hanging. Roller covers also need attention; I swap out foam or nap lengths based on the surface, and clean them with gentle soap and water to prevent dried paint from ruining their texture. Proper maintenance not only extends tool life but also guarantees smoother application and faster results during your next paint job.
Automate with Smart Scheduling and Software
Long-term success in interior painting involves planning and organization. I recommend using project management tools like digital scheduling apps such as Trello or Asana to break down tasks, set deadlines, and track progress. These platforms help you anticipate drying times, order supplies in advance, and coordinate with helpers or contractors efficiently. In the future, AI-based scheduling and inventory management tools will further streamline home improvement projects, reducing downtime and ensuring everything is ready when you need it. By integrating these technologies, you’ll keep your project moving seamlessly from prep to finish, avoiding costly delays and rework.
How do I maintain my painting equipment over time?
Maintaining your tools over the long haul involves routine cleaning, correct storage, and timely replacement of worn parts. For brushes and rollers, thorough cleaning immediately after use prevents paint buildup that can compromise performance. Store them in a dry, dust-free environment to preserve their shape and avoid deformation. For spray equipment, such as HVLP sprayers, flush the system with solvent after each use and check for clogs or wear in the nozzle. Regularly inspecting and replacing worn parts keeps your equipment operating efficiently, ensuring consistent spray patterns and smooth finishes. Investing a little time in maintenance pays off by reducing the need for frequent replacements and re-coats, ultimately saving you money and effort. Want to learn more about professional-grade maintenance? Check out expert tips for equipment care.
Predicting Future Trends in Painting Tools
Looking ahead, advances in smart tools and AI integration will revolutionize how we approach interior painting. Expect paintbrushes with embedded sensors to monitor application pressure and coverage, providing real-time feedback via smartphone apps. Automated mixing systems will ensure perfect color consistency, reducing waste and human error. As these innovations become more affordable, DIYers and professionals alike will benefit from faster, more reliable results. Staying updated with these trends will help you select the best equipment for your projects and maintain them efficiently. For now, adopting meticulous cleaning routines and strategic tool management will keep your tools working perfectly, setting you up for success in any painting endeavor. Give one of these maintenance tips a try on your next project—your future self will thank you.
Looking back, the most valuable lessons I learned about interior painting often came from mistakes I didn’t see coming—like rushing surface prep or choosing the wrong tools. These lessons weren’t just about avoiding bad results; they transformed how I approach every project with efficiency and confidence.
The Hardest Lesson I Learned About Painting Fast
I used to believe that rushing through the prep work would save me time, but I quickly discovered that skipping even small details like sanding or filling holes led to peeling paint and uneven finishes. The real breakthrough was realizing that investing a little extra time up front meant less work fixing mistakes later. Trust me, good prep is the secret sauce behind faster, more durable results.
3 Myths About Painting That Held Me Back
One common misconception was that cheap paint saves money. In reality, lower-quality paints require more coats and fade faster, costing more in the long run. Another myth was that brushes don’t matter—wrong! High-quality brushes and rollers make a huge difference in speed and finish quality. Finally, I thought I could cut corners on surface preparation—turns out, this is the fastest way to end up redoing the job. Busting these myths opened my eyes to smarter, faster painting.
What Experts Won’t Tell You About Speeding Up Your Painting
Most pros keep their secret weapon under wraps: meticulous tool maintenance. Cleaning brushes and rollers immediately after use and storing them properly ensures they perform their best on every project. Additionally, using the right tools—like an angled brush for cutting in and a roller with the perfect nap—can cut hours off your job. Learning these insider tips made my painting faster and more consistent. Want to see how these strategies work? Check out this guide.
Curated Recommendations for Smarter Painting
My essential toolkit includes high-quality brushes from Purdy, which I trust for their durability and smooth application. For surface prep, I recommend top painting tools—they’ve saved me hours. I also rely on professional techniques outlined in trusted resources to streamline my workflow. Investing in these essentials means faster results and a finish that lasts.
Believe in Your Power to Transform Spaces
The journey to mastering interior painting isn’t just about technique—it’s about confidence. Every project I complete with these insider tips reminds me that anyone can achieve professional-looking results with the right mindset and tools. So, don’t wait for perfection—start today, and watch your space transform faster than you ever thought possible. Ready to take the first step? Your dream room is just a brushstroke away!
What’s the biggest challenge you face when trying to speed up your painting projects? Share your experience below—I’d love to hear your story!