Walking into a freshly painted home and feeling underwhelmed? I used to think that repainting walls was enough to refresh a space—until I realized I was missing something vital. One afternoon, I taped off my living room for a new coat of paint, only to discover ugly roller marks and uneven patches that took days to fix. That moment hit me hard: there had to be a better way. Soon, I learned about how the luxury house painting trends of 2026 are shifting toward personalized wall treatments, especially custom wallpaper, and it changed everything.
The Shift in Home Aesthetics and Functionality
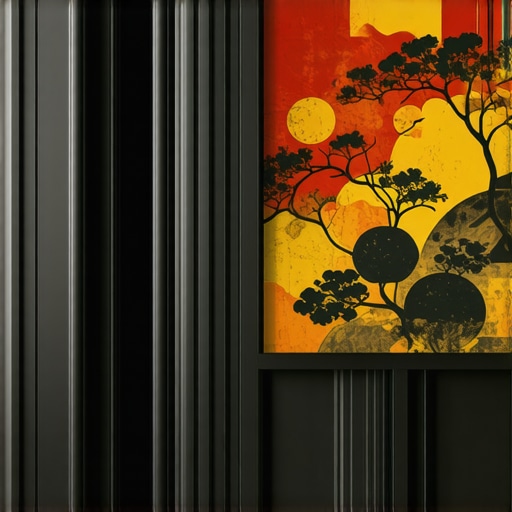
In my early days of house painting, I believed a fresh coat of paint — especially in neutral tones — was the ultimate upgrade. But the market is evolving rapidly. Today, homeowners crave something more unique, more expressive. Custom wallpaper offers a tailored touch that paint just can’t match. Not only does it allow for intricate patterns and textures, but it also adds depth and personality that truly reflects the homeowner’s style. Plus, with advancements in wallpaper technology, durability has never been better.
Did you know that according to industry reports, 2026 is expected to see a 35% increase in demand for wallcoverings over traditional paint? That says a lot about where homeowners’ priorities are leaning.
If you’re still relying solely on paint, you might be missing out on elevating your interiors to the next level. And honestly, I made a mistake early on: I ignored the benefits of custom wallpaper because I thought it would be complicated or expensive. But turn out, there are smart ways to incorporate it without breaking the bank. Curious about how to seamlessly integrate this trend into your home? Stick around, because I’ll share the secrets I’ve picked up along the way.
Is all the hype about custom wallpaper just for luxury homes?
Initially, I thought custom wallpaper was only suited for upscale estates or designer-level renovation projects. I worried it wouldn’t fit a typical budget or style. However, I discovered that modern options are much more accessible and customizable than ever. There are affordable techniques and materials that fit most budgets and tastes. For example, tried-and-true tips like choosing the right textures or coordinating with paint colors can make your walls stand out beautifully without overspending.
Want to avoid the common pitfalls early paint jobs tend to face? I found that rushing into a project without proper preparation often leads to peeling or bubbling. Learning from that mistake, I now focus on using top-quality primers and correct surface prep. If you’re interested, I recommend checking out some of the latest strategies to get flawless results — such as the innovative primers that slash interior heating costs in winter or how to stop roller marks on dark walls in 2026, which can be quite the challenge. You can explore these helpful tips [here](https://elitepainterpro.com/3-smart-thermal-primers-that-slash-2026-interior-heating-costs) and [here](https://elitepainterpro.com/stop-roller-marks-on-dark-interior-walls-5-pro-fixes).
So, with all this in mind, why wait? The trends for 2026 are clear. Moving beyond basic paint to embracing custom wallpaper could be your home’s next big upgrade. Ready to learn how to choose the perfect wallcovering and integrate it flawlessly? Let’s dive into the practical steps that will help you transform your home, just like I did.
Select the Perfect Design and Texture
Start with a clear vision of your space. I once chose a bold geometric pattern for my living room, mirroring a design I saw in a magazine. To do this effectively, gather samples or digital mockups to see how the pattern complements your existing decor. Remember, textures matter; try tactile samples to assess durability and feel. For a small bedroom, light colors with subtle textures can make the space feel larger, as I experienced when I tested light wallpaper with a delicate linen texture, which visually expanded my room.
Prepare Your Walls for a Flawless Finish
Proper surface prep is critical. I learned this the hard way when I skipped sanding and priming, resulting in bubbling. Remove any existing wallpaper or peeling paint—use a steamer for stubborn remnants. Fill cracks and holes with high-quality filler, then sand smooth. Applying a smart primer, especially one that enhances adhesion, will ensure your wallpaper sticks evenly. Check this guide for priming tips: thermal primers can also help in colder months.
Use the Right Adhesive and Application Tools
Choosing the correct adhesive is like selecting the right glue for a model; it determines longevity. Modern wallpapers often come with peel-and-stick options, but for traditional wallpapers, opt for a high-quality, specialty wallpaper adhesive suited to your wall type and wallpaper weight. I found that a standard roller often leaves streaks; switching to a smoothing tool or a plastic scraper prevented air bubbles and resulted in a sleek finish. Avoid common pitfalls such as over-application of glue—less is more—and work methodically from the center outwards.
Align and Pattern Match Accurately
Pattern matching can be tricky but is vital for a professional look. Use a level and a plumb line to align your first strip. For patterns that require precise match, mark guidelines with a pencil and double-check before hanging. I once mismatched a complex floral pattern, which became obvious after drying. Take your time; patience pays off. If your design is particularly complex, consider digitally printing a smaller section before full application, much like previewing a paint color before committing fully.
Cut and Trim with Precision
Trim excess wallpaper at corners and ceiling edges using a sharp utility knife and a straightedge. I recommend a fresh blade—dull blades can tear the paper. When trimming near outlets or switches, turn off power and carefully cut around them, smoothing edges afterward. For sharper edges, try the pro secret of stopping using blue tape, which minimizes bleed lines and provides crisp results (learn more here).
Add Finishing Touches to Ensure Longevity
Seal edges with a small brush of sealing compound to prevent peeling. For high-humidity rooms, consider using a protective coating or clear vinyl overlay to extend lifespan. I also discovered that some modern wallpapers come with anti-fade and stain-resistant coatings, a game-changer in busy households. Regular cleaning with a damp cloth will maintain vibrancy, keeping your wall looking fresh for years.
While many homeowners focus on selecting the right color or finish, there’s a murky world of misconceptions that can sabotage your painting project. A frequent myth is that simpler tools like brushes are always better for detailed work; in reality, advanced tools like paint sprayers, when used properly, deliver superior, even coatings and save time. Misjudging surface preparation is another costly error—skipping primer or neglecting surface repairs can lead to peeling, bubbling, or uneven finishes that will frustrate even seasoned painters. Particularly in 2026, understanding the latest primer innovations, such as thermal or ceramic binders, can be game-changing, and neglecting these can double interior heating costs or compromise durability.
Why do so many still underestimate the importance of surface prep?
Experts assert that proper surface preparation accounts for up to 80% of a successful paint job. Failing to properly clean, sand, or prime surfaces traps moisture, dirt, or loose paint beneath the new coat, accelerating deterioration. Many overlook how modern primers can dramatically improve adhesion, especially in challenging environments like humid or cold climates. For example, smart primers tailored for thermal insulation can cut heating bills significantly—discover how in this insightful article: thermal primer innovations. An advanced mistake many make is rushing into painting without understanding environmental factors—installing paint during high humidity or low temperatures can cause streaks or extended drying times, undermining the entire effort. These issues are often overlooked but can be avoided by consulting local experts who stay current with evolving trends.
Another overlooked aspect is the layering sequence and timing. Applying the wrong type of paint over incompatible primers or previous coatings can result in adhesion failure. For example, using oil-based paint over a water-based primer without proper preparation can cause cracking. Knowing the nuances of modern paint chemistry helps prevent such pitfalls. Industry research confirms that recent developments in ceramic-bonded paints and nanotech coatings offer improved longevity and resistance to environmental stressors in 2026.
Additionally, many underestimate the hidden surcharges integrated into local painting quotes—such as surcharges for specialty primers or advanced textures—that can inflate costs unexpectedly. Being aware of these can help you negotiate better and avoid surprises. As I always advise, vetting contractors thoroughly using updated criteria can prevent costly missteps, and understanding these unseen factors is part of that process. Now, before you jump into your next project, ask yourself: Are you aware of all the hidden nuances that determine a successful, durable finish? Dive deeper into these advanced aspects to ensure you don’t fall into common traps—your wall’s longevity depends on it.
Keep It Working: Essential Tools for Maintenance
Maintaining freshly painted walls requires not just good techniques but also the right equipment. I personally rely on a high-quality microfiber roller and a flexible paintbrush set to touch up minor imperfections without disturbing the overall finish. Microfiber rollers are gentle on surfaces, prevent lint transfer, and are durable over multiple use cycles, making them invaluable for touch-ups and small repairs. Pair that with a set of angled brushes designed specifically for corners and edges, and you’ll find minor touch-ups become quick and seamless—saving time and ensuring the integrity of your paint job.
Applying Smart Maintenance Techniques
Periodic inspections are key to long-lasting paint. I check for peeling, bubbling, or discoloration every six months—especially in high-moisture areas like kitchens and bathrooms. In such zones, using a touch-up kit with primer and matching paint ensures damage is addressed before it worsens. For larger areas, I recommend a light cleaning with a damp cloth and mild detergent to remove dust and prevent stain buildup. Regular upkeep prevents minor issues from escalating into costly repairs, extending the lifespan of your paint.
Future Trends in House Maintenance
As technology advances, predictive maintenance tools, like smart sensors embedded in walls, are becoming a possibility. These sensors can detect moisture intrusion or air quality issues, alerting homeowners before visual signs emerge. While still emerging, the integration of such systems signals a future where proactive house painting and maintenance could become more automated and efficient—helping us preserve our investment with less effort.
How do I maintain long-lasting paint over time?
Ensuring your paint remains vibrant and intact involves a combination of good tools, routine inspections, and timely touch-ups. Using specialized brushes and microfiber rollers makes touching up minor damages easier and more precise, avoiding the need for full overhauls. Moreover, investing in durable, advanced primers—like the innovative thermal variants discussed here—can protect against environmental stressors. For the future, I predict smarter, sensor-based maintenance systems will alert us to issues early, saving money and prolonging the life of our paint. Try applying a high-quality primer to vulnerable areas and schedule semi-annual inspections—these simple steps can drastically improve your home’s appearance and durability over time.
Lessons Learned That Go Beyond the Brush
One of the toughest realizations I had was that patience and preparation are king in house painting. Rushing through surface priming or ignoring detailed pattern matching can undo even the most beautiful designs. Another insight was understanding the tech behind modern primers and paints; knowing about thermal or ceramic-bonded primers has saved me money and headaches, and I wish I started using them sooner. Also, investing in quality tools, like microfiber rollers and precision trims, has radically improved my results—these small upgrades make a big difference. Finally, I learned that embracing customization in wallpapers opens up endless possibilities to showcase individual style, proving that wall treatments are a form of personal storytelling rather than just decoration.
My Go-To Resources for House Painting Success
For anyone serious about elevating their house painting game, I highly recommend exploring several resources. First, the latest thermal primer guides have transformed how I approach insulation and durability. Second, the comprehensive articles on preventing roller marks and modern painting hacks are invaluable for honing technique. For color choices that optimize small spaces, the color palette strategies have helped me create expansive feeling rooms. And finally, understanding the hidden surcharges and quotes ensures I never overpay or get caught off guard—knowledge that empowers every homeowner.
Take Action and Reimagine Your Walls
Now that I’ve shared some of my deepest lessons and trusted resources, I want you to see wall transformations as a chance to express yourself fully. The trends for 2026 point toward personalized wall treatments and innovative textures that reflect your unique style and needs. Don’t hesitate to experiment with custom wallpapers or advanced primers—these small but impactful changes can redefine your space. If you’re ready to elevate your interior, start planning today, gather inspiration, and remember: every great project begins with a single step. Your walls are waiting—what will you create?