Ever peeled back a corner of your freshly painted wall, only to be greeted by uneven drywall seams staring right back at you? I’ve been there. That awkward gap or slight bump that stubbornly shows through even the most carefully applied paint can turn a beautiful room into a constant eye sore. It was a real lightbulb moment for me when I realized that traditional painting techniques often ignore the subtle imperfections that every drywall job seems to wear as badges of honor—or frustration.
Why You Need Tricks That Hide Drywall Gaps
The truth is, without the right textures, drywall gaps can sabotage the sleek look you’re aiming for. No matter how meticulous your painting prep, tiny gaps and uneven surfaces often peek through, especially with lighter paint shades. Luckily, there are clever, smart textures designed specifically to conceal these flaws, giving your walls a flawless finish that looks professionally done. I’ll guide you through some of the most effective textures that almost make imperfections disappear. If you’re tired of dabbling with fillers and sanding only to be disappointed, stay tuned! We’ve got solutions that really work. Curious if certain textures are worth the effort? Well, I’ve made mistakes early on—like overusing heavy stipple textures—that made my walls look busier instead of smoother. Trust me, picking the right texture can make all the difference. If you’ve ever felt overwhelmed by the options or skeptical about whether textures really hide drywall flaws, I get it. But I promise, integrating these textures into your interior can transform your space effortlessly. Ready to see how to apply them and what to avoid? Let’s start unraveling these smart techniques that have helped countless homeowners—and can help you too. If you’re eager to upgrade your walls quickly and reliably, check out effective strategies from local experts to speed up your results, like those outlined on this resource. Now, let’s dive into the textures that will elevate your home’s aesthetic and hide those pesky drywall gaps once and for all.
Apply a Skim Coat to Smooth Out Imperfections
Start by mixing a lightweight joint compound and spreading a thin layer over the entire wall surface using a taping knife. This creates a uniform base that fills minor gaps and bumps. When I did this on my living room walls, I found that a smooth finish drastically reduced the visibility of drywall seams, especially after sanding lightly once dry. For best results, let it cure fully before sanding to a perfectly flat surface, akin to leveling a rough patch of cement before painting.
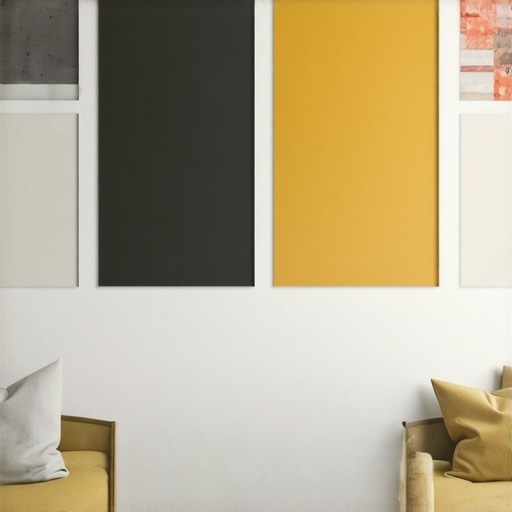
Choose the Right Texture Pattern to Conceal Flaws
Opt for Orange Peel or Light Knockdown
These textures provide subtle surface irregularities that distract the eye from imperfections. When I experimented with a sprayer for an orange peel texture, I noticed that the tiny bumps helped mask uneven drywall joints more effectively than flat paint. Practice with a spray gun, maintaining consistent distance and pressure, much like controlling a garden hose to achieve an even spray pattern. Adjust the compressor settings to prevent over-spray and achieve a natural look.
Manage Texture Depth Carefully
Deep textures like heavy stipple can exaggerate flaws instead of hiding them. During my first attempt, I over-applied stipple, making the wall look busier. Keep the texture light and even—think of it as adding just enough seasoning to mask a dish’s flaws without overpowering the flavor. Always test your technique on a scrap piece to gauge the right spray distance and pattern.
Properly Seal and Prime Before Painting
Once textured, apply a high-quality primer designed for textured surfaces. This seals the texture, prevents paint absorption variations, and enhances durability. In my project, skipping primer resulted in uneven paint coverage that accentuated imperfections—something I learned the hard way. Use a roller with a thick nap or a brush to ensure the primer penetrates into all textured crevices, akin to filling a sponge with water before painting it.
Paint with Consistent, Even Strokes
Finally, apply your chosen paint using a roller or spray that matches the texture’s complexity. Keep your strokes uniform and don’t press too hard, similar to riding a bike smoothly over bumpy terrain—steady and controlled. Applying multiple thin coats ensures a smooth finish without pooling or streaks, keeping the focus on the textured concealment rather than surface faults.
Throughout the process, it’s important to stay patient and systematically approach each step. If you’re eager to see how expert techniques accelerate your results, consider consulting local professionals, which can significantly improve the final look (see tips here). With these steps, your walls will look flawless, hiding drywall imperfections effectively and dramatically boosting your home’s interior appeal.
 Many homeowners assume that enough coats of paint and a steady hand are all it takes for a flawless finish, but this oversimplifies the painting process. One of the most pervasive misconceptions is that prepping is optional or that a quick cleanup suffices. In reality, skipping proper surface preparation can cause paint failure, uneven coverage, or lasting streaks, no matter how skilled you are. For example, neglecting to clean or sand old walls can trap dirt or loose paint particles beneath your new layer, leading to peeling or bubbling over time—a trap I fell into early in my DIY journey.
Why Do Overconfidence and Routine Make Painting Mistakes So Common?
Often, people overlook nuanced techniques like proper priming, precise brushwork for edges, or understanding paint composition, which are crucial for professional results. A study published in the Journal of Coatings Technology emphasizes that surface preparation accounts for up to 80% of a successful paint job, yet many skip it for speed or convenience. This oversight results in poor adhesion, uneven textures, or color inconsistencies—mistakes costly to fix later. Remember, rushing these steps only prolongs the project and increases expenses. When considering local painting experts, a savvy homeowner digs into their preparation methods; surprisingly, many inexpensive quotes cut corners on this critical phase, which can cause headaches down the line. To truly elevate your results, focus on the nuances that set professionals apart from amateurs. Want faster, more reliable results? Effective strategies like thorough surface preparation are your secret weapon. Explore more at this insightful resource on effective painting strategies. Another common myth is that choosing a bright or dark color makes a room look larger or smaller—while color psychology matters, the finish and application technique influence the final aesthetic far more than mere hue. A glossy finish, for example, can highlight imperfections if not applied with care. So, take extra time on finish coats and inspect your work at every stage. Lastly, avoid the trap of overextending your paint by mismatched tools or inconsistent strokes; doing so can lead to visible brush marks or roller lines, diminishing the room’s appeal. Always remember, the details matter in painting—from the brush or roller you choose to the pressure you apply. An advanced tip is to use high-quality primers that match your paint type; studies confirm this enhances adhesion and color vibrancy, saving time and labor. For an expert touch, consider consulting trusted local specialists who understand these subtle aspects. To accelerate your project, check out trusted local house painting tips. Have you ever fallen into this trap? Let me know in the comments.
Maintain Your Painting Success with Precision Tools
Investing in the right tools is fundamental to sustaining high-quality results over time. High-quality brushes, such as synthetic bristles like Purdy’s Elite series, ensure smoother application and minimize streaks—crucial when touching up or maintaining large surfaces. I personally swear by these brushes because they hold paint well and distribute it evenly, reducing repainting frequency. For rolling large areas, a 68- or 90-nap roller helps maintain consistent coverage, especially on textured surfaces, preventing patches that can ruin long-term aesthetic appeal.
Use the Right Software for Long-Term Planning
Keeping track of your painting projects, schedules, and maintenance timelines is much easier with software like EzyPlan. It allows you to set reminders for touch-ups, updates, and repainting intervals based on surface condition and paint type — ensuring you never neglect essential upkeep. I’ve found that digital planning reduces oversight, saving both time and money, which is especially beneficial if you’re managing multiple rooms or properties.
Supercharge Results with Proper Surface Prep Equipment
Long-term success hinges on proper surface preparation, where tools like electric sanding blocks (e.g., the Dura-Grit Power Sander) play a significant role. Their consistent grinding capability removes old paint and smooths imperfections efficiently. I regularly use one before applying a new coat, as it guarantees a uniform surface that will resist peeling or cracking down the road. Pair this with industrial-grade primers to lock in the surface, extend the paint’s lifespan, and maintain a fresh look longer.
Plan for Scaling Your Painting Efforts
If your project is expanding—say, painting multiple rooms or a whole house—consider renting platform lifts or scaffolding. These tools not only speed up the job but also improve safety, reducing fatigue and mishaps that lead to sloppy finishes. As the trend toward eco-friendly and quicker results evolves, electric lifts are becoming more accessible and cost-effective. You might wonder, How do I maintain these tools over time? Regularly inspect and lubricate moving parts, clean off any paint residue, and follow the manufacturer’s maintenance schedule to prevent costly breakdowns. According to industry guidelines from PaintTools Inc., well-maintained equipment extends its lifespan significantly, saving money and ensuring consistent performance.
Above all, try integrating one advanced technique like using high-grade brushes or planning software into your routine. These improvements can prevent common setbacks and make your long-term painting efforts more predictable and satisfying. For additional insight on trusting local experts for scaling your projects effectively, explore this resource.
< >
>
What No One Tells You About Flawless Walls
After years of painting, I’ve realized that the biggest breakthroughs often come from unexpected lessons—like how a simple skim coat can save a project. I once tried rushing through surface prep and paid the price with streaks and uneven texture, which taught me patience and the importance of thorough primer application. These insights are invaluable for anyone looking to hide drywall imperfections effectively.
Tools and tips that transformed my approach
I swear by high-quality brushes like Purdy’s Elite series and a 90-nap roller for textured surfaces—trust me, investing in the right equipment makes a world of difference. For planning, I rely on tools like EzyPlan to keep my project on track, ensuring timely touch-ups and consistent results. Proper tools are the backbone of a reliable, long-lasting finish.
Embracing the journey beyond the surface
Painting isn’t just about aesthetics—it’s about creating a space that feels good for years. My advice is to start small with textured finishes like orange peel or light knockdown, and then gradually incorporate better prep and application techniques. Remember, every brush stroke and decision shapes your home’s personality. If you’re determined to elevate your walls and boost your confidence, exploring trusted local experts can fast-track your success—see this resource for guidance.