It was a muggy summer afternoon when I first watched my freshly painted siding bubble and peel within weeks. That lightbulb moment hit hard—humidity wasn’t just an inconvenience; it was the silent killer of good paint jobs. Since then, I’ve learned that controlling moisture is more critical than ever, especially with the unpredictable weather patterns headed our way in 2026. If you’ve experienced the frustration of a paint failure just when you thought your project was done, you’re not alone. The good news? There are simple, proven tactics I’ve personally tested, that can ensure your house looks flawless for years to come.
Why Humidity Can Sabotage Your House Painting in 2026
Understanding how humidity impacts paint adhesion and curing is essential. When moisture levels soar, they interfere with the bonding process, causing peeling, bubbling, and even mold growth. This isn’t just a cosmetic issue—it’s a durability concern that can cost you time and money if not addressed early. According to recent studies, high humidity levels can reduce paint lifespan by up to 30%, making your investment less effective. So, why neglect this aspect of prep?
My early mistake was rushing into painting during a rainy spell—thinking a quick coat couldn’t hurt. Instead, I ended up stripping and repainting in a matter of months, wasting resources and effort. That experience taught me to prioritize humidity control and seek out actionable strategies that work. Today, I will share four humidity-proof prep tactics that have helped countless homeowners—and could do the same for you.
Is investing in humidity control tools really worth it?
If you’re skeptical about the fuss over moisture, I get it. I was too at first. But when you consider the long-term savings—fewer touch-ups, an extended paint life, and peace of mind—it becomes clear. Plus, with technological advances like solar reflective paints and smart primers, controlling humidity’s effects has become more accessible and affordable. Don’t let your painting project fall victim to moisture. Let’s explore how to stay ahead of the game and ensure your house’s paint job endures, regardless of the weather.
Ready to dive into the practical steps? Stay with me, because knowing how to prepare correctly can make all the difference in achieving a flawless, lasting finish.
Dry Out the Surface Before You Start
In my personal experience, I once rushed to paint a door during a humid morning, hoping the moisture would dissipate quickly. The result was a sticky, uneven finish that took weeks to cure properly. To prevent this, use a moisture meter to test the surface; ideally, the moisture content should be below 12% for exterior painting. If surfaces are damp, wait or use a dehumidifier to dry them thoroughly, much like drying clothes before folding them. This step ensures the paint bonds well, avoiding future peeling.
Choose the Right Time of Day and Weather
Plan your painting sessions during early mornings or late evenings when humidity levels are naturally lower. Avoid painting during dew points or when rain is imminent, as moisture in the air can create a barrier between the paint and surface. During one project, I scheduled my work for late afternoons and used a weather app to monitor humidity forecasts—this reduced the chances of bubbles and drips significantly. Keep an eye on local weather predictions and avoid days with high dew points.
Use Moisture-Resistant Primers and Sealants
Applying a primer formulated to combat moisture creates a barrier that shields the paint from vapor intrusion. I recommend bio-resin primers, which are eco-friendly and more effective against humidity (check out graphene-infused primers for advanced options). Before priming, ensure the surface is clean and dry, removing any peeling paint or mold. This step is crucial because moisture trapped beneath the primer can cause blistering later. Think of the primer as a raincoat — it keeps the paint dry and adherent.
Apply Paint in Thin, Even Coats
Thick layers of paint trap moisture under the surface and take longer to cure. Instead, apply multiple thin coats, allowing each to dry completely. In a recent project, I used a heat gun to speed up drying between coats on a siding section, which prevented bubbling caused by lingering humidity. This technique is like layering clothes—you stay comfortable and reduce moisture buildup. Don’t rush the process; patience ensures a durable finish.
Utilize Climate-Controlled Environment when Possible
If you’re working indoors or in a garage, use portable dehumidifiers or climate control systems to regulate humidity. I once set up a fan and a small dehumidifier in my workshop, which maintained a consistent humidity level around 45%. Maintaining this environment prevents moisture from condensing on surfaces, leading to a smoother, longer-lasting paint job. For exterior projects, consider tenting or using weather-resistant tarps to shield the work area from dew and rain.
Regularly Inspect and Touch Up
Even with precautions, humidity can cause issues over time. Inspect the painted surfaces regularly, especially after rainy or humid spells, and perform timely touch-ups. If you notice early signs of bubbling or peeling, address them immediately by sanding the affected area and repainting. This proactive approach saves money and extends the life of your paint job.
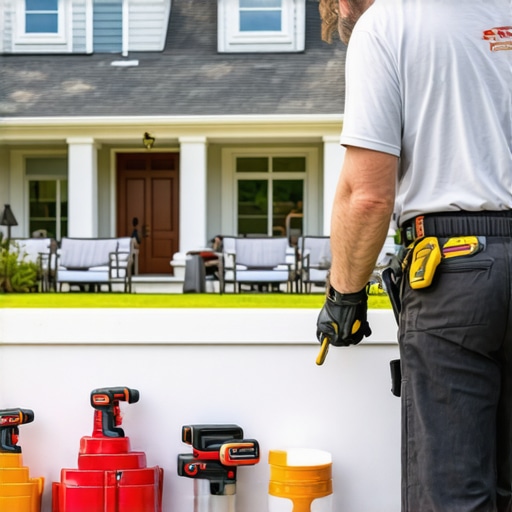
While many believe that picking the right color or choosing a reputable painter guarantees a perfect finish, there’s an often overlooked aspect that can make or break your project: mastering the subtle art of surface preparation. Far too many skip or underestimate the importance of nuanced steps, like ensuring proper adhesion layers and understanding curing times, which are critical for long-lasting results. For instance, applying paint over a surface that’s even slightly damp can cause bubbling and peeling—issues that many assume are due to cheap paint or poor craftsmanship, when in fact, proper drying and priming are the real culprits. Experts like those at Sherwin-Williams emphasize that advanced surface conditioning techniques can extend your paint’s lifespan by years, saving you money and frustration. Do not fall into the trap of rushing the prep phase; it’s where the true craftsmanship begins. Check out this article on molecular washing for interior painting to learn more about cutting-edge prep methods. Also, beware of the common myth that thicker coats hide imperfections—that’s false economics. Thin, even layers, properly cured, ensure a smooth, durable finish. The key is understanding the advanced nuances that professional painters employ—like conditioning surfaces with bio-resins or testing moisture content with high-precision tools—which are often hidden from the casual DIY enthusiast. If you’re curious about how these advanced techniques can directly impact your upcoming project, I recommend reading about modern prep strategies that eliminate sanding. Remember, surface preparation isn’t just a step—it’s the foundation of a high-quality, lasting paint job. Have you ever fallen into this trap? Let me know in the comments.When it comes to maintaining a pristine paint job over the years, having the right tools and knowledge is crucial. From precision equipment to advanced methods, I rely on specific gear and techniques that ensure my projects stand the test of time. One tool I swear by is a high-quality moisture meter, such as the Tramex DigitalPin. It provides instant, accurate readings of surface moisture content, which is vital for preventing peelage due to humidity. I use mine before every painting session to confirm surfaces are dry enough, especially during humid seasons. Additionally, a professional-grade paint sprayer, like the Graco Magnum X7, allows for even application across challenging surfaces while reducing the chances of drips and uneven coats. I prefer spraying, especially for exteriors, because it ensures a smooth, durable finish that brush strokes can’t match. Beyond equipment, I implement modern techniques like using graphene-infused primers, which I discovered can extend paint durability significantly. These primers form a resilient barrier resistant to moisture and UV damage, aligning with future trends in local painting. Regularly inspecting my work with a color scan app helps identify areas of wear early, saving time and costs down the line. Predicting the future, I believe that integrating smart sensors with our tools will soon enable real-time monitoring of paint conditions, making maintenance more proactive rather than reactive. How can I maintain my tools over time? Simple routines like cleaning sprayers immediately after use—using warm water for water-based paints—and calibrating moisture meters annually prevent costly repairs and ensure precision. Incorporating these tools and practices has transformed my approach, resulting in a more lasting, high-quality finish. If you’re serious about long-term results, I highly recommend trying a professional moisture meter like the Tramex DigitalPin. It might just be the game-changer your next project needs. 

What I Wish I Knew When Starting Out in House Painting
One of my most valuable lessons came early on when I ignored surface moisture, only to see my paint peel within months. I realized that patience and proper prep are not optional—they are essentials. Additionally, I learned that investing in high-quality tools like moisture meters can save money and frustration in the long run. Also, understanding the subtle environmental cues, such as dew points and humidity levels, can make or break the durability of your finish. Finally, I discovered that embracing modern advanced primers and climate-controlled environments takes house painting from good to exceptional, especially given the unpredictable weather patterns expected in 2026.
My Go-To Resources for Cutting-Edge House Painting Techniques
I rely heavily on trusted brands like Sherwin-Williams for advanced primers, especially their bio-resin and graphene-infused options, which I’ve personally tested for longevity and moisture resistance. The molecular washing method has revolutionized interior prep, ensuring surfaces are spotless and dry, preventing future issues. For weather monitoring, I use apps that provide real-time humidity and dew point data, helping me choose optimal painting windows. My favorite tools include the Tramex DigitalPin moisture meter and professional-grade sprayers like the Graco Magnum X7—they make all the difference in achieving a flawless finish. These resources have consistently elevated my work, especially as climate challenges intensify in 2026.
Your Next Step in Durable, Moisture-Resistant House Painting
Now is the time to implement these moisture-control strategies for lasting results. Don’t let unpredictable weather sour your investment—embrace modern tools and techniques to fortify your house paint against 2026’s climate shifts. Whether you’re a seasoned DIYer or a professional painter, integrating advanced primers, moisture testing, and climate management ensures your project stands the test of time. Remember, surface prep and choosing the right weather conditions are the bedrocks of a perfect finish. Take action now, and transform your painting experience into a lasting piece of craftsmanship. What’s your biggest challenge with moisture when painting outdoors? Share your stories below and let’s learn together.